MyFreeCopyright.com Registered & Protected
Showing posts with label Kim. Show all posts

October 22, 2011

Hallo...Scream!

Hi There! Its Kim from Ricketts Cricuts! This week the Sweet Sassy Diva Design Team is creating different treat containers! One of my favorite treat containers are the sour cream containers. I make them for every holiday, party, or just because occasion! They are very fast and simple to make! To watch the tutorial click here;!

Here is my Halloween Sour Cream Container!

Recipe:

4inch by 6 inch Halloween Pattern DCWV paper
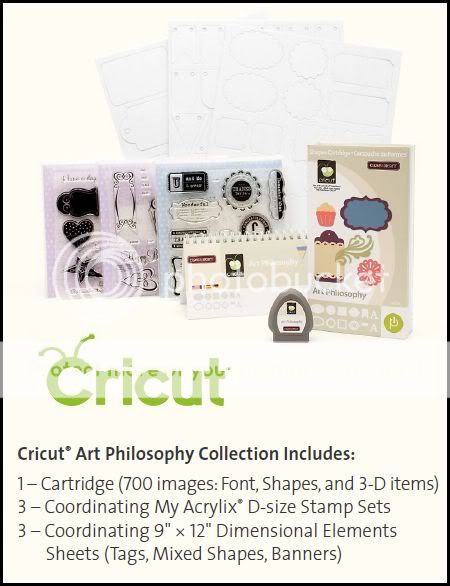
Black tag cut at 3inches from Art Philosophy
Orange tag cut at 2.75 inches from Art Philosophy
Black spider from Doodlecharms
Black tulle

I hope you enjoyed my post today! Be sure to check back each day for more creative treat box ideas! 

Kim :)

October 13, 2011

A Wreath You Can Really Wrap Yourself Around!

Hi There!!! Its Kim from Ricketts Cricuts! This week the Sweet Sassy Diva Design Team is creating Fall wreaths! I loved this idea! At first I was going to create another rosette wreath but then saw a wreath similar to this and had the idea ready to go! I LOVE my Close To My Heart Art Philosophy cartridge and couldn't wait to make some flowers!

Here is my wreath!
I chose some multi colored orange, creme, and gold colored yarn from my stash and a straw wreath from Michaels!

I cut out
I cut flowers from Art Philosophy and chalked the edges.
I adhered them to the wreath with a pearl stick pin.
Close up of flowers
flowers
My Fall Wreath!!


I hope you enjoyed my wreath!! If you want to see more wreaths or creations check out my facebook; page too!

If you would like to order the cricut cartridge or this stamp set, please send an email to Click Here! and I will send you an invite to my CTMH party.

October 4, 2011

Autumn Banner!

Hi There! Its Kim from Ricketts Cricuts! This week the Sweet Sassy Diva Design team is creating projects using the AMAZING Close To My Heart Cricut Art Philosophy cartridge!!! I absolutely LOVE this cartridge and it really is a must have!! I decided to make a banner to celebrate my favorite season Autumn!

I programmed the images on my gypsy and added the layers.

Background images!
Cricut cuts made from the Art Philosophy cartridge. Paper stack is the DCWV Harvest stack!
Leaves

close up of letters

I love how the tree is framed so I didn't add another cut image into the square :)
My Autumn Banner!


I hope you like my banner! Its hard to see the letters in the picture but they look great in person! :) 

If you want to see more of my creations check out my facebook; page!

Crafty hugs,

Kim


If you would like to order the cricut cartridge or this stamp set, please send an email to Click Here! and I will send you an invite to my CTMH party.

September 22, 2011

Pillow box!

Hi! Its Kim from Ricketts Cricuts! This week for Sweet Sassy Diva we are designing Autumn projects! I just got my new Art Philosophy cartridge and just had to use it! Every cut on my project is from the Art Philosophy cartridge. I LOVE Autumn! Its by far my favorite season! I love seeing all the colors change and the cool crisp mornings! I decided to make a pillow box!

Here it is:
I used my GYPSY to see my sizes of the pillow box and leaves!
Placed my papers and cut them accordingly!
I assembled the pillow box and added some Twine from the Twinery and my leaves!
I added an acorn and some pearl pen! 

I hope you enjoyed the pillow box! They are great to fill with a treat for family and friends! 
Make sure and come back each day for more Autumn inspiration from the Sweet Sassy Design Team! 
Hugs,

Kim

If you would like to order the cricut cartridge or this stamp set, please send an email to Click Here! and I will send you an invite to my CTMH party.  There are some freebies until the end of this month as well as a stamp of the month set.

September 13, 2011

Heroes of 9/11

Hello! Its Kim from Ricketts Cricuts! This week for SweetSassyDiva we are honoring the HEROES of 9/11. That day has changed our country and will always be remembered. I remember exactly where I was the day I saw the Twin Towers on TV. It was a sad day for so many. I have many family members that have served or are currently serving in various branches of the military and I choose to support them all. I am very patriotic and thought that I would love to make a patriotic wreath! I was inspired by Pink Cricut's Halloween wreath. Click here; if you would like to see it (She has an awesome video tutorial on it!)

Here is my wreath:

I cut my paper into various strips and scored them on my score board every .5 inches.  I used these to make the rosettes. Be careful of HOT glue!! It can make for very sore fingers.
I hot glued my rosettes to my cardboard circle. I have them layered for more dimension!
I added stars from the George and Basic Shapes Cartridge cut in various sizes.
I added red and blue buttons on the stars. Some of the buttons have the airmail twine in them.

I love how my wreath turned out and can't wait to make another one! Make sure you come back and check out more of the SweetSassyDiva Designers this week for more inspiration! 

Kim

We also have a challenge and prizes this week!  Click here for more details!

September 8, 2011

Quilts!

Hello again! Its Kim from Ricketts Cricuts! This week the SweetSassyDiva Design team has created projects in honor of Grandparents day! I decided to make a card that resembled a quilt for my Grandma Rose! She makes the most amazing quilts I have ever seen. I want to have everyone that she makes but understand I have to share with the rest of my family!........sigh........ well on to my card!

I cut nine 1.5 inch squares from the Mango Frost DCWV stack and 4.75 inch square of matching orange pattern paper.

I adhered the squares to the yellow pattern paper in a simple quilt pattern.

I then added the card front to a pink square cut at 5 inches.

Here is the card base for the easel card. It measures 5inches by 10 inches. I score it at 5 inches and 7.5 inches.
I added the yellow pattern paper to the card base and added a sentiment from Pink By Design. The Butterflies are from Kate's ABC's. Also added some white faux stitching!
Here is a side view of the card!


I hope you like my card! Don't forget to check back this week and see what the rest of the Design team has created for more inspiration!


Crafty Hugs,
Kim

Be sure to enter the SweetSassyDiva Design Team Call!

September 1, 2011

Boo!

Hi there! Its Kim from Ricketts Cricuts! This week for Sweet Sassy Diva we are sharing some awesome Halloween Banners! I love Halloween! I love all the yummy candy that I get to buy for all the trick or treaters ;) (We have had a total of one in the past two years lol) I don't have a picture tutorial for you but I can give you the recipe for the banner!

Here is my banner!
Spooky ghost from Simply Charmed cut at 2.5 inches. I added a Peachy Keen Monster face with purple chalk around the eyes and pink cheeks. Banner is held together with orange and black trendy twine!

Here is the complete banner! Paper is from the DCWV Halloween Stack :)


I added white faux stitching around the edges! Font is Ashlyns Alphabet! My current favorite font! 

Recipe:

Black Triangles cut at 4 inches using Birthday Bash
DCWV Pattern paper triangles cut at 3.75 inches using Birthday Bash
BOO cut using Ashlyns Alphabet at 3 inches
Ghost cut from Simply Charmed
Banner held together using Trendy Twine Orange and Black!

I hope you like it! Be sure and check back each day to see the next Halloween Banner at Sweet Sassy Diva!

Crafty Hugs!

Kim

August 14, 2011

Apple Notepad!

Hi Everyone! Its Kim from Ricketts Cricuts! This week the Sweet Sassy Diva Design team is making projects in honor of  National Apple Week! I love apples! Apples are a popular kitchen or classroom theme and are just plain cute! I am always making lists and decided to decorate a notepad for the fridge with apples. I chose red because they are my favorite! Here is my project:
I placed my apple layers by colors in the corners of my Gyspy.
I placed scrap paper in the corners for each layer.
I cut the top for the notepad at 4.5 inches by 5 inches and ran it through my paper crimper.
I glued the pattern paper on the top of the notepad.
I placed three strips of magnet on the back of the notepad to ensure it stays put!
Last, I placed the notepad on my fridge ready for lists!
I hope you liked my Apple Notepad! They are quick and fun gift to make for friends or family. 
Make sure you come and say hi on my facebook page and check back each day to see what the other awesome SweetSassyDiva Design team members create! I know I will! 
Hugs,
Kim


be sure to check back tomorrow for the blog hop!

Back To School Hop


August 12, 2011

Clip it!

Hi there! Its Kim from Ricketts Cricuts again! This week we are celebrating Back to school with SweetSassyDiva. I have actually been back to work for 2 weeks now and will be getting my students this week! I am excited to meet them but also want everything perfect before they arrive on their first day (if that is possible). In Kindergarten, we are constantly taking assessments and notes while students are working hard. I decided to make a cute clipboard for my friend. Here it is:

I used a clipboard, pattern paper, and my Gypsy!
I cut and glued my patterned paper to the clipboard.
I used my gypsy to cut out Ms. Jensen and Brenda (I let her choose.)
I added her name, sealed it with modge podge and ribbon! 
I hope you like my creation! If you want to see more check me out on my facebook page! Make sure you come back and see what else the SweetSassyDiva Design Team has created for you!

Happy Crafting!
Kim

August 1, 2011

Picnic at the Park!

Hi there!!! August is National Picnic Month!! I decided to make a layout in hopes of going on a picnic sometime this month!  When ever I go to a park I am always looking at the flowers around. Anyone who knows me, knows that I LOVE flowers of any kind! Here is my layout:

Here is how I made the layout!  
  1. Cut the green pattern paper 11.5 inches by 11.5 inches and mount on the 12 by 12 red cardstock
  2. Next I cut out my flower pattern paper from Nana's Kitchen stack at 4 inches by 11.5 inches. I used my deco shell border punch on the top and bottom and adhered it to the green pattern paper an inch from the bottom. 
  3. Next I used my Gypsy to cut out the Picnic at the park sentiment from Kate's ABC's. The red words are layered on the green background! 
  4. I also used the gypsy to cut ants from Nate's ABC's in 1/2 inch, 1 inch, and 1.5 inch sizes to place around the layout! 
  5. Next I cut three of the red squares are 3.25 inches square with Aqua Divine Twine wrapped twice around each card.
  6. I glued down the ants around the page! 
If you want to see more of my creations stop by my blog; or facebook page

Thanks for coming by! 

Kim


Order your CTMH Cricut Art Philosophy cart today! Click here!

Be one of the first to own it! Your order will process and ship (provided they do not run out of stock and back order it) even before my party ends if you order it online.

If the link doesn't work, leave me a comment with your email address and I will send you a personal invite.

The item number is Z1686. You can also get the stamp of the month for $5 more and a few other goodies depending on your order date. You can comment on this post or email me for more details.

You can view more details and a video on the new cartridge.... Click Here!

July 29, 2011

Happy Summer!

Happy Summer! This week for SweetSassyDiva we are designing picnic projects! Well when I think of a picnic I automatically look for the watermelon! I LOVE watermelon! Here is a quick card! I forgot to take pictures while making the card but the recipe and directions are below the card in case you want to know how I made it! :)


Card Recipe:
Black A2 card
Green paper from DCWV Safari Matstack cut at 5.25 by 4 inches and mounted
white cardstock cut at 1.5 inches by 5.25 inches layered on lower portion of green paper
Red ribbon with white polka dots glued down where the green and white meet
Watermelon from Simply Charmed cut at 3.99 by 2.18 and popped up
Happy Summer Sentiment by Pink By Designs Summer Vacation stamp set

If you want to see more of my creations check out my facebook page or blog here

Happy Crafting! 
Kim

July 23, 2011

Where is Mr. & Mrs. Clause?

Hi there! Do you ever wonder what Mr. and Mrs. Clause do during the summer? Well here is what I think they do! ;)
I placed my images on my Gypsy according to how I want them to cut.
I placed all the color pieces for the correct images. (I was able to use all scraps too)


Mr. and Mrs. Clause love to relax on their own tropical island! Who wouldn't want to? I hope you enjoyed the card!

Card Recipe:
Green cardstock from Joanns
Blue patterned paper from Sizzix Mat Stack
Island and tree is from Life is a Beach cartridge
Bikini is from Life is a Beach
Santa Hat is from Christmas Cheer
Sentiment is from Pink By Design

To see my other projects visit me on Facebook; or my blog;!

Happy Crafting!

Kim

July 12, 2011

3 Ring Circus!

Hi there! Its Kim from Ricketts Cricuts! We had a Mix it up challenge over at SweetSassyDiva to come up with our own theme in our group! Our group chose Circus! I have been loving mini albums and found some really cute paper so I decided to make a Circus mini album for when Hubby and I go! I ran right out and found the Cricut Carousel Lite Cartridge and some Circus patterned paper from my local scrapbook store!
Here is the patterned paper I used to create the mini album!

 I mounted most of the patterned embellishments on solid blue or green textured DCWV cardstock. I added white faux stitching for extra texture on the page. After making the album I think I will fill it with pictures after we go to our State Fair! I hope you like the album! 

Dont forget to check back and see what the other SweetSassyDiva design team is making! If you want to see more of my craftiness check out my facebook page here
;