Showing posts with label Tim Holtz Stamps. Show all posts

Saturday, September 25, 2021

Saturday Showcase - 6 Easy Cards with 1 Tim Holtz Stamp Set

Hello Crafty Friends!

Today I wanted to share a fun challenge I gave myself. I challenged myself to use only 1 stamp set to create 6 simple cards that can be good for any occasion.  I chose to use the Tim Holtz Set - CMS385 "Into the woods".  I wanted a woodsy look that could be good for fall, Christmas, or masculine cards.


3 of the cards are A2, one just a bit shorter than A2, a slimline card, and one that's about 2/3s the size of an A2 (made from the scrap from cutting the slimline card).


A simple frame card (you could easily switch out any of the animals to the bear or the fox from the set).


Simple and woodsy.


Woodsy with a splash of color.


A touch of plaid for simple color.


A simple and easy wreath card. (This could also be a bird nest. I should have done a touch less stenciling for my preferred look).


My favorite of all the cards, and yet the simplest!


What do you think of these cards?
This stamp set could easily make so many more simple cards, or awesome elaborate ones!!

Products Used:

Stamp Set - Tim Holtz Into The Woods
Inks:
    Distress Oxides - Vintage Photo, Frayed Burlap, Walnut Stain,  Forest Moss, Crackling CampfireCandied Apple, and Black Soot
    Original Distress Inks - Scattered Straw, Walnut Stain
    Other Inks- Delicata Golden Glitz, Embossing Ink
Embossing Powders - Black and Red
Tim Holtz Layering Stencil - THS021 Speckles
Tim Holtz Small Talk Stickers
Plaid Scrapbook Paper
Blending Tool

Saturday, December 15, 2018

Saturday Showcase - Tim Holtz Stamps for a Festive Birthday Card

It's our final Saturday Showcase tutorial of the year here at the Frilly and Funkie Challenge blog. We hope you are enjoying this series as we showcase a variety of techniques and projects incorporating the range of craft supplies stocked in The Funkie Junkie Boutique.

This is a busy time of year for sending those festive cards to friends and family and of course there are still people marking other celebrations like birthdays. Here's an idea for using a selection of Tim Holtz stamp sets to create a festive birthday card and as you'll see I'm keeping in with our current challenge theme for using things you'd see 'In the Kitchen'.


Here are the steps I took to create this card (and remember to click on each photo for a closer look).

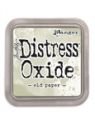
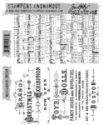
Start by cutting a piece of white card smaller than you card blank and use a brayer or spatula to scrap a little White Gesso over the surface unevenly. Blend Old Paper Distress Oxide Ink over the dry gesso background. Dampen a piece of tissue or cloth and wipe over the surface - the gesso acts as a partial resist to the ink so you will be left with a mottled look. Stamp the Music background from the Music & Advert stamp set with Watering Can Archival Ink over the background.


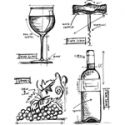
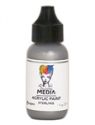
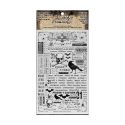
Stamp the wine bottle image from the Wine Blueprint stamp set onto the lower half of the background using Black Archival Ink (I used my Stamp Platform to make sure I got a perfectly replicated image). Next stamp the cork screw image above the bottle, again with Black Archival Ink. Paint the metal part with Sterling Acrylic Paint and dry before re-stamping the image with the Archival Ink; this ensures the details are not lost beneath the paint.


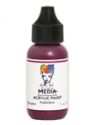
On a spare piece of card stamp the wine bottle image as before and this time colour it with Umber, Fuchsia and Buff Acrylic Paints. Re-stamp with the Archival Ink to add the details back in and cut out the image. Repeat this process for with the handle of the cork screw, painting it with the Umber Acrylic Paint before re-stamping and cutting out.


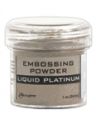
Use numbers from the Merchant stamp set to stamp and emboss the recipient's age if required; I used Liquid Platinum Embossing Powder but a silver or gold colour could work equally well.


Apply dimensional foam tape or similar to the reverse of the wine bottle and cork screw handle and layer onto the background over the original images.


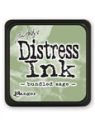
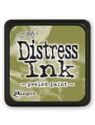
Use Distress Inks and stamp out some of the Winter Watercolor foliage onto Watercolor card. The colours used here were Peeled Paint, Bundled Sage, Aged Mahogany and Walnut Stain.


Cut around the foliage (leaving as much of a white border as you like) and blend the Walnut Stain Distress Ink around the edges to age the white parts. Blend the same ink around the edges of the stamped background too.


To create matting layers for your stamped background cut a piece of Silver Metallic Kraft Card and a piece of white card to size. Sand the Metallic Card lightly to give it a burnished look and paint the edges of the white card with Fushia Acrylic Paint to match the wine bottle.


Finish the card by layering the three background together and arranging the foliage around the bottle and cork screw. I stitched around the edge of the main background too before adding it all to the card blank as a finishing touch.

Now let's take a closer look at the finished card so you can see how it came together in more detail;


I hope you've enjoyed finding out more about how this festive birthday card came together. A list of the essential ingredients is listed below, all available from The Funkie Junkie Boutique. And remember there's still time to enter our final Frilly and Funkie challenge of 2018 HERE.

Jenny xxx


Saturday, May 26, 2018

Saturday Showcase Tim Holtz Ticket Booth

Hello and welcome, Zoe here hosting this weeks Saturday Showcase. This week I am showcasing the Tim Holtz Ticket Booth stamps and framelits dies. Stampers Anonymous and Sizzix partnered up again to create matching stamps and dies for the Tim Holtz line.


As mentioned in a previous Saturday Showcase, the dies that accompany the stamp sets are "framelits," not to be confused with "thinlits" dies (which are standalone dies). "Framelits" are named (quite literally) because they frame the stamp. So if you ever wonder if there are dies to match Tim's stamps, check and see if there is a framelits set. At the end of each project I have shown which framelits dies I used for reference.

 #8 Tag  

  • To create the tickets, spritz frayed burlap distress spray onto the Tim Holtz glass media mat and drag a distress mixed media heavystock tag through it.
  • Spritz with water and dry with a heat tool.
  • From the Tim Holtz Ticket Booth stamp set (CMS337) stamp a ticket onto the heavystock tag using the Tim Holtz travel stamp platform.
  • Using the accompanying Ticket Booth framelits set, die cut the ticket. These will all fit into the Sizzix sidekick machine! BONUS!

Another BONUS is that the Ticket Booth framelits dies will also cut stamps from the Tim Holtz Odds and Ends stamp set (CMS100)! This was the first Tim Holtz stamp set that I ever bought.


Using the stitched slots die is a fun way to create some tickets to store in your planner or travelers notebook. I stamped the die cut stitched slots with ticket booth stamps to create a background and adhered it to a tag with distress collage medium. I added "ticket" with die cuts from the alphanumeric thinlits die set and tucked the tickets in. Check out this cool video by Tim Holtz showing how to ink a die to create highlights where the crease detail is.


~

A5 Card

  • Stamp a moth from the Tim Holtz Entomology stamp set (CMS328) in frayed burlap distress ink using the travel platform and leave the stamp in place on the platform. Squish distress ink onto the glass media mat.
  • Pick up the distress ink with a water brush and paint the moth.
  • Place the tag back onto the travel stamp platform, (this is why you leave the stamp in place) and stamp over the top with archival ink.
  • Die cut the ticket with the ticket booth framelits die and add a little stamped detail onto one end with the ticket booth stamps. Drop water onto the moth using the water brush and let it wick before drying with a heat tool.

I love that you can use the ticket booth stamps in so many ways, mixing and matching the dies and using portions of the stamps.


Speaking of mixing and matching, I used some of the leftover flower jar die cut stamps from my last Saturday Showcase. It's always worth making a few extra and so simple with the Tim Holtz Sizzix sidekick.


~

 #8 Tag

The ticket on this tag was a "happy accident!" I had stamped a ticket onto heavystock but it was too close to the edge to die cut with the framelits die I wanted to use. Waste not, want not, I layed over a smaller die from the same set and blended in ink. I noticed I had a perfect ticket inside a ticket so I pushed the inside ticket back in and loved it.


You can see it slightly more clearly here. I added walnut stain distress ink to the outer part to highlight the green ticket inside. I used the end of a ticket booth framelits die to give the bottom a ticket style edge. I also used up some Tim Holtz halloween remnant rubs. I love that parts of these can be used all year round. I also used some Tim Holtz holiday twine on the other tag. Covered with a little walnut stain distress ink gives it a more vintage and less candy cane look.


I hope you have enjoyed this Saturday showcase and take a look at the current Layers of Lace challenge. All the products I used are available from The Funkie Junkie Boutique.

I hope you have a great and creative weekend.
Zoe