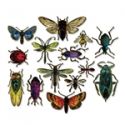
Welcome to our Saturday Showcase feature! It's Sara Emily here to shine a spotlight on Wendy Vecchi's Make Art Blendable Dye Inks. I spotted these water soluable inks in The Funkie Junkie Boutique and had to give them a try. I have to admit, I was first attracted to them by their names. But Wendy's archival inks are my go-to waterproof, permanent inks, so I knew they had to be special. Today, I hope to demonstrate their rich, intense color and versatility. First, I'll outline my steps with photos and descriptions, then we'll get to the close ups. Remember, you can click on any photo to zoom in. Here's a look at my completed project.
The Background
1. Spray a jumbo manila shipping tag with Distress Resist Spray and allow to dry thoroughly.
2. Blend with Garden Patina and Acorn inks. All mentioned inks will be the blendable dye inks from here on unless I specify otherwise.
3. Using a clean dry cloth, wipe tag to remove ink from resist.
4. Spritz tag with water. I used a Distress sprayer, and squeezed the trigger slowly to get larger, more sparse droplets. Allow to sit a moment to activate the ink. Then dry with heat tool.
5. Tear a desired section of Ideaology Aviary Collage Paper and adhere with Distress Collage Medium Matte. Before tearing the thin paper, I use a water brush to outline the area I wish to use on my project. This makes tearing the tissue a breeze.
6. Edge tag with Acorn ink.
The Details
1. Cut a panel of sandable card (from stash), sand edges, and wipe to remove dust. Ink sanded areas with Sunflower and Acorn inks. Set aside. You could use Classic Kraft Stock instead. I just happened to have this one out.
2. Color rayon seam binding by blending random areas of Acorn and Garden Patina. Spritz lightly with water, allowing the colors to mingle, and heat dry when you are satisfied with the effect. This will halt further blending.
The Bark
1. Emboss a strip of kraft card with Lumber 3D Texture Fade. Apply Watering Can and Acorn inks by swiping pads down the grain of the embossing. Dry with heat tool and apply Wendy Vecchi Crackle Texture Paste (I used my finger) in random areas and thicknesses. Allow to thoroughly dry.
2. Use a water brush to 'draw' outline of where you wish to tear the panel to make an organic shaped piece. Tear and dry, discarding edges. Edge remaining 'bark' with Archival ink in Coffee. Rub that same ink pad randomly over ridges to give more depth. Dry with heat tool.
3. Pick up some Acorn ink on finger and rub into cracks to further define them. Set piece aside.
The Leaves
1. Ink Tim Holtz new Nature's Wonders leaf in Wendy Vecchi Watering Can Archival ink and make impressions on Ideaology Kraft Glassine paper. I used my Stamp Platform to ensure a good impression. I ended up having to stamp three times to get good coverage on the slick surface, and the platform makes it a breeze to ensure the impression is perfectly aligned. Dry thoroughly with heat tool. Bring a clothespin, because this does not smell wonderful.
2. Blend with Poppy ink. Fussy cut. Set aside.
3. Stamp the maple leaf from the same set in Wendy Vecchi Potting Soil Archival ink on a scrap of Heavystock. Using a water brush pen, color leaves with Sunflower, Prickly Pear and Poppy, allowing the colors to blend. I applied lighter colors first. Dry with heat tool.
4. Apply some Acorn ink to craft mat and spritz with water 'til beads form. Pick up color with Splatter Brush and splatter ink onto leaf panel. Dry.
5. Blend leaves with Acorn ink. Dry and fussy cut. Ink edges with Acorn. Set aside.
6. Spread crackle paste onto Heavystock in random thicknesses, making some streaks by dragging the paste down. Allow to dry thoroughly.
7. Blend with Sunflower ink, dry and spritz with Resist spray. While the spray is still wet, sprinkle with Emerald Creek Burnt Copper Leaves embossing powder. Heat dry to melt powder. You have to work fast, because the spray dries quickly.
8. Blend with Poppy and Acorn inks. Dry.
9. Using Layered Leaf die, die cut leaf from panel. This die comes with a coordinating embossing folder, which I did not use. I already had the texture I was looking for.
10. Edge with Acorn ink. (not shown) Set aside.
***I ended up flicking the finished leaf with water, sprinkling with more Burnt Copper Leaves and heating to add more contrast.***
The Sentiment
1. Using the stamp platform and a fitting sentiment from the Nature's Wonders set, I heat embossed my chosen words on Heavystock. I inked with Acorn and used Ranger Clear Super Fine Detail powder.
2. Blend with Garden Patina.
3. Blend edges with Acorn. (not shown)
The Finish
Wrap seam binding ribbon around tag, make a bow, and secure on back with tape. Adhere to black panel with collage medium. Adhere bark and layer and adhere leaves. In keeping with our current Back to Nature challenge, I adhered some dried bracket fungus. Pop up sentiment with Ranger Foam Adhesive.
The Close Ups
I hope you've been inspired to step out of your routine and try some new craft products! I highly recommend giving these wonderful inks a try. If you're anything like me, you'll fall in love with the rich colors, which are especially perfect for fall crafting.
And don't forget, you've got until Tuesday to play along in our current Back to Nature challenge. Then on Wednesday, we'll start all over with another fun challenge! Happy crafting!
Sara Emily
The following products were used and can be purchased at The Funkie Junkie Boutique:


