Hello and welcome! It's Sara Emily here to bring you this week's Saturday Showcase. This week, I will be sharing a tutorial for a pair of distinctly different cards featuring a couple of Tim Holtz newest 3D embossing folders along with Seth Apter's silky Baked Velvet embossing powders from the Neutrals Kit. Here's the pair; please click on any image to enlarge.
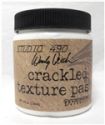
Let's get started! For the vintage portrait card, I began by embossing a water color paper panel with the Elegant 3D Texture Fade and then spread a layer of Wendy Vecchi Crackled Texture Paste in varied thicknesses over the panel. While the paste was still wet, I poured Eclipse Baked Velvet on one side of the card and tipped the card to allow the powder to flow down over the surface. I set this aside to dry and returned the remaining powder to it's jar.
After the crackle paste dried, I heat the panel to allow the embossing powder to melt. I love this crackled surface, and I could see this used to alter a frame. In fact, that was my original plan, but I instead decided to go another route.
I sprayed the panel with Cracked Pistachio Distress Oxide Spray and allowed it to dry. I blotted up the spray from the embossed areas, being careful not to smear the ink. I love how this single spray takes on so many beautiful hues and how it settles into the cracks. I blend some of the raised areas with Mowed Lawn Distress Oxide ink and spritz lightly with water to blend the inks. After drying with a heat tool, I blend the edges with Vintage Photo Distress Crayon.
I make a panel to frame the embossed panel out of design paper from my stash. In the photo below, I did a comparison of regular black embossing powder to Eclipse Baked Velvet. As you can see in the photo, after heating, Eclipse is matte in appearance compared to the other which is shiny. It has a wonderful velvety creamy texture, too. This is ground breaking for someone like me who does not care for the shine that most embossing powders provide.
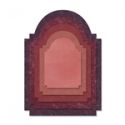
Now, I work on the embellishments. I cut the frame using Tim Holtz Stacked Archway Thinlits and Metallic 2 Kraft Stock and sprayed it with Ground Espresso Distress Spray Stain. I sprinkled with Desert powder and heated to melt the powder. I was surprised not only by the amazing texture, but that the color changed from taupe to almost white as I heated it. To highlight the texture, I scribbled and blended with Vintage Photo crayon. In the end, I decided to tap on just a bit of Cracked Pistachio oxide spray (not shown).
I sanded one of the small Found Relatives cards and used the remaining Vintage Photo on my craft mat and on my fingers to shade her. I trimmed her to fit the frame and cut a second archway from craft foam and adhered it to the back to give some dimension. The pack of Found Relatives is very generous and includes 15 each of 3 sizes of fabulous vintage portraits. I don't think it comes as any surprise these fit perfectly in
Tim's Lace Baseboard Frames.
I die cut my favorite of the Wildflower Stems #2 and some of Tim's old Wildflowers Thinlits from cream card and colored them with Cracked Pistachio Oxide ink and Vintage Photo crayon. While the ink was still wet, I dipped the ends into White Cloud Baked Velvet and heated to melt. I love how it pulled some of the color from beneath it as it heated. Sorry for the blurry shots--my Iphone wanted to focus on the frame.


Finally, I embossed and cut a pair of the smaller leaves using the 3D Impresslits Leaf and cream card stock. Impresslits are embossing folders with a built in die, and the Leaf Impresslit has two sizes on the one folder. I painted the leaves with Cracked Pistachio Oxide ink, embossed them a second time and when dry, slightly brushed them with Vintage Photo crayon. When I first saw the 3D Leaf Impresslit last fall, of course my mind turned to fall foliage. I was a bit disappointed we would have to wait for April for it to be released. But good things come to those that wait, and I think they are perfect for all of my spring makes and they'll carry over to fall, too! If you are a fan of roses, then you know they make the perfect rose foliage.
Here is the finished card and some close ups for you to enjoy.
Now let's see how the shabby Easter card came together.
I started with a die cut of Tim Holtz Bigz Cottontail--this one happened to come in the sweet thank you gift in my last order from The Funkie Junkie Boutique. Thank you, Linda! I colored it with Distress Oxide inks, dried it, and gave it a coat of Distress Crazing Medium. While the medium was still wet, I sprinkled randomly with White Cloud Baked Velvet. I waited for the Crazing to dry before heating the powder to melt. Lastly, I used Distress crayons to add more color.
To make the crackled background, I spread crackle paste over a panel of Distress Mixed Media Heavystock and allowed it to dry. I spread the dried crackle with a good coat of collage medium. When dry to touch, I sprayed with oxide spray and blotted with a paper towel to remove most of the ink, leaving it in the cracks. I then embossed the panel with the Elegant folder and sanded the raised areas.
I blended the sanded panel with oxide inks in two shades of green and edged the panel by blending with Distress ink.
Then it was time to assemble the card, using a Stitched Oval cut from burlap covered card, some Wildflower Stems water colored with Distress markers and a water pen, and a trio of the 3D embossed leaves sprayed with Peeled Paint oxide and blended with Bundled Sage oxide ink.
Here's the finished card and a couple close-ups.
Don't you love that Crazing with the White Cloud powder? Not shiny, but soft and smooth like a bunnies fur. A double dip into the powder makes for even more texture on the tail.
I hope you've been inspired to add these new embossing folders to your crafty stash or possibly give one of the new Seth Apter Baked Texture Powder kits a try. These powders are a perfect way to alter that item you've been saving in your stash -- there's still plenty of time to enter our current Frilly and Funkie challenge,
'Re-purpose, Re-use, Recycle'.
Happy crafting!
Sara Emily
Links to the products used on this project and available from
The Funkie Junkie Boutique:
Sizzix 3-D Texture Fades Embossing Folder - Elegant
Sizzix 3-D Impresslits Chapter 2 Embossing Folder - Leaf
Tim Holtz Sizzix Bigz Die - Cottontail
Seth Apter Baked Velvet - 3 Piece Neutrals Kit
Tim Holtz Sizzix Thinlits - Wildflower Stems #2
Tim Holtz Idea-ology Ephemera Pack, Keepsakes
Tim Holtz Idea-ology Found Relatives
Distress Oxide Sprays
Tim Holtz Idea-ology 8 x 8 Metallic Confections Kraft Stock


