Showing posts with label Alcohol Inks. Show all posts

Saturday, March 12, 2022

Saturday Showcase: Alcohol Ink Play

Hello, Lisa Hoel here with a new Saturday Showcase for you. For our current challenge, "Rather Blustery Day", you are supposed to focus on a technique, supplies, etc. that you find challenging. I chose to focus on Alcohol Inks for my challenge and I'm continuing that theme here today! I used the alcohol ink backgrounds I created to decorate two phone stands made with Eileen Hull's new Phone Stand Die.

Lisa Hoel for The Funkie Junkie Blog challenge – alcohol ink Phone Stands made using Eileen Hull's Phone Stand Die #creativejuicefreshsqueezed #tim_holtz #sizzix #mymakingstory #thefunkiejunkie #thefunkiejunkieboutique #frillyandfunkie
These stands are so quick to make and are great for gifts!

Lisa Hoel for The Funkie Junkie Blog challenge – alcohol ink Phone Stands made using Eileen Hull's Phone Stand Die #creativejuicefreshsqueezed #tim_holtz #sizzix #mymakingstory #thefunkiejunkie #thefunkiejunkieboutique #frillyandfunkie

Lisa Hoel for The Funkie Junkie Blog challenge – alcohol ink Phone Stands made using Eileen Hull's Phone Stand Die #creativejuicefreshsqueezed #tim_holtz #sizzix #mymakingstory #thefunkiejunkie #thefunkiejunkieboutique #frillyandfunkie

I'm really glad I dove in and just played around with the alcohol inks. I started off by watching again some of Tim Holtz's educational videos (soooo informative!). You can find two here and here. I used Yupo cardstock for my substrate. Yupo is a non-porous synthetic paper that is perfect for alcohol ink. I have a list of other supplies used at the bottom of this post but you can browse products here in the Funkie Junkie Boutique.

Here are some photos of the results of my background experiments:


Here's one technique that Tim shared that I really liked. He showed us how to make prints with stencils.


Mist a stencil with isopropyl alcohol and "stick" it down onto the Yupo. Drip various colors of ink onto the stencil/paper. It will wick under the stencil but that is what you want it to do. Let it sit there until all the ink dries underneath the stencil.

Peel off the stencil and you get your first generation print!


You can create several successive prints with the ink left on the front of the stencil. Mist it with more isopropyl alcohol and lay it on a new sheet of Yupo. Let it dry and peel it off. Repeat.


Another fun product to use is Alcohol Lift-Ink.


I cut a piece of one of my backgrounds very slightly larger than the face of the phone stand. Also a smaller piece to cover the front of ledge on the bottom.

A stamping platform is very helpful for this technique because it often needs several applications of Lift-Ink to remove enough alcohol ink. Start with a CLEAN stamp! Residual ink on your stamp will stain your ink pad.

Amount of ink removed after one stamping.

Position and ink your stamp, then stamp it onto your background. The lift-ink reacts with the alcohol ink. Dab (don't wipe, smear warning) the stamped areas with a clean paper towel. When most of the inks have been picked up by the towel, you can buff the rest off.

Results after repeating process 3x.

If you want a stronger contrast repeat the above steps to keep removing alcohol ink. Don't forget to clean your stamp each time.

You can also stamp over alcohol ink using Archival Ink. Be careful stamping on the Yupo because it is slick and can easily smudge as you apply pressure.


Next I cut out the "HELLO THERE" words out of the background using the Bold Text #1 Die Set . Thinlits dies cut through Yupo just fine. I glued it to the stand and trimmed off any overhanging paper.


Phone Stand assembly time!
It only takes one pass through your die cutting machine to cut all the pieces you will need. Cut it out of mat board or heavier chipboard so it will be sturdy.


Fold all the parts at their score lines. I find it easier to insert the tabs of the ledge piece through the slots before I glue the back brace into place.


Put some dabs of glue under the tabs.


Glue back brace in place.


You can change the pitch of your stand depending on where you adhere the brace.


Glue the front piece of the ledge in place.

Details about the second phone stand:
I used Eileen Hull's new Snail Mail Die Set to cut "stamps" to make the collage on the front. First I picked out complementary alcohol ink backgrounds from my pile and cut them up into sheets with the Snail Mail Die. With regular paper you can tear them apart like stamps but since the substrate was Yupo I cut them with scissors.


I mixed and matched my stamps into a collage covering the front of the phone stand. I also put some extra stamping on the back because, why not? ;-)


Lastly, I stamped with various of colors of Archival Ink over the whole collage. I assembled the stand as shown above.

Whew, that was a lot! I hope you are inspired to go play and try some new techniques. Supplies are listed below. Have a great weekend!


Supplies used:

Tim Holtz Die Set - Bold Text #1
Eileen Hull Scoreboards Die - Phone Stand
Eileen Hull Thinlits Die Set - Snail Mail
Tim Holtz layering stencils - Patchwork Hex, Dotted Line, Circuit
Tim Holtz stamp sets - Halftone & Rings, Glitch 1, Glitch 2, Mini Glitch, Inquisitive, Evolution, Field Notes, Specimen, Spring Sprung
Ranger Archival Ink -  Black Soot, Vintage Photo
Alcohol Ink Blower tool
Stamping Platform
91% Isopropyl rubbing alcohol (from drug store/grocery store)
Sizzix Making Essential - Mat Board

Saturday, July 31, 2021

Saturday Showcase - Tim Holtz Sizzix Flower Field Die

Hello friends. It's Teri from TerisMailbox here spotlighting the 'Flower Fields' Die from Tim Holtz and Sizzix for The Funkie Junkie Boutique. I admit to be addicted to all things Tim Holtz. This die has become a new favorite!

Check out the variety of techniques on all five cards!

I started by watercoloring two different cards using watercolor techniques. The first card uses the border as a watercolored die-cut piece.

Check out the dimension achieved by layering an additional die cut below the water-colored piece! I used distressed ink reinkers to color the die cut and smooshed the background with Tumbled Glass and Speckled Egg Distress inks.

Colors used include Wilted Violet, Mustard Seed, Spun Sugar, Bundled Sage, Peeled Paint and Abandoned Coral inks for the flowers.


After gluing the die cut watercolor piece to the smooshed background, I mounted the watercolor piece on an A2 hotdog  cardstock base. The sentiment is from Stampers Anonymous 'Nature's Wonder' stamp set that I thought completed this card well.

The second card is also water-colored, this time using an embossed image. Check out this soft willowy image!


This card started with the die embossed onto a piece of watercolor paper. I added the same colors of ink listed above to the embossed areas on the paper. I filled in the sky with Tumbled Glass Distress Inks and spritzed the paper and let the colors move.


Check out how soft the colors are after they spread!  If you look closely, you can see a faint outline on the flowers and grass, This was achieved by using a brayer to apply Hickory Smoke Distress ink directly to the die and re-embossing the piece. I love how it just spotlights the flowers!


The sentiment is from Stampers Anonymous 'Tiny Text' Stamp. I love these sets for the variety of sentiments for all occasions! I stamped it on a strip of watercolor paper and applied to the front of the piece. The embossed piece is mounted on an A2 cardbase.

I have a video on my YouTube Channel documenting the process for these two cards. I hope you enjoy the video I'd love to have you subscribe to my channel.


In addition to these cards, I created three other cards using backgrounds from my stash. Do you make backgrounds and save for "just the right card"? Once I get going with a background technique, I tend to make several and find just the right opportunity to use them at a later date.

I used two alcohol ink backgrounds for the first two cards.


Check out the shine on this card! The background is Ranger orange and yellow alcohol inks with gold spotlights from gold Thermoweb Deco Foil applied while still wet. The floral border was cut from gold cardstock and applied over the alcohol ink piece.


The sentiment is from the Stampers Anonymous 'Tiny Text' Stamp by Tim Holtz, embossed in gold on black cardstock. Black cardstock frames this piece beautifully.

I love the elegant look of this card!


This card is also on a Ranger alcohol ink base, this time with rainbow hues. The alcohol inks spread so well on Ranger Yupo Paper


Check out the brillance created from the combination of the bright alcohol inks mounted on black cardstock and topped with the 'Flower Field' Die cut from black cardstock. The sentiment is from the Stampers Anonymous Tiny Text Stamp by Tim Holtz, white heat embossed on a strip of black cardstock.

The final card today used ink smooshing. I love to ink smoosh. This background uses Dusty Concord and Bundled Sage Distress inks on watercolor paper. 


This color combo is one of my favorites!  The 'Flower Field' Die was cut from Dusty Concord ink smooshed watercolor paper and mounted on the base.


There is that same sentiment from 'Tiny Text', this time stamped on watercolor paper and popped up with additional strips of cardstock. The watercolor base is mounted on an A2 cardstock base.


Stop by The Funkie Junkie Boutique and check out all the wonderful products available!

I hope you have enjoyed my spotlight. I hope I have inspired you to try different techniques. I'd love to have you follow/subscribe on my social media sites Instagram, Facebook, Blogger and You Tube.  Be well. Be creative!

Saturday, June 22, 2019

Saturday Showcase - Tim Holtz Idea-ology Transparent Wings

It is Cec here to present the Saturday Showcase this week.  I am sharing a couple of projects I made featuring the Tim Holtz Transparent Wings from his Idea-ology line of products, which can be found at The Funkie Junkie Boutique.


I have made one a little frilly and another a little more funkie but believe me, both were so much fun to create.  First up is the frilly one - a tag I think I will call Wildflower Fairy.


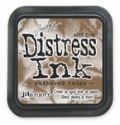
I started with a jumbo manila tag and gave it a coat of White Gesso (Dina Wakley) on both sides.  Then I smooshed the tag through puddles of Antique Linen, Frayed Burlap and Vintage Photo Distress Oxide (Tim Holtz).


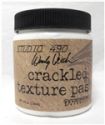
Once the tag was dry I gave each side a coat of Clear Gesso (Dina Wakley).  This was followed with Crackled Texture Paste (Wendy Vecchi) through the Crossed stencil (Tim Holtz) - I only added the paste on the side I decided was going to be the front.  Note:  The clear gesso acts as a barrier so the paste will stay white when it dries.  If you don't mind it sucking up some of the colour, the clear gesso can be omitted.


Next I die cut all sorts of wildflowers from the Wildflower Stems #1 and #2 sets (Tim Holtz).  The die cuts were coloured by inking them with a variety of Distress Inks using either a water brush (Tim Holtz) or smooshing them through puddles of colour.  The inks used were: Worn Lipstick, Shaded Lilac, Picked Raspberries, Festive Berries, Wilted Violet, Wild Honey, Spiced Marmalade, Peeled Paint.


Gathered Twigs Distress Ink was used to colour a little picket fence that came in one of the great goodie packages you get with an order from The Funkie Junkie Boutique.  The wildflowers and the fence were added to the tag.


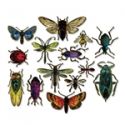
Next I used some Watering Can Archival Ink (Wendy Vecchi) to stamp a couple of bees from the Entomology set (Tim Holtz) and cut them out using the co-ordinating die set - what a time saver.  The bees were coloured with some Wild Honey and Spiced Marmalade DI before they were added to the tag.  I also stamped a lady bug but did not use it in the end because it was too large and looked out of scale.


I coloured the back of some transparent wings with a mixture of Aqua and Purple Twilight Alcohol Ink (Tim Holtz) and then fastened them to the back of a sweet girl from the Paper Dolls (Tim Holtz).

Finally some burlap string and some fuzzy fibre from my stash were combined with a strip of seam binding that was dyed with Gathered Twigs DI to make a topper for the tag.


For my more funkie project I made a canvas I am calling Brave Wings.  I started with a piece of mat board and adhered some corrugated cardboard on top of it.  This gives some stability to the cardboard but still keeps the project light.


I ripped some of the top layer off the cardboard in random areas to expose the corrugation and then smeared Texture Paste thickly over sections to provide rough texture.


I tore a piece of paper from an old book and gave it a light dry brushed coat of White Gesso.


Next I laid the paper loosely on the cardboard and sprayed both with some Antique Linen, Iced Spruce and Gathered Twigs Distress Spray Stain (Tim Holtz) followed by White Linen Spray (Dylusions).


Before I glued it on the cardboard I added some stenciling to the book paper using the Checkmate Stencil (Wendy Vecchi) and Iced Spruce DI as well as the Speckles stencil (Tim Holtz) and Gathered Twigs DI.


The transparent wings were coloured on the back with a mixture of Mushroom, Cloudy Blue and Denim Alcohol Ink (Tim Holtz).  One large pair of wings was added to the back of a ballerina from the Paper Dolls set (Tim Holtz).  Strings of copper seed beads were added to the bodies of the remaining wings before they were added to the canvas.

Finally I created the sentiment on the computer, cut it into segments, inked each word with Gathered Twigs DI and adhered then to the canvas.

These transparent wings are so much fun and very handy to have.  They can be coloured as I did but they also look wonderful just as they are.  The package contains a great variety of sizes so they can be used in all sorts of ways.  You can purchase them at The Funkie Junkie Boutique - a great online store with super pricing and customer service.

Here is a list of supplies with links to The Funkie Junkie Boutique:

Tim Holtz Idea-ology Transparent Wings TH93785
Tim Holtz Sizzix Thinlits Die Set 5PK - Wildflower Stems #1 by Tim Holtz
Tim Holtz Sizzix Thinlits Die Set 5PK - Wildflower Stems #2 by Tim Holtz