Hi everyone and thanks for joining me at Frilly and Funkie today. It's Jenny here as your 'hostess with the mostest' and a technique I like to call 'Weathered Wood'. Have you seen some of those super aged wood panels in shabby chic projects? Well I've got a way of replicating that look with inks, paints and a brayer to give you a background that can create a card like this...
Here goes (and remember, you can click on each of these photos for a closer look)... cover a rectangle of plain thick card with Antique Linen Distress Paint. Dry.
Add a little Frayed Burlap Distress Paint and a little water to your craft mat. Run your brayer through it then apply VERY LIGHTLY to the card in vertical sweeps. Dry and clean off your brayer.
Repeat the process this time using Weathered Wood Distress Paint.
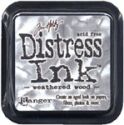
Apply Weathered Wood Distress Ink over the whole of the card with a blending tool.
Add droplets of water over the top, allowing the water to react with the ink before drying again.
This is a clever bit. Add a little rubbing alcohol/surgical spirit to your craft mat together with the tiniest of dots of Potting Soil and Orange Blossom Archival Reinker. DON'T mix them.
Run your brayer through the ink mixture to pick up the dots and runs and apply these over the painted layers. They will create the effect of knots in the wood and are permanent when dry. You can do this to age any painted surface, with the Potting Soil Reinker being particularly useful for this task.
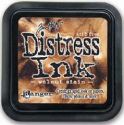
Score your card at 1.5 inch widths, fold towards you and blend Walnut Stain Distress Ink along the fold lines.
Re-score your lines so that they are indented to create the effect of planks. You can leave it at this stage or go one step further.
This next idea is based on the same principles as Tim Holtz' Eroded Metals technique. Working at speed and in vertical stripes, cover your background with your paint colour of choice (I used Tumbled Glass flavour).
Flick large droplets of water over the paint surface, allowing it to react just a little before using your heat gun to dry some of the paint - BUT NOT ALL OF IT. Using a clean tissue lay it over the semi-wet surface to remove the wet paint, dabbing away any further areas as required. The point is to make it look like the paint is peeling off the 'wooden surface'.
Finally blend Tea Dye Distress Ink over the surface to revive the wood colour.
You can see from the picture below how I chopped the rectangle into a square and used the remaining portion to create strips for layering over the top to create some structure to the end card.
And so to recap the finished card... and then review the embellishments...
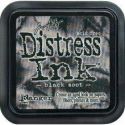
A corrugated card butterfly covered with Wild Honey and Rusty Hinge Distress Paints, Black Soot Distress Ink, Clear Rock Candy Crackle Paint and a chopped up Industrious Arrow, plus one of those ever-present Simple Sayings!
Studio 490 Wendy Vecchi 'Blooming Art' flowers and leaf stems coloured with Wild Honey and Rusty Hinge Distress Stains, and Bundled Sage DS mixed with Pearl Perfect Pearls powder, all clear embossed.
The little pearls are from Melissa Frances. A window and box have been cut from black kraft core card, embellished with an Industrious border.
And that's all there is to it! I hope you give this technique a whirl to create your own faux wood panelling. You'll be able to use it as a background or for die cutting embellishments from in the same way you would with your patterned papers.
Love the idea of using your brayer to create great backgrounds? If you haven't seen it already, Wendy Vecchi has another fantastic tutorial using Archival Reinkers over on her blog
HERE.
Of course those hot summer blooms are just perfect for the current '
Summer Heat!' challenge here at Frilly and Funkie right now. Don't forget, you have the chance to join us as a guest designer and there's a $25 shopping spree awaiting one lucky entrant, so it's well worth linking up those projects. Meanwhile you'll find a shopping list below for all the items used in this project just in case you are missing that vital ingredient.
Thank you for joining me today. Whatever you're up to have a fantastic weekend and take care of yourselves, Jenny xxx