I started by cutting up those scraps and an abandoned tag, keeping the colours to pinks, greens and whites. There were paper offcuts, painted card, clear embossed paper and card that had inks and stamping all over. Whilst I used a die you could just as easily cut them into squares or rectangles.
The pieces were then reassembled and glued down in a random pattern onto a square of card.
A thin coat of Picket Fence Distress Paint, dried, then very light misted with coordinating ink sprays created a more uniform look. As the paint and inks dried I wiped over the surface gently with a cloth to ensure the embossing and some of the deeper colours still showed through.
White embossing paste was applied to the dry surface through a stencil, covering the whole card.
It is important to let the paste dry naturally as it gives it time to soak up some of the ink from the papers below. To give a more aged appearance Brushed Corduroy Distress Stain was dabbed on the edges. If you want to add tiny drips of other inks you can do at this stage (I added a little more of the green).
While this is drying I created some 'suede' flowers. The kraft side of some Kraft-Core card was spritzed liberally with Ink Refresher and worked into the card with my fingers until it became soft and pliable.
As the Kraft-Core dried I scrunched it up to form wrinkles so that the colour side could be sanded lightly. The same techniques were used on plain parcel paper (you get plenty of this when ordering from The Funkie Junkie Boutique). Flowers were die cut from the Kraft-Core and parcel paper and layered together.
An important tip from Tim Holtz here - after die cutting delicate shapes like leaves from Kraft-Core card sand them before you remove them from the card to prevent accidentally tearing the shapes.
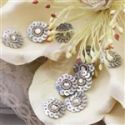
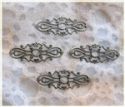
With all the elements coming together it was time to start putting the card together. I used the offcuts from the Kraft-Core and parcel paper to add a base strip for the flowers, hand sewing through some of this. A strip of die cut lace border was stained and a metal embellishment was cut in half before being glued into place. I used some silver Prima flower centres for the suede flowers, adding Spun Sugar Distress Paint and drops of Gold Mixative Alcohol Ink to them.
And here are some close ups of the finished card. I tucked a little stained seam binding in between the flowers to add to the vintage look. The texture and colour from the scraps really gives the stencilled background an added depth and dimension.
I hope this inspires you to reach for those scraps and stencils to create your own new backgrounds. And you still have time to enter our current challenge, 'Stencils and texure' as it runs through to March 11th.
Have a great weekend and get time to be creative.
Jenny xxx


