Showing posts with label Seam binding. Show all posts

Saturday, December 8, 2018

Saturday Showcase - Christmas Sugar & Spice

It is Cec here and I am presenting the Saturday Showcase this week.


I wanted to create something that followed the theme of the current challenge In The Kitchen so I have made a simple Christmas folio card using many types of products that can be found in The Funkie Junkie Boutique.

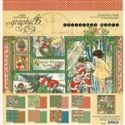
Please note that the Graphic 45 papers I used (St. Nicholas and A Christmas Carol) were from my stash because new product I ordered has not arrived due to postal issues at my end.  I will link below to Graphic 45 Christmas papers that would be perfect alternatives.

I also utilized my computer to create some paper with dancing gingerbread men and to create the Sugar & Spice text.  Both were inked with some Old Paper and Vintage Photo Distress Inks to age them.

I made my finished folio card 5 1/2" square with a 1/2" spine but you can create yours in any size you wish.  I cut my mats and papers 1/8" smaller than the previous layer - except for the red mat strip across the front where I had a senior moment and made it a bit wider.  Here is how to put this folio card together - there are lots of steps so hang in with me.

The folio base


  • Cut two pieces of heavy card stock and score each piece at 1/2" on the long side
  • Adhere the two 1/2' sections together and bend - this forms a spine


  • Cut four pieces of red card stock and adhere to the front and back and inside and outside of the folio
  • Cut four pieces of patterned paper, ink the edges with Vintage Photo Distress Ink and add to the red card stock
  • Cut two pieces of red card stock and adhere to the outside and inside of the spine
  • Cut two pieces of patterned paper, ink the edges with Vintage Photo Distress Ink and add to the red card stock on the spine

The pockets


  • From the same card stock as the folio blank, cut two pocket sections and score at 1/2" on the short side
  • Cut four hinges (gussets) for the pockets 1" wide and score in half lengthwise
  • Clip the ends of the hinges on an angle  Note: You should do the same with the 1/2" section of the pocket base - I forgot
  • Add Scor tape to both sides of each hinge and to side of the 1/2" section of the pocket base that will folded towards the inside of the pocket
  • Cut two pieces of red card stock and adhere to each pocket base and then top with patterned paper
  • Add hinges to both sides of the inside of the pockets with the folded edge to the outside and remove the tape
  • Fold the bottom to the inside, remove the tape and add the pocket to the card on the inside top and bottom

The embellishments


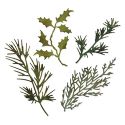
Using the Holiday Greens die.cut greenery and holly leaves from green card stock


  • Cut the word Sweet from red card stock using the Alphanumeric die
  • Cut chevrons from Christmas paper and Metallic Gold paper and ink the edges with Vintage Photo Distress Ink
  • Emboss the gold chevron with an embossing folder or texture fade


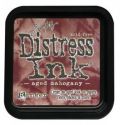
  • Dye a length of seam bin ding with Aged Mahogany, Candied Apple and Vintage Photo Distress Ink and dry crumpled up


  • Alter a silver Christmas tree charm with a Peeled Paint Distress Crayon


  • Alter an Idea-ology pine cone with Ginger Alcohol Ink


  • Add the two charms along with a mini Idea-ology jungle bell to a length of chain with small jump rings
  • Create a loopy bow with the dyed seam binding and tie with a length of burlap string that has the charm chain threaded through it

To assemble

  • Add greenery and chevrons to the front of the card
  • Add patterned paper to a strip of red card stock and adhere across the card
  • Add Sugar & Spice text, the loopy bow, a little poinsettia, some retro ephemera and a gingerbread man button


  • On the inside, add the holly leaves and red gems along with the word sweet to one pocket front
  • Add recipe card and tea bags to the pockets
This would make a great little gift for a friend that you don't normally exchange gifts with.  I hope you make one and have fun creating.


Saturday, October 19, 2013

Step X Step - Goulish Halloween Card

Today for the Step X Step I thought I would show you how I made the Goulish Halloween card I made for the current challenge.


I started by creating a background using Peeled Pain, Pumice Stone and Dusty Concord Distress Ink on some white card stock.


The next step was to use a stencil with some Black Soot Distress Ink in just one corner.


I then cut an oval from some Tim Holtz card stock and chopped one edge off before I ran it through a texture fade.


I used some Black Soot Distress Ink to highlight the raised areas and then rubbed some purple Jacquard Lustre Paste over everything (sorry forgot to take a photo after this step).


I then pounced some of the Black Soot and Peeled Paint Distress Ink on my craft sheet and spritzed it with water.


Some rayone seam binding and some netting were smooshed (very technical term) into the ink to dye them.


The netting was added to some Prima flowers.  Normally I would have made the flowers from the Crinoline that Linda carried in the The Funkie Junkie Boutique but I was leaving on another trip and running out of time.


A copper metallic corner was transformed with a coat of black craft paint.


 A little of the purple along with some green Jacquard Lustre Paste was added to the corner.


 I took some old poison labels and added Peeled Paint and Dusty Concord Distress Ink to them.

Finally I grabbed some black card stock for a card blank and started to glue everything down.  The goulish little boy was added to the part oval and then I cut out some little spiders to which I added black glitter, placed a purple button in the centre of the flower with a floss bow and added some little purple buttons on top of the dyed seam binding down the side.  I also added the crow, which has some Gel pen highlighting on his feathers.

I hope you like the finished product.

Hugs!
Cec

These products used in the creation of this card can be found at The Funkie Junkie Boutique:

Saturday, March 9, 2013

saturday StepXstep

well it is Trace here with a stepXstep to make a small  gift holder. This could be used to include a gift card or greeting or a small gift.  It is simple to make and all from a size 10 tag and piece of card and some seam binding and lots of fun.

So here is the finished make :


 and inside:
So there are lots of pictures, to show the stepXstep stages, just click on them to get a larger view..

Start with a #10 tag, and fold in half, trimming the corners so both sides match.  Also punch a hole in the back piece of the tag so that the ribbon tie can be threaded through at the end.


Next colour the whole tag using the fab seasonal distress colour, now part of the distress ink family, peacock feathers. Using blending foam on a blending tool gives a great smooth finish to the tag.


Now to add some interest to the piece, start by placing a stencil over the tag and spritzing the surface with water, then remove and leave the water to sit on the surface for a few seconds. then blot off with some kitchen paper.


This will remove some of the colour giving a soft pattern..sorry forgot to take a picture of this step till the end!


Now to add these fab splats using the coordinating colours of distress stain, showing how well all the distress products work so well in the same colour for different effects!


Push the stain down onto a craft sheet so that the inks starts to collect in the sponge top part then lift up and splat down onto the project, repeat and then leave for a few seconds and dry with a heat tool.
To create the pocket on the inside cut a piece of card to fit, colour on outside using peacock feathers and then add wonder tape on three sides as shown, to adhere inside.
To complete I added some stamping using distress stains in peacock feathers and evergreen bough distress stains, using the splatter stamp from spills and splatters set. I also added splats using evergreen bough in the inside too.
I added some tissue tape, some letters from the word play die ( coloured picket fence distress crackle paint, then when dry I rubbed peacock feathers into the crackle)..
... and on the inside I added a sentiment from simple sayings and dyed some seam binding with peacock feathers and evergreen bough distress stain.
Well hope you have enjoyed my stepXstep for this Saturday and maybe you will have a go at making a tag gift holder, for some mini pencils, notebook, gift card or any other small gift.

hugs trace  x


And don't forget, all these fabulous products are available for sale, at seriously awesome prices, at The Funkie Junkie Boutique: