![]()
![]()
![]() Buy. Download. Create. Get Photoshop CS5 now at the Adobe Store.
Buy. Download. Create. Get Photoshop CS5 now at the Adobe Store.
![]() Try before you buy. Download any Adobe product for a free 30 day trial.
Try before you buy. Download any Adobe product for a free 30 day trial.
![]()
 Mark Galer is currently a senior lecturer in Digital Imaging at RMIT University on the BA Photography program (the leading commercial course in Australia) and has published 6 titles for the International publisher Focal Press - ranging from location photography through to Digital Imaging and Photoshop skills.
He has a commercial background in editorial photography (travel/landscape) and is currently a regular contributor to magazines in the USA, Australia and the UK. He is an Adobe beta tester for Photoshop, Bridge and Photoshop Elements, is one of the leading educators in Photoshop training and has recently been appointed as an Adobe Ambassador for Photoshop training in Australia. For more info visit his site. We'll also just posted an in-depth interview with Mark.
![]()
![]()
![]()
PHOTOSHOP CS5 TUTORIALS
![]() Refine Edge - Best New Feature in Photoshop CS5 - Refine Edge Tutorial
Refine Edge - Best New Feature in Photoshop CS5 - Refine Edge Tutorial
The Refine Edge feature has been completely revised for Photoshop CS5 and now has the WOW factor when it comes to creating composite images. Mark Galer gives it a test drive.

One of the most challenging montage or masking jobs in the profession of post-production editing used to be the hair lift. When the model had long flowing hair and the subject needed to change location many post-production artists would call in sick. If you got it wrong, just like a bad wig, it showed. Extract filters, Magic Erasers and Tragic Wands didn’t get us close but we now have a new Refine Edge feature in CS5 that has eased the burden of this task and made the task easier than ever before...
Merge To HDR Pro - Photoshop CS5 Tutorial From Mark Galer
 Here is our first Photoshop CS5 tutorial, New To Photoshop CS5 - Merge To HDR Pro. From the intro:
I have to admit to not being a big fan of the original Merge to HDR feature in previous versions of Photoshop and, although not a big user of plug-ins or additional image editing software, I did succumb to purchasing standalone HDR software – this has, however, all changed with Photoshop CS5.
The automated feature for creating High Dynamic Range (HDR) images in Photoshop has been given a complete overhaul for Photoshop CS5 and has been given a new name ‘Merge to HDR Pro’. The Auto Alignment, Lens Correction, Remove Ghosting and expanded controls for rebuilding detail and contrast are now so good it will firmly establish Photoshop CS5 as the software of choice for photographers interested in HDR Photography. Read the full New To Photoshop CS5 - Merge To HDR Pro Photoshop CS5 tutorial.
PHOTOSHOP CS4 TUTORIALS
![]() How To Sharpen An Image In Photoshop — Advanced Sharpening Techniques
How To Sharpen An Image In Photoshop — Advanced Sharpening Techniques
 Most if not all digital images require sharpening, even if shot on a state of the art digital megaresolution SLR with pin-sharp focusing. Most cameras or scanners can sharpen as the image is captured but the highest quality sharpening is to be found in the image editing software.
The best sharpening techniques are those that prioritize the important areas for sharpening and leave the smoother areas of the image well alone, e.g. sharpening the eyes of a portrait but avoiding the skin texture. These advanced techniques are essential when sharpening images that have been scanned from film or have excessive noise, neither of which needs accentuating by the Unsharp Mask. So let the project begin.
![]() Selecting & Extracting Hair - Masking Tutorial - Extraction Tips
Selecting & Extracting Hair - Masking Tutorial - Extraction Tips
 One of the most challenging montage or masking jobs in the profession of post-production editing is the hair lift. Get it wrong and, just like a bad wig, it shows. The first secret step must be completed before you even press the shutter on the camera. Your number one essential step for success is to first shoot your model against a white backdrop, sufficiently illuminated so that it is captured as white rather than gray.
The post-production is the easy bit - simply apply the correct sequence of editing steps and the magic is all yours. This is not brain surgery — but follow these simple steps and you will join the elite ranks of Photoshop gurus around the world. Celebrity status is just a few clicks away.
![]() Use The Displace Filter & Displacement Maps To Make A Realistic Flag
Use The Displace Filter & Displacement Maps To Make A Realistic Flag
 By using the blend modes the flag in this project can be modified to respect the color and tonality of the undulating silk beneath it. The highlights and shadows that give the silk its shape can however be further utilized to wrap or bend the flag so that it obeys the material’s shape and sense of volume.
This can be achieved by using the Displace filter in conjunction with a ‘displacement map’. The ‘map’ defines the contours to which the flag must conform. The final effect can be likened to ‘shrink-wrapping’ the flag to the 3-D form of the undulating silk.
![]() Photoshop Masking & Montage Tutorial — Using Masks To Improve Landscape Images
Photoshop Masking & Montage Tutorial — Using Masks To Improve Landscape Images
 In this sample chapter from his new book, Photoshop CS3 Essential Skills, Mark Galer shows you Photoshop techniques that use selections and Photoshop masks to create amazing effects that can be applied to landscape images. As a bonus, you can also download high resolution versions of the images that are used in the tutorial, so you can work along with Mark.
This tutorial is an excellent way to become more familiar with Photoshop's powerful masking and selection tools.
![]() Working With Photomerge In Photoshop Elements 6 For Windows
Working With Photomerge In Photoshop Elements 6 For Windows
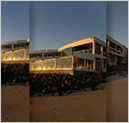 They say that sequels are never as good as the original - try telling that to Adobe. There fully revamped Photomerge now comes in three flavors and is ‘fully fantastic’. You get to explore the greatly improved Photomerge features only in Elements 6 and Photoshop CS3. Photomerge is now capable of aligning and blending images without any signs of struggle - banding in smooth areas of tone.
The fully revised Photomerge feature first made its appearance with CS3 but the maths seems to have got even better with the release of Elements 6 and the stitching is so clever it will really have you amazed at the quality that can be achieved inside this budget program.
![]() Creating Selections With Photoshop's Pen Tool
Creating Selections With Photoshop's Pen Tool
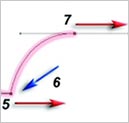 The Pen Tool is often used in the creation of sophisticated smooth-edged selections, but strictly speaking it is not one of the selection tools. The Pen Tool creates vector paths instead of selections; these, however, can be converted into selections that in turn can be used to extract or mask groups of pixels.
Although graphic designers are quite adept at using this tool, many photographers the world over have been furiously waving magic wands and magnetic lassos at the megapixel army and putting graphics tablets on their shopping lists each year in an attempt to avoid recognizing the contribution that this unique tool has to offer.
![]()
![]() Adobe Photoshop Lightroom - Who Needs It?
Adobe Photoshop Lightroom - Who Needs It?
If you have managed to live without Photoshop Lightroom up until now, what makes it so fantabulous/damned hot that you need to place it at the top of your software wish list?
Photoshop Lightroom has had somewhat of an identity crisis amongst the general population of photographers since its release in early 2007. The Adobe engineers built it to fill a gap in the Photoshop family of products (Photoshop CS3 and Photoshop Elements being the other two family members) but many amongst the photographic community have not been able to identify its primary task to make it the ‘must have’ product that Adobe hoped it would become for all digital photographers.
![]() Working With Adjustment Layers In Elements 6
Working With Adjustment Layers In Elements 6
 One of the most important image adjustment features in a professional photographer’s workflow is Curves (a sort of Levels command on steroids). Color Curves has now made a welcome appearance in the Enhance menu in Photoshop Elements but it is still not available as an adjustment layer.
This project shows you several ways to control contrast using adjustment layers to increase your post-production editing power to maximum performance.
![]() Adjusting Exposure in Adobe Camera Raw CS3
Adjusting Exposure in Adobe Camera Raw CS3
 For those digital photographers interested in the dark side, an old SLR loaded with a fine-grain black and white film is a hard act to follow. The liquid smooth transitions and black velvet-like quality of dark low-key prints of yesteryear is something that digital capture is hard pressed to match.
The typical DSLR camera is, however, a pessimist when it comes to clipped highlights and ignorant of what is possible in Adobe Camera Raw. Adobe Camera Raw can recover at least one stop of extra highlight information when the Exposure slider is dragged to the left (so long as the photographer has used a DSLR camera that has a broader dynamic range than your typical fixed lens compact digicam).
![]() Working With Shadows In Photoshop - Advanced Shadow Techniques
Working With Shadows In Photoshop - Advanced Shadow Techniques
 Learn the fine art of isolating and preserving delicate and complex shadows for transplantation to exotic new backgrounds. This tutorial reveals how to introduce a world of exciting textures to your ever so subtle... not... studio tabletop.
The flower for this tutorial was photographed (using a Fuji FinePix) on a cold winters morning in Victoria whilst the sand (shot on Kodachrome film) hails from the Great Indian Desert in Rajasthan. Unlikely bedfellows, but with a little craft the two can lie together comfortably within the same frame – but only if the subtle shadow is captured with all of its subtlety and delicately transplanted to its new home in the desert. This is how...!
![]() Photoshop CS3 Tutorial High Dynamic Range
Photoshop CS3 Tutorial High Dynamic Range
 Contrary to popular opinion – what you see is not what you always get. You may be able to see the detail in those dark shadows and bright highlights when the sun is shining – but can your CCD or CMOS sensor? Contrast in a scene is often a photographer’s worst enemy. Contrast is a sneak thief that steals away the detail in the highlights or shadows (sometimes both).
Photoshop’s Merge to HDR (High Dynamic Range) automated feature has been improved for CS3, but it is still not able to merge exposures where subjects have moved between the separate exposures. The technique in this tutorial (taken from the new Photoshop CS3: Essential Skills book) shows you how to resolve this problem. This technique also offers superior midtone contrast than Photoshop’s merge to HDR automated feature.
![]() Adobe Photoshop CS3 Public Beta - A Photographer’s Perspective
Adobe Photoshop CS3 Public Beta - A Photographer’s Perspective
 Unless you have been hiding in a cupboard somewhere high in the Andes you have probably heard by now that Adobe has released a public beta of Photoshop CS3. As a beta tester (prior to this pubic release) I have been working with this software for some time now and would strongly recommend that you download this beta before Photoshop CS3 goes on sale.
For G4 Mac laptop owners, and for those Mac users who have invested in the new Mac hardware sporting the new Intel chips, this public beta is your Christmas present from Adobe. Even if we stop talking about the new features that this public beta offers, the software delivers the speed you have probably been yearning for now.
![]() Adopting A Photoshop Lightroom Workflow - Lightroom Tutorial
Adopting A Photoshop Lightroom Workflow - Lightroom Tutorial
If you are a photographer who wants to take a laptop on location to review your work-in-progress,
here are the four essential steps that you need to take to ensure you stay organized when using
Adobe Photoshop Lightroom.
This workflow is optimized for a photographer who owns:
- A laptop computer.
- An external large-capacity hard drive or studio/home-office desktop computer with a large hard-drive capacity.
- A smaller pocket drive that can be powered via the USB or Firewire port off the laptop computer. Some photographers may prefer to burn DVDs using their laptop instead of using a USB/Firewire pocket drive.
The four steps in the workflow are as follows:
- Create a master Lightroom catalog.
- Import images on location into a working catalog using a laptop computer.
- Export the working catalog to your USB/Firewire pocket drive or burn the catalog to a DVD.
- Import the catalog from the location shoot into the master catalog and transfer the images to the main hard drive.
Photoshop Elements 10 Tutorial - 16 Bits Channel Editing Secrets
Multi-layered editing in 16 Bits/Channel is the 'professional's approach to image editing, but it was never supposed to be possible in Photoshop Elements. In this extract from the full 16 bit tutorial (available in Photoshop expert Mark Galer's new Photoshop Elements Maximum Performance 10 book) he adopts the age old adage "never say never" and demonstrates how you can edit at the higher bit depth so that you can achieve maximum quality from your Raw files.
This project requires the use of camera raw files, rather than JPEG files. The bit depth of a Raw file is higher than the 8 Bits per channel of a JPEG file. If files are edited at a higher bit depth the color and tone of the image can be corrected or optimized to a much greater extent without the risk of introducing image artifacts and color banding in the final image. This is essential when the user requires maximum quality for a fine print.
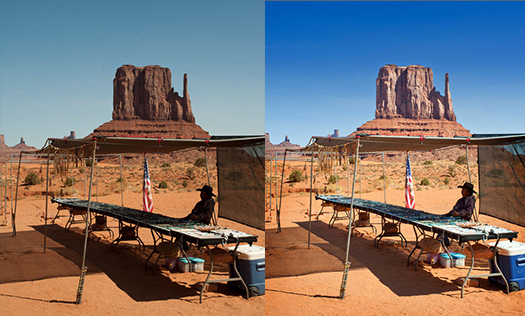
All professional photographer’s know that major edits to color and tone are best done in Adobe Camera Raw (ACR), as these changes are applied at the native bit depth of the sensor (usually 12 or 14 Bits/Channel). This ensures the histogram is kept in pristine condition and massively reduces the risks of tonal banding when the file is opened in the full edit space and then printed or saved for the web.
For most photographers, however, the full version of Photoshop is a simple case of overkill. Photoshop Elements can pretty do most things photographers want and need to do. Perhaps the most disappointing omissions in the budget version of Photoshop, however, are the lack of localized editing features in Adobe Camera Raw. This forces most Elements users to prematurely open the file in the main editing space of Elements to fine-tune some target colors, add a gradient or vignette and do simple spotting to remove the annoying dust bunnies.
This editing is usually performed at the lower 8 Bits/Channel as Photoshop Elements is not supposed to be able to support additional layers or adjustment layers and most editing tools do not function at all in the higher bit depth. Adobe has disabled these features but has mysteriously left enough of an odd assortment of tools and commands available (perhaps by accident) to make multi-layered editing at the higher bit depth possible… if you know Mark Galer’s secret workarounds. Although the workflow outlined in this project will demonstrate how we can edit multi-layered files at 16 Bits/Channel we will have to flatten the file before saving as Photoshop Elements will not open multilayered files at the higher bit depth - the price to pay for increased tonal quality.
Read the full tutorial -- 16 Bits/Channel Editing in Photoshop Elements
Create A Tilt Shift Effect In Photoshop Elements 10
 Our friend Mark Galer has written a tutorial that shows you how to create a tilt shift effect using Photoshop Elements 10. And remember, if you can do this in Elements, then you can surely do it in Photoshop.
The Tilt Shift effect is a popular technique that originated from the use of 'Tilt Shift' lenses. Architectural photographers use these specialized lenses to correct the converging verticals of the buildings they are photographing, but they can also be used creatively to shift the plane of focus so that areas of the image are thrown dramatically out of focus.
One of the most popular effects is to create a 'toy town' look where figures and cars look more like they have been placed in a model village. This effect can be created easily in post-production and the advantage is the cost saving (tilt shift lenses are extraordinarily expensive) and the fact that the point of focus can be changed at any time when and if you change your mind.
Read the full tutorial, How To Create The Tilt Shift Effect Using Elements 10.
s
Tonal Mapping And Faux HDR Effects In Photoshop Elements 9 - Tutorial
Adapted from "Adobe Photoshop Elements 9.0 Maximum Performance" by Mark Galer and Dr. Abhijit Chattaraj.
In this tutorial Mark Galer demonstrates how to give your photographs a ‘tonal mapping’ or ‘Faux HDR’ treatment to create a signature style. Mark Galer shows you how to boost detail by pushing some adjustments in Photoshop Elements 9 to the max.


The final effect is one where the image seems to be part photograph/part illustration. Read the full tutorial.
Create A Faux Holga Effect In Photoshop
Adapted from "Adobe Photoshop Elements 9.0 Maximum Performance" by Mark Galer and Dr. Abhijit Chattaraj.
The Holga is a cheap (US $30) plastic medium format film camera mass-produced in China. Originally manufactured in the early 80’s for the home consumption, it has now gained cult status amongst bohemian western photographers who are drawn to the grunge ‘art’ aesthetic. The camera represents the antithesis of everything that the modern digital camera manufacturers are striving to achieve. If you are looking for edge-to-edge sharpness and color-fidelity then give the Holga a very wide berth. If, however you are looking to create images that are full of ‘character’, but without the hassle of going back to film, then you may like to look into the wonderful, and weird, world of Holga-style imagery and give this Photoshop workflow a spin (no Holga required).


Getting tired of pin-sharp, noise-free, character-free images from your 24 Megapixel Pro DSLR? Then try this grunge effect to give your images the toy camera aesthetic - think WEIRD – think GRUNGE, think ART! The treatment outlined in this tutorial is also available as an automated Photoshop action that can be downloaded from www.markgaler.com.
Read the full How To Create A Holga Effect In Photoshop Tutorial.
High Dynamic Range - HDR - In Photoshop Elements 8 Tutorial
Adapted from "Adobe Photoshop Elements 8.0 Maximum Performance" by Mark Galer
 Contrary to popular opinion, what you see is not always what you get. You may be able to see the detail in those dark shadows and bright highlights when the sun is shining – but can your image sensor? Contrast in a scene is often a photographer’s worst enemy.
 Contrast is a sneak thief that steals away the detail in the highlights or shadows (sometimes both). Wedding photographers will deal with the problem of contrast by using fill flash to lower the subject contrast; commercial photographers diffuse their own light source or use additional fill lighting and check for missing detail using the Histogram.
Landscape photographers, however, have drawn the short straw when it comes to solving the contrast problem. For the landscape photographer there is no ‘quick fix’. A reflector that can fill the shadows of the Grand Canyon has yet to be made and diffusing the sun’s light is only going to happen if the clouds are prepared to play ball.
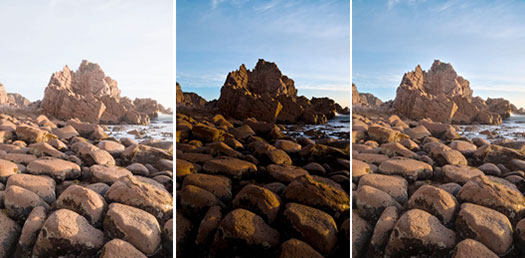
Read the complete tutorial.
High Key Portrait - Mark Galer Photoshop Tutorial - High Key Effect
In this tutorial Mark Galer shows you how to create the classic High Key look, using a combination of simple lighting and some judicious Photoshop techniques.
High Key is one of the classic looks in photographic portraiture. The look is ‘clean’ and ‘light’ and the images have very few midtones or shadows. The darker tones that remain serve to shape the contours and define important details. If the treatment is clumsily done the image will just look like it has been badly overexposed. To avoid this disaster the final image must display bright highlights that are not clipped (overexposed) and the darker details must have depth and weight.

Before and After. Photography by Ed Purnomo
The camera technique is relatively simple – just photograph your sitter using a large soft light or window light. Choose a light background and ask your sitter to wear light-coloured clothing. The rest of the treatment can be created in Photoshop. Unfortunately there is no single adjustment feature or filter that provides the High Key look. A sequence of adjustments and simple masking techniques can, however, deliver the goods every time. The resulting histogram will look like all the levels are making friends with the right-hand wall. Let the show begin.
Read the full tutorial — Create A High Key Portrait Effect In Photoshop
Photoshop Elements 7 Tutorial - Smart Brushes And The Action Player
Here is a sample tutorial from the new book from Mark Galer, Adobe Photoshop Elements 7
Maximum Performance. In this tutorial you will see how to use the new Smart Brushes and the Action Player in Photoshop Elements 7. (Download the tutorial - PDF - 1.8MB) From the intro:

OK, here is a few interesting questions, what does acronym HSL stand for in Adobe image editing software? Would that be Lightness or Luminance? And why do we have an L anyway when Photoshop Elements uses HSB (Hue, Saturation and Brightness) in the Color Picker as its standard RGB color model? Is the L having an identity crisis and do Luminance, Lightness and Brightness sliders all do the same thing? In order to take control over our colors and tones when image editing we have to understand one of the most basic image adjustment features inside of Photoshop Elements - Hue/Saturation. The third slider in the Hue/Saturation dialog is the Lightness slider and this is so useful that even Adobe decided to leave its name off the adjustment feature!
If you try to make a target color lighter or darker using the Lightness slider in the Hue/ Saturation adjustment dialog it is always desaturated the color in the process. In this project we will explore how to adjust the brightness of a color without desaturating it. Adjusting how bright a colors appears without shifting its Hue or Saturation is what Adobe now calls a ‘Luminance’ adjustment.
This, however, can only be made possible in Photoshop Elements 7 with the new Smart Brushes that come shipped with the Maximum Performance DVD and some very clever Maximum Performance know-how. This project concludes with a few automated actions courtesy of the new Action Player in Photoshop Elements 7 and some action presets from the Maximum Performance DVD.
Download the tutorial - PDF - 1.8MB.
Sample Chapter - Working With Photomerge In Photoshop Elements 6
They say that sequels are never as good as the original - try telling that to Adobe. There fully revamped Photomerge now comes in three flavors and is ‘fully fantastic’. You get to explore the greatly improved Photomerge features only in Elements 6 and Photoshop CS3. Photomerge is now capable of aligning and blending images without any signs of struggle - banding in smooth areas of tone. The fully revised Photomerge feature first made its appearance with CS3 but the maths seems to have got even better with the release of
Elements 6 and the stitching is so clever it will really have you amazed at the quality that can be achieved inside this budget program.
The quality will be even better if you capture the component images of your panorama in vertical format (to reduce the effects of converging verticals) with a 50% overlap and you also use a manual exposure, focus and white balance setting on your camera (or process the images identically in camera Raw). The results will now truly be seamless - an excellent way of widening your horizons or turning your humble compact into a 30-megapixel blockbuster.
The Photomerge feature in previous versions of Photoshop Elements (and the full version for that matter) left a lot to be desired. All of the flaws and weaknesses of the original feature are now gone with the release of Elements 6.0.
Read the full sample chapter, Working With Photomerge In Elements 6.
Contrast Tutorial - Working With Adjustment Layers In Elements 6
We've got a new Elements 6 tutorial, Contrast Tutorial - Working With Adjustment Layers In Elements 6. This tutorial is an extract from Adobe Photoshop Elements 6.0 Maximum Performance by Mark Galer. Here's the intro...
Working With Adjustment Layers
One of the most important image adjustment features in a professional photographer’s workflow is Curves (a sort of Levels command on steroids). Color Curves has now made a welcome appearance in the Enhance menu in Photoshop Elements but it is still not available as an adjustment layer. This project shows you several ways to control contrast using adjustment layers to increase your post-production editing power to maximum performance.
Read Contrast Tutorial - Working With Adjustment Layers In Elements 6 by Mark Galer.
Photoshop Elements 7 Tutorial - Smart Brushes And The Action Player
Here is a sample tutorial from the new book from Mark Galer, Adobe Photoshop Elements 7 Maximum Performance (available in December). In this tutorial you will see how to use the new Smart Brushes and the Action Player in Photoshop Elements 7. (Download the tutorial - PDF - 1.8MB)
Digital Basics 101 — The Seven Steps — Tips For Working In Photoshop
 Here are some Frequently Asked Questions from photographers who are new to Photoshop. In response, Mark Galer offers professional tips and advice for Photoshop beginners.
The answers have been arranged in order to follow the typical editing workflow in Photoshop.
Working With Photoshop Preferences
OK, Mark, I figured out how to get the CD into my computer and load the program. But what about the preferences? Yikes, I’m already lost!
The great thing about Photoshop is that it comes ready to use. Don’t get hung up on trying to make decisions about all of those settings until you have been using the software for a couple of months. Nothing is going to get screwed up in the first instance just because you forgot to check the ‘beep when done’ preference.
Working With Photoshop Color Spaces
My friends keep talking about the color space they are using. I just nod my head and pretend I know what they are talking about. What is it and what do you recommend?
Space is about size. Think of color space as a box of colored pencils. sRGB is the small box of colored pencils and Adobe RGB is the medium sized box of colored pencils (not many people have need for the ‘supersize-me’ box of colored pencils called ProPhoto). Small may not sound so great but the computer monitor you are now looking at probably can’t display the extra colors that can be found in the larger box (Adobe RGB). These colors come in to play if you use an inkjet printer or a better quality photographic lab (print service provider).
Photo Optimization Tips
How do I quickly fix an image to look better?
Some people have turned editing images into a science and an art form all rolled into one, but it is possible to get some good results by just hitting a few buttons that have the word ‘Auto’ written on them. Most digital images will benefit from a couple of simple ‘quick fixes’ to optimise the color and contrast. The camera may have done a reasonable job but the chances are that Photoshop will be able to further improve the image (well that’s why you purchased the software right). If you are new to digital image-editing then Photoshop will complete these steps automatically with just a click of the mouse and do a pretty good job pretty much most of the time. Just duplicate the original image first (just in case you make a pig’s ear out of things and want to start again).
How To Crop An Image In Photoshop
How do I crop an image?
Before I tell you how, I should really answer why. With most photographers capturing images in excess of 8-Megapixels you have way more pixels than you need for most ‘normal’ everyday uses. Uploading an 8-megapixel image to an online gallery or eBay is overkill (there are only 2-megapixels on a full HD widescreen TV!). The second reason you should crop an image is ensure that it is the correct shape (there is no use giving somebody an oblong image if their one and only photo frame is square). The third reason you should crop is to improve the composition (which is another way of saying that it is a good idea to get rid of all of the uninteresting or distracting parts of the image that you don’t want people to see). You can enhance or improve the image by just cutting, or cropping, the unwanted parts of the image off. This will make people think you are a much better photographer than you really are!
Image Resolution Tips
What is resolution and which one is right?
The issue of resolution can sometimes get confusing because the same word is often applied to different aspects of photography. Imagine, for a moment, that the word ‘Device’ was the name for a camera, a computer screen and a printer. If you were having a conversation with a friend and were discussing a photographic workflow from capture to print, imagine the confusion that could occur (“which device called device are you now referring to?”). This is what currently happens when some people talk about resolution but don’t have a good understanding of when and how to use the word appropriately or clarify what they are referring to. When you talk about resolution you have to add a second word before or after the word resolution, e.g. optical resolution (of your lens), image resolution (the file), monitor resolution, printer resolution etc.
Tips For Saving Images In Photoshop
Now that I have edited my image I want to save it but there are so many options – which do you recommend?
If you open your original file, change something and then hit the ‘Save’ command in the ‘File’ menu you run the risk of writing over your original file – which is not a good idea. In a year’s time you could be editing like a professional and regret the work you carried out on the image you are working on now. It’s always good to know that the original can be edited again at some point in the future.
All About Monitor Calibration And Printing
My prints look different to the images on my screen – why?
Your monitor is only accurate if you have calibrated it using a monitor calibrator. These are relatively inexpensive devices now and are easy to use. Companies such as Gretag-Macbeth and datacolor make inexpensive units that will enable you to make sure that the colors captured by your camera are displayed accurately on your screen. When you adjust the image colors on a calibrated screen you will be confident that it actually needs adjusting. A good print service provider should now be able to provide you with prints that are very similar to the images that appear on your screen.
Photoshop CS5 & Photoshop CS5 Extended - Best Deals From Adobe
 Adobe Photoshop CS5 delivers breakthrough capabilities to help you create images with impact. Refine your
images with reengineered photography tools for removing noise, adding grain, and creating high dynamic
range (HDR) images. Get precise results when making complex selections. Remove any image element and
see the space fill in almost magically. Paint with naturally textured brushstrokes and realistic color blends. Learn more about Photoshop CS5.
Adobe Photoshop CS5 delivers breakthrough capabilities to help you create images with impact. Refine your
images with reengineered photography tools for removing noise, adding grain, and creating high dynamic
range (HDR) images. Get precise results when making complex selections. Remove any image element and
see the space fill in almost magically. Paint with naturally textured brushstrokes and realistic color blends. Learn more about Photoshop CS5.Adobe Photoshop CS5 Extended software helps you create the ultimate images for print, the web, and video. Enjoy all the state-of-the-art editing, compositing, and painting capabilities in industry-standard Photoshop CS5, and experience fast performance thanks to cross-platform 64-bit support. Also create 3D extrusions for logos, artwork, and motion graphics; edit 3D objects with advanced tools; and create and enhance motion-based content. Learn more about Photoshop CS5 Extended.
Find CS5 upgrade options and Creative Suite 5 deals at the Adobe Store. See CS5 pricing in UK currency at the Adobe UK Store. Visit the Adobe Special Offers page to find the latest deals. Save 80% on Adobe Student Editions. Try before you buy — download a free Photoshop CS5 trial.
 Adobe Creative Suite 5 Design Premium
Adobe Creative Suite 5 Design Premium software gives you fresh new creative tools, along with the ability to deliver ideas faster in print and create interactive content without writing code. Plus Design Premium integrates with Adobe CS Live online services to maximize your design time by streamlining critical nondesign tasks.
Adobe Creative Suite 5 Design Premium combines Adobe InDesign CS5, Photoshop CS5 Extended, Illustrator CS5, Flash CS5 Professional, Dreamweaver CS5, Fireworks CS5, and Acrobat Pro with additional tools and services. Download a free CS5 Design Premium 30 day trial.
Photoshop CS5 Tutorials & CS5 Resources
See our Photoshop CS5 Resource Center for Free Photoshop CS5 Tutorials, and the Free Photoshop CS5 Trial Download. See our Photoshop CS4 Resource Center for Free Photoshop CS4 Tutorials.
Photoshop CS5 Essential Skills - By Mark Galer And Philip Andrews
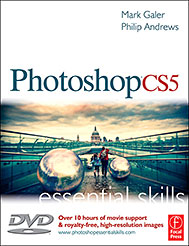 A practical guide to creative image editing, Photoshop CS5: Essential Skills by Mark Galer and Philip Andrews will help you to master the essential features and tools of this awesome software. Broken into three parts to form a structured, self-study guide, the book covers foundation skills and more advanced techniques, with a complete section of step-by-step imaging projects so you can practice your skills and create professional-looking results.
Written by two internationally recognized authors and Adobe Photoshop Ambassadors, this established book and DVD package is fully updated with the latest CS5 features and contains vital information on optimizing photography and digital imaging workflows. Photoshop CS5: Essential Skills includes a DVD with more than 10 hours of movie tutorials and supporting files.
Read 2 free sample chapters:
Refine Edge - Best New Feature in Photoshop CS5 - Tutorial
New To Photoshop CS5 - Merge To HDR Pro - Tutorial
Find more Photoshop CS5 tutorials on our Photoshop CS5 Tutorials Page.
Photoshop CS4 Essential Skills - By Mark Galer And Philip Andrews
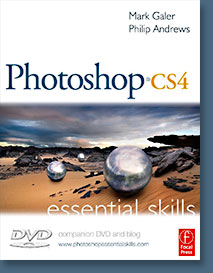 Brimming with beautiful pictures, Photoshop CS4 Essential Skills guides you through a project-based, progressive curriculum so that you can build all the essential skills to enhance photographs creatively and professionally with Photoshop CS4. If you are an aspiring professional or a student learning photography, digital imaging, or design graphics, you'll be amazed at the stunning results you can achieve. A DVD is included free.
The Essential Skills Photography Series from Focal Press uniquely offers a structured learning experience for photographers of all ages, with both the underlying theory and loads of invaluable 'how to' and real-life practice projects - all from the most talented photography practitioners/educators in the world.
Read 2 free sample chapters:
Skin Retouching Tips In Photoshop CS4
Transforming Smart Objects In Photoshop CS4
Find more Photoshop CS4 tutorials on our Photoshop CS4 Tutorials Page.
Read 2 free sample chapters from the Adobe Photoshop CS3 version:
Adjusting Exposure in Adobe Camera Raw CS3
Photoshop CS3 Tutorial High Dynamic Range
Find More Adobe Photoshop Books at Amazon.com
Find all the latest bestselling Photoshop books at discount prices at Amazon.com.
Exclusive 15% Discount On All Topaz Plugins - Use Coupon Code PHOTOSHOPSUPPORT - Includes Bundles And Upgrades
 Enter our exclusive discount coupon code PHOTOSHOPSUPPORT during the checkout process at Topaz Labs for an instant 15% discount on any Topaz product, including bundles and upgrades.
Topaz Labs Photoshop plug-ins are specifically designed to expand a photographer's creative toolbox by harnessing powerful image technology developments. Photographers everywhere are now taking advantage of the creative exposure effects, artistic simplification, unique edge manipulation, and top-of-the-line noise reduction offered in Topaz products. The Topaz Photoshop Plugins Bundle is a super powerful Photoshop plugins package that includes the following Topaz products:
Topaz Adjust
Deliver stunning and dynamic images with this uniquely powerful plug-in that features HDR-like abilities and enhances exposure, color and detail.
 Topaz Detail
A three-level detail adjustment plug-in that specializes in micro-contrast enhancements and sharpening with no artifacts.
Topaz ReMask
The fastest and most effective masking and extraction program with one-click mask refining.
Topaz DeNoise
Highest-quality noise reduction plug-in that removes the most noise and color noise while preserving the most image detail.
Topaz Simplify
Provides creative simplification, art effects, and line accentuation for easy one-of-a-kind art.
Topaz Clean
Take control of the detail depth of your images with extensive smoothing, texture control and edge enhancement tools.
Topaz DeJPEG
Drastically improves the quality of web images and other compressed photos.
Learn more about the Topaz Photoshop Plugins Bundle. Download a free trial version.
Exclusive onOne Software 15% Instant Discount Coupon
 Enter our exclusive discount coupon code - PSSPPT06 - during the checkout process at onOne Software for an instant 15% discount on any onOne product. This includes Genuine Fractals and their amazing Photoshop Plug-In Suite.
OnOne’s new Plug-In Suite solves six of the most frequent problems photographers will encounter in Photoshop. This suite has been granted American Photos Magazine’s Editor’s Choice award for Top Image Editing Software. The Plugin Suite includes:
Genuine Fractals Pro is renowned by both photographers and printers for its finesse at increasing images to more than ten times their original size while maintaining the sharpness and detail you started with. Think of this as the industry standard for image resizing.
Mask Pro is used to remove the tough stuff — such as hair, smoke and glass — while retaining the fine detail. You choose what colors to keep, then paint away what you don’t need.
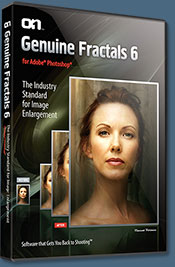 PhotoTools Pro packs hundreds of high-calibre photographic effects into one user-friendly plug-in. It’s fast and easy to use. Gives your photos that pro quality look.
PhotoFrame Pro lets you enhance your pictures with hundreds of such design effects, or simply drop your image into a pre-fab layout in Photoshop, Lightroom or Aperture.
FocalPoint helps to control focus and minimize visual noise. Draw the eye to specific points in your images by using selective focus, depth-of-field and vignette effects.
PhotoTune lets you can compare images side-by-side and easily color correct and enhance them. PhotoTune optimizes the dynamic range, color and sharpness of your image without the need to know all the complicated controls in Photoshop like levels and curves.
Simply enter our exclusive discount coupon code - PSSPPT06 - during the checkout process at onOne Software for an instant 15% discount on any onOne product.
Nik Software 15% Instant Discount - Exclusive 15% Coupon
Enter our exclusive discount coupon code - NIKPSS - during the checkout process at Nik Software for an instant 15% discount on any Nik Software product. This exclusive discount coupon code can be applied to all the latest Nik Software Photoshop plugins, including Silver Efex Pro, Color Efex Pro, Viveza, Sharpener Pro, and Dfine.
Color Efex Pro
 52 photographic filters with over 250 effects for professional quality images.
Completely Original. Completely Indispensable.
52 photographic filters with over 250 effects for professional quality images.
Completely Original. Completely Indispensable.Nik Software Color Efex Pro filters are the leading photographic filters for digital photography. The award-winning Color Efex Pro filters are widely used by many of today's professional photographers around the world to save time and get professional level results. Whether you choose the Complete Edition, Select Edition, or Standard Edition, you’ll get traditional and stylizing filters that offer virtually endless possibilities to enhance and transform images quickly and easily.
Patented U Point technology provides the ultimate control to selectively apply enhancements without the need for any complicated masks, layers or selections. Control color, light and tonality in your images and create unique enhancements with professional results. With 52 filters and over 250 effects found in Color Efex Pro, you can perform high quality retouching, color correction, and endless creative enhancements to your photographs. Download a free Trial version.
Viveza
 The most powerful tool to selectively control color and light in photographic images without the need for complicated selections or layer masks.
Two of the most important factors in creating great photography are color and light. Mastering the art of selectively correcting or enhancing each of these is now possible for every photographer without the need for complicated masks or selections, or expert-level knowledge of Photoshop. Integrating award-winning U Point technology, Viveza is the most powerful and precise tool available to control light and color in photographic images.
U Point powered Color Control Points, placed directly on colors or objects in an image (such as sky, skin, grass, etc.), reveal easy-to-use controls that photographers can use to quickly adjust brightness, contrast or color in a fraction of the time needed by other tools. With Viveza you’ll spend more time shooting photographs and save hours of image editing. Download a free Trial version.
Silver Efex Pro
 Complete power and control to create professional quality black and white images in one convenient tool.
Silver Efex Pro from Nik Software is the most powerful tool for creating professional quality black and white images from your photographs. For the first time, all the advanced power and control required for professional results have been brought together in one convenient tool.
Featuring Nik Software’s patented U Point technology to selectively control the tonality and contrast of the image, Silver Efex Pro includes advanced imaging algorithms to protect against unwanted artifacts, a comprehensive collection of emulated black and white film types, a variable toning selector for adding traditional toning techniques, over 20 one-click preset styles, and a state-of-the-art grain reproduction engine that help produce the highest quality black and white images possible from your color images while providing more freedom to experiment. Download a free Trial version to use Silver Efex Pro.
Enter our exclusive discount coupon code - NIKPSS - during the checkout process at Nik Software for an instant 15% discount. This exclusive discount coupon code can be applied to all the latest Nik Software Photoshop plugins, including Silver Efex Pro, Color Efex Pro, Viveza, Sharpener Pro, and Dfine.
Photoshop Masking Plugin Fluid Mask - Exclusive Instant Discount
 The 4 1/2 out of 5 star review of Fluid Mask at MacWorld begins by saying that this "Photoshop plug-in takes the pain out of extracting backgrounds," and goes on to recommend the latest version, stating that "Fluid Mask is a very effective tool for separating objects from their backgrounds. It offers a variety of useful features for tackling almost any difficult image, from wispy hair to complex foliage. Online video tutorials and live training sessions help ease the learning curve."
Our friends at Vertus, the makers of Fluid Mask Photoshop Plugin, have set up a special exclusive discount for PhotoshopSupport.com. Go to our Fluid Mask page for a special, exclusive discount link.
Fluid Mask is designed for photographers, image editors, graphic designers and all those who take digital image editing seriously. In a streamlined interface and workflow, Fluid Mask instantly shows key edges in the image and provides comprehensive easy to use tools that work with difficult-to-see edges and tricky areas like trees & lattices. Fluid Mask will also preserve all-important edge information for a professional quality cut out. Go to our Fluid Mask page for more info.
lynda.com Online Training Library - View Free Video Clips
 Subscriptions to the lynda.com Online Training Library provide anytime access to tens of thousands of video tutorials covering Photoshop, Illustrator, Dreamweaver, web design, digital imaging, 3D, digital video, animation, and many other topics. View free video clips.
For less than a dollar a day, members have the opportunity to stay current and keep skills sharp, learn innovative and productive techniques, and gain confidence and marketability - all at their own pace. Premium subscriptions include instructors’ exercise files so that members can follow along with the exact examples onscreen. Customers learn at their own pace and may stop, rewind, and replay segments as often as necessary. View some free video clips (high resolution).
Did You Know You Could Create An Entire Website In Photoshop?
SiteGrinder Photoshop Plugin - Create Websites Instantly
 There often seems to be a strict division of labor within the world of web design and development. Creative professionals tend to stick to the Photoshop domain, while those well-versed in scripting are left to the task of implementing their work. Indeed, the two realms are quite different from each other, to which any of us even vaguely familiar with either can easily attest.
Essentially, Photoshop is a no-holds-barred design studio, offering the artist a seemingly endless array of creative options. On the other hand, HTML, CSS, Java and the like follow strict rules of engagement, requiring the developer to take any number of esoteric concerns into consideration in order to ensure that designs are properly displayed on the web.
Turn Photoshop Into A Complete Web Design Tool
SiteGrinder seeks to bridge this gap between design and development. Basically, SiteGrinder turns Photoshop into an easy-to-use and fully functional web design tool. With SiteGrinder, designers will now have the freedom to totally let their creativity loose and then, without skipping a beat, transfer their designs to the web. Bringing esthetic concerns together with more practical considerations, SiteGrinder is an amazingly powerful tool that would make a fantastic addition to any web designer's bag of tricks. Mac OS X and Windows versions of the SiteGrinder unlockable demo are available now via download.


