Sunday, March 11, 2012
DIY Pin Cushion Flowers

Wednesday, April 6, 2011
Party Highlights
 Some plastic eggs, a little bit of twine, some spray paint and a frame make a pretty cute Easter decoration. See these hanging twine eggs at Momma Did It.
 My love affair with carrots continues! These burlap carrots from Frou Frou Britches are so adorable! (There are a few more in today's party I'm loving too!)
  Make a simple, fun spring flower picture by yourself or with your kids with the help from Occasionally Crafty. My kids could definitely do this!
  Calico and Cupcakes created this beautiful dahlia flower pin! Gorgeous. She links you to the tutorial from which she was inspired.
  This specimen art made from jelly beans and peeps is adorable for Easter. I'm loving the blue bunny with his ears chomped off! Head over to Choose To Thrive to see how she made it!
Tuesday, March 1, 2011
Pearl Bow Pin/Accessory!
 This pearl bow pin is gorgeous! You should see it on a shirt over at Of Pinks and Fairytales! It totally dresses up a plain black shirt (or anything, really!) Stunning!
Monday, October 25, 2010
Petal Pillow and Felt Flowers!

See the felt flower tutorial.
See what it looks like in fall colors on a belt! Beautiful!
This post sponsored by The Speckled Dog

Thursday, October 7, 2010
Trading Pins and Lanyard

Once you have pins, you also must have a way to display them. Disney sells lanyards with pins and without. Without pins, a lanyard will run you about $8. I figured we could make one for cheaper than that. I was right. Of course ours are different but I still like them and they are Little Monkey approved! I went to Joann's with a 40% off coupon and bought two yards of Mickey Mouse Belting. There were other options including Finding Nemo, Winnie the Pooh and other Mickey ones. I decided that the Mickey heads would be the best to go with for now. The belting is normally $6.99 a yard. I ended up making two lanyards from two yards of belting. They are not the same length. One is longer, more for an adult and the other is shorter, the one that Little Monkey is wearing in the picture. We will keep some of the pins on the longer one for now and let him use the shorter one for going to Disney.
I am excited for Little Monkey to go to Disney and get to trade pins with the employees. So far he has picked out a few that he does not want to trade. (Buzz, Mr Potato Head with a Goofy Hat and the Monorails) Interesting choices, but hey, whatever he wants! I hope he likes trading the pins to get ones that he would like. I have a feeling Toy Story pins will be at the top of the list. They should be abundant now too with the new movie coming out. I think he will probably also want some Cars, Finding Nemo and Monster's Inc ones.
Thanks What A World
for making us more aware of pin trading and for how to find them inexpensively!!!!

Sunday, August 29, 2010
Guest Blogger - Cluck, Cluck, Sew - Scrappy Flower Pillow/Brooch

Here is The Double Hourglass Quilt the EASY Way.
If you like skirts, you will love this Drawstring Jersey Skirt !
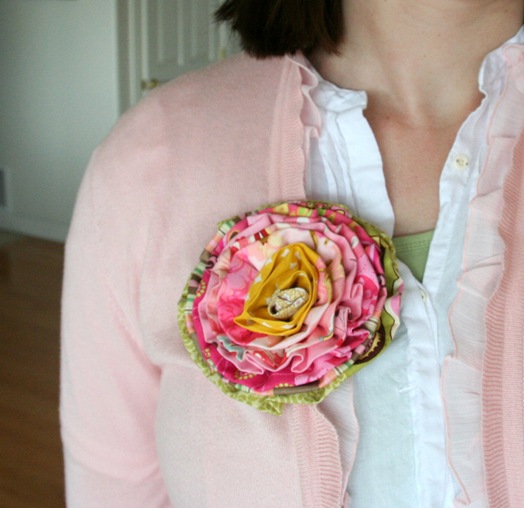
Today, we are going to make this cute flower that is easy to make and uses up any leftover binding strips or jelly roll scraps (for all you sewers out there!). Mine is attached to my bag as you can see, and it looks so cute that I almost forget my bag is full of diapers and crumbled goldfish crackers. Now on the tutorial…
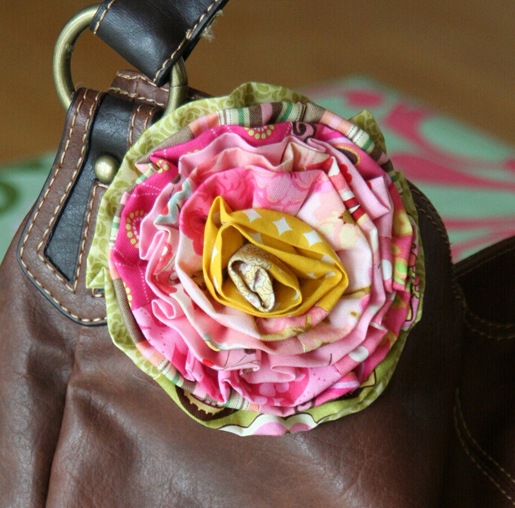
First you’ll need:
- 2.5” wide scraps of fabric in whatever colors your heart desires cut to various lengths. Mine were 3" long to 14" long. For fabric I used my leftover binding strips. My strips added up in length to about 2 yards, which made me a 5" flower. Add or take away strips or cut them shorter if you want a bigger or smaller flower. Shorter strips and more of them will make a more colorful flower.
- A sewing machine and a needle and thread.
-A piece of felt or other strong fabric, a hot glue gun, and a broach bracket.
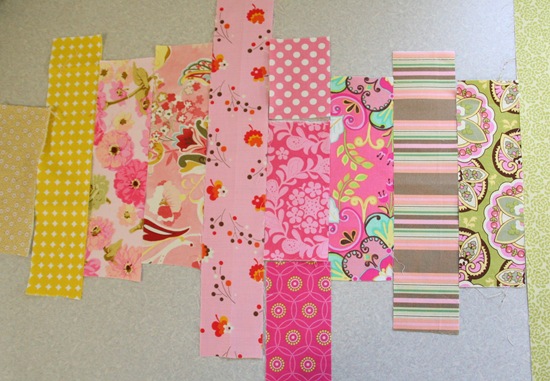
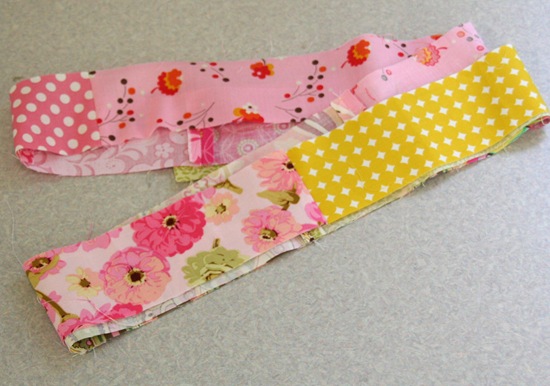
Here are my various 2.5" wide strips. Put them in order from the color you want in the center of the flower, to the outside of the flower. Now sew them all together end to end, and press seams open.
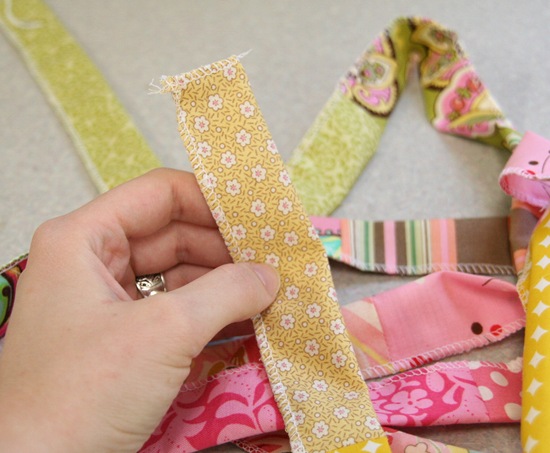
Now folding your strip in half as you go, serge OR sew a zig zag stitch down the raw edges. Do the same on the ends.
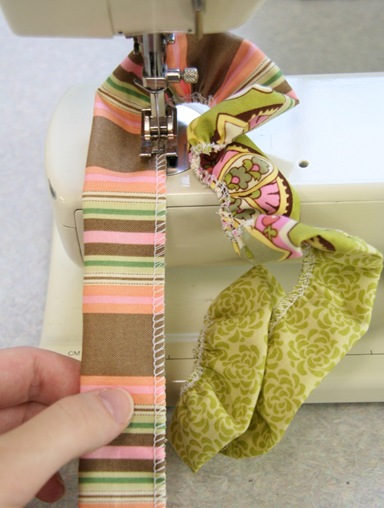
With your sewing machine….increase the stitch length as high as it will go (a 4 on my machine) and increase the thread tension as high as it will go. Now sew down your strip again right along your sewn/serged edge. The strip should gather as you go. If it is gathering TOO much, lower the stitch length (see picture below for how much mine gathered)
**** I tried this gathering method on a computerized machine first and it would NOT work. When I switched to the older, manual machine it worked like a charm. So if this method isn’t working on your machine…you can either gather it by hand by folding and scrunching the sewn edge as you sew over it, or use a gathering foot. Because the strip is so long it won’t work to sew down it with a large stitch length and pull the bottom thread.
This is what it should look like after its sewn:
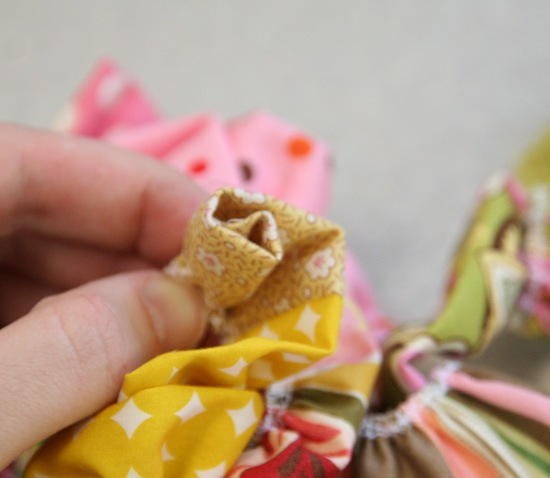
Starting with the end you want as the center of the flower, fold the raw edge down and make the center of the flower by folding the strip around it. Sew in place either by hand or machine with a few stitches.
Continue to wrap the sewn/serged edges around the center, securing the edges to the center with your needle and thread. I put the needle and thread all the way through the center for the first few layers.
As you continue adding the layers the center will have a tendency to stick out, but try to keep the sewn edges lined up and flat. Also as you add more and more layers, you can secure the layers to the previous layers with a stitch every half inch or so. If you secure the layers loosely to the previous layer, you’ll get a better result.
This takes a little bit of practice, but I’m also quite possibly the worst hand sewer ever, so chances are you’ll do it perfectly the first time.
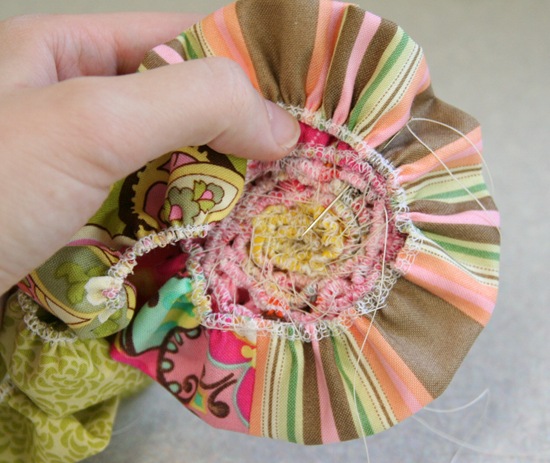
When you get to the end, or the flower is as big as you want it, cut off the end and tuck the end to the back. Secure it with a stitch and knot your thread off.
Make sure your flower is just right and poke the center down a little if its sticking up too much to make the back flat.
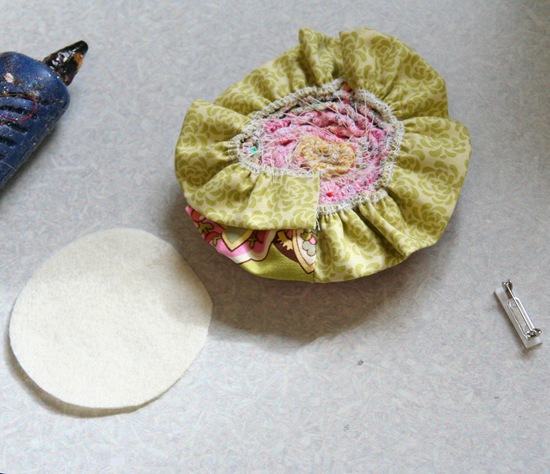
Cut a circle out of your felt, just big enough to cover all of the sewn / serged edges.
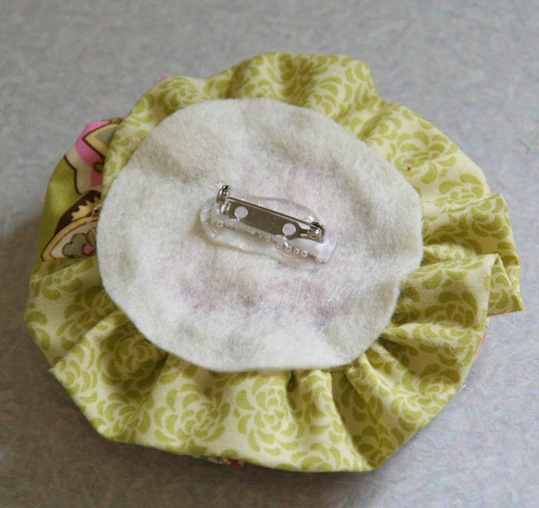
With your hot glue gun, cover the backside of your flower with glue, then press the felt onto the back.
Then hot glue your broach bracket to the felt. (think I used enough hot glue??? I’m paranoid)
And there you have it, your cute scrappy flower you can attach to just about anything.
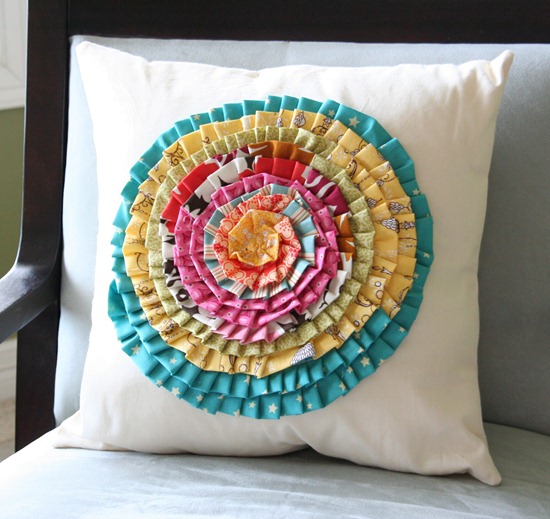
To make the cute pillow below, make an extra long strip (about 7 ft. long…you can cut the length off if its too long) and sew it onto the pillow, pleating it as you go instead of gathering the strip on your machine.
You can find more sewing, quilting and home projects over at my blog, Cluck. Cluck. Sew. Thanks Michelle for letting me visit your blog today! -Allison
Allison, Thanks for that tutorial. I love the pillow!!!! Cluck, Cluck, Sew is a great blog for those who love to sew and quilt. Beautiful pictures. Detailed tutorials. Amazing projects. I highly recommend this blog. Visit Cluck, Cluck, Sew and become a follower!
Linking to: Funky Junk - Saturday Nite Special, Tatertots and Jello - Weekend Round-up, Under The Table And Dreaming., Show and Tell - Be Different, Act Normal

Saturday, August 21, 2010
Book Paper Flowers
 While this flower made from book papers is meant to be an ornament at Dreaming Under The Table, I am seeing many different possibilities for it! A hair bow, brooch, adornment, etc. Even though paper not hold up the best, I think it could work. (Or some company should just print old book pages on material)!
 Friday, March 19, 2010
Square Zipper Flower
 If you are into the zipper craze currently, you really should try a square zipper flower! These would look great with a headband, brooch, bracelet or shoe! Try this out! Visit Craftaholics Anonymous to read more about it. Go HERE.
The T-Shirt Categorically Crafting Show is still going on. Add a project or view the ones that are posted HERE.

Monday, March 8, 2010
Shabby Shamrock
 Wear a shabby shamrock for St. Patty's Day! This would darling on a headband, on a pin attached to a shirt or bag or on a clip. Go HERE.
 If you want to make an accessory that is more versatile, just make it round. That way you can wear it all year. Thanks for Ramblings From the Sunshine State for joining this to the St. Patrick's Categorically Crafting Show. Go HERE to see the show or to add a project.
Saturday, February 27, 2010
Zipper Headbands
 The Queen of Zippers, Craftaholics Anonymous, has come up with a new use for zippers - a zipper headband. Oh so cute, and goes great with all her zipper adornments. I love her zipper daisies and her zipper shoes. Check all of them out!
Friday, February 5, 2010
Four More Valentines' Projects
 Use lots of little flowers and straight pins to create this fun heart decoration for Valentine's Day. Using this idea, you could make many other decorations for other holidays. See Punkin Patterns for the how-to. Go HERE.
Help your kids make an adorable alligator Valentines box for their classroom with Crafting In Carolina. It is a vlog! (I couldn't copy a picture.) Lots of other fun stamping and paper crafting ideas found on this site. GO HERE.


Fill a wire basket with roses and flowers to accent a table or Valentine vignette. See more at Brambleberry Cottage. She also is hosting 14 days of Valentine's so link up your Valentine's projects at her site. Go HERE.

Sunday, January 31, 2010
More Random Ideas!
 These sock monsters are hilarious! What little kid wouldn't love a bunch of these? Learn about there quirky personality traits and how to make them by visiting That's So Cuegly and following the links! Go HERE.
 What a fun gift for a baby shower!!! A bassinet made from diapers. I saw this idea on Designing and Motherhood. There's not a tutorial, so you will have to figure out how to make it! There are a few other baby shower gift ideas HERE.
  Pop rocks have to be one of my favorite treats to watch little kids eat! I just love their expressions (especially the first time they try it). So this pop rock Valentine is perfect! See it HERE at Casa Camacho.
 Wouldn't flowers like this look cute in your daughter's hair or as a brooch? I think so! See how to make them at CrafteNVy. Go HERE.
 Make a light saber or sword with a noodle and some PVC pipe. Perfect for any boy (or girl, if they are like my daughter). See the tutorial on Dude, I Made It. Go HERE.
 This is another idea I would have done when I was younger. I LOVE the dressing up as a nerd idea!!!! So funny! Find a few more personalized Valentine ideas at the Sadleir's. Go HERE.


