Sunday, October 31, 2010

Halloween Wrap-up: Part 2, Kids Rooms

On the first Day of October, the kids come home to a bedroom fit for a Ghoul or Goblin. I did basically the same thing this year as last year... so a couple of the photos are not the most fabulous, but they work... right?

Halloween Trees:

My crafty girlfriends and I saw these darling trees in Ben Franklin last year, and decided to give it a go for our own houses. I decided to put one in each of my kids rooms. They were SUPER EASY to make. We even came up with a few ornaments of our own.

This tree is in my daughter's room:


This is the tree in my son's room:


The ornaments were made using glass ornaments, and filling them with paint (glow-in-the-dark for the mummy) beads, or puff balls, and then embellishing them however we chose.


I also hang Banners:


Halloween blankets:

So, when I saw this fabric, I knew I HAD to OWN it! So cute - right? I had been wanting to make warm snugly Halloween blankets for my kids for a long time, and this fabric gave me the perfect excuse. They have LOVED snuggling up in their Halloween blankets all month, and were asking about them starting in September.

This is my son's:


This is my daughter's:


They are backed with minky, and oh so SOFT!


I even like to use them if I am watching tv.

This year, I added to the decor, using an idea I found on lil' luna.
Here is the link to the tutorial.

Halloween Paper Centerpiece:

I decided to use monster paper I got at Roberts.
(Again... something I saw, and had to figure out a use for!)
I used foam from the dollar store, and boxes from the dollar store. I sprayed both black. I used BBQ skewers. I probably should have painted them as well, but I got impatient.

Here is my daughter's:


Here is my Son's:


I do other things, like replace the light bulbs in their lamps with black bulbs, just to trick them :) It worked, and they liked it!

Have a Happy and Creative Day!

Risa


Halloween Wrap-up: Part 1, The FOOD!

Here is a look at some of the Halloween food my kids see during the month of October. I missed photographing a few things, and a couple things are from last year.

I have a group of girlfriends that got together every week this month, and made a cupcake and appetizer for our families.

Here are a couple of the cupcakes:


Skeletons - Thanks Christine!


Monsters - Thanks Candy!

Fondant - Me.

Brittney did dirt cups, but I forgot to photograph them. They were darling though!

Appetizers:


Spiders - Thanks Candy!


English Muffin Mummies - Me.

Here are a few pics from last year:


Appetizer plate.


Hot dog mummies.


Spaghetti Squash Owls


Pear Witch


Potato Ghost


Meatball eyeball.

Frank cups

Celery Ghouls

Calzone (sp?) Ghost
Haunted House

Haunted House

Can you see why I am excited to move on to November? I am exhausted!

Have a Happy and Creative Day!

Risa

Trick-or-Treat night & My Porch

I live it Utah, and yes... we trick-or-treat here on Saturday night if Halloween falls on a Sunday. Last night was trick-or-treat night here. It was soaking wet, but the kids still had fun!

This is how the entry part of my porch looked all month:

The witch legs were from Ben Franklin. They were $5.99 each. I inserted wire hangers in them, and put them upside down in my pots. I also filled each pot with gourds.


I used the same wreath I had in the spring. I just removed the blossoms and replaced them with a cut up candy corn garland from Taipan. I swapped out the ribbon, and hung a skeleton in place of our "B" monogram.


Part one of the trick-or-treat night transformation.
The Jack-O-Lanterns!


Part two, moving some of the inside stuff out...

Imagine, "Oggie Boggie," from, Nightmare Before Christmas on repeat blasting on the porch.

Did I mention it poured??? I opened the door to
cute little soaking wet trick-or-treaters all night.

Whew... it's over, and I have to admit... I am EXCITED to take down all the Halloween decor. I have already started. I can't wait for Thanksgiving, and setting up Christmas in four weeks!

What would I ever do without holidays???

K, I have to be realistic... the baby is coming in just over two months... I am just hoping I can have enough energy to have everything look just the way I want it to look, and be able to put it up and take it down when I want to. Wish me luck!

Have a Happy and Creative Day!

Risa

Thursday, October 28, 2010

Bun In The Oven...

Any ladies out there feel like it is SUPER HARD to find a Halloween costume when you are expecting? I do, so I decided to make my own. My husband and I were supposed to go to an adult's only Halloween party last Sat night, but I was sick :( so we didn't get to go. If we would have gone, I was going to wear this, and have him wear an apron and baker's hat with some clever wording about being a, "bun maker," on the front of the apron. I did get to wear the costume for a girls only party though.


Ya, I am the big one... in the middle!

What you will need:

1) White Polyester Felt
2) Gray felt if you can find it. I had to use fleece.
3) Light Blue, Tan, Black and Brown felt. (tip!!! I prefer stiff felt. It is SUPER easy to work with!)
4) Alene's tacky glue
5) Coordinating Thread

Getting Started:

1) FRONT AND BACK Cut out your white felt in the size you choose. I made mine WAY too big. I guess I feel/think I am bigger than I am? I cut out a yard for the front and then cut it in half along the fold line, and used the other piece for the back.
2) SIDES I used half of the measurement from above, and the same length.
3) TOP Use the same width as the sides, and width as top.
4) DETAILS Use the patterns below.


5) Tape the details onto the felt. This really helps in cutting.


6) Lay out the shapes and get them where you want them. Glue the objects in place.


Tip: Cut the gray oven door whatever size you want in proportion to the size you decide to do your white. Also, I just cut out a strip of black to go under the bun. I forgot to include it in the patterns, as I didn't make a pattern for it out of paper first.


7) Optional: Applique around the edges of the details. I feel this really gives the project a finished look.
8) Attach (sew) the top to the front and back. Attach the top of the sides to the top. Attach the sides of the sides to the front and back.
9) Cut out neck opening, and decide where you want the arm opening to be and cut them out as well. I didn't finish these, as they won't fray.
10) Cut a piece of cardboard out the size of the top. Trace the neck opening, and cut it out as well. Insert cardboard.


11) Embrace your BIG ROUND BABY BELLY!

Have a Happy and Creative Day!

Risa

Saturday, October 23, 2010

Halloween Greeting Card

I am a huge fan of greeting cards for Christmas, but I love sending them for random, unexpected occasions. A couple years ago, we sent out a Halloween greeting card, and when my husband asked me the other day if we were going to do it again this year, I thought... "Why not?"

The kids were in costume for a church party yesterday, so I got out the camera and snapped a few pics. I used Picasa (free editing program) to add the words and special effects.

I sent the cards to Costco, and it will only cost me about $2.50 plus stamps to send these spooky little greetings out. (I don't send nearly as many for small holidays as I do for Christmas.) I like sending them in clear envelopes, which I get from Xpedx.


A little about the costumes... Spider Girl was purchased at DI for $4. The glasses were from Wal-mart for $4. For Con-Bot, we used some boxes I got at a case lot sale a few weeks ago. I did the spray painting, and let my boy cut out shapes to attach to the front. The dryer vent for the arms and legs was from Home Depo and cost $10. My husband zip-tied the head body and arms together. My daughter liked his costume so much, that next year she wants to be a pink robot!

Here is the one from a few years ago.
Simple, but unexpected and fun!

It's not too late! You can do this today. The grandparents (or other loved ones) will love having a photo of their grandchildren in costume on their fridge for the next week!

Have a Happy and Creative Day!

Risa

Monday, October 18, 2010

Halloween PARTY Invitations!!!

If you are looking to host a Halloween party, and need invitations, you can get them at The Paper Doll Shoppe, this darling etsy shop I found. I contacted the seller to ask a few questions, and she told me she was offering the complete package for free! You can message her in her etsy store and ask if it is still available. I was planning on spending around $20 for the invitation and other printable, and about $15 for printing. She saved me $20! How nice is she!?! Her name is Kelli. If you message her, tell her I sent you :) I just thought I would pass along this spooktacular deal.

Look how DARLING!

(I don't know why the images are being cut off :( Sorry!
You can click to see the whole thing.)


Party invitation

Party circles

Halloween labels

Party sign

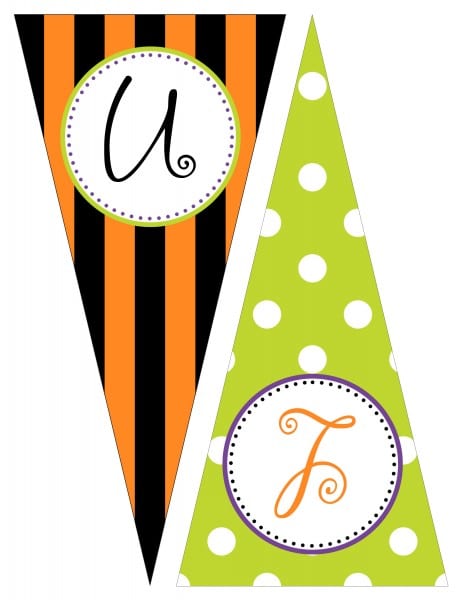
“Spooktacular” banner

“Spooktacular” banner

“Spooktacular” banner

“Spooktacular” banner

“Spooktacular” banner

“Spooktacular” banner


Nice people make me HAPPY! Thanks again Kelli!
You made my day :)
Have a Happy and Creative Day!

Risa

Related Posts Plugin for WordPress, Blogger...