Pages

Showing posts with label Tutorial. Show all posts

Monday, May 31, 2010

Tutorial: How to make your own doilies using corner punches


Happy Memorial day everyone, hope you had a safe, fun weekend!

I want to share a little tutorial with you all today. While browsing various blogs lately, I've seen a couple of crafters using small doilies from Martha Stewart in their paper projects. There was even a post about it on Splitcoast Stampers, and apparently they're hard to find in stores. Well, not too long ago I was experimenting with some new corner punches and had a lightbulb moment. Was it possible to make my own doilies with these corner punches? I set out to try. Sure enough, I had some success! I've only experimented with a few different kinds of punches, and some worked better than others. For example, this Layered Arch worked really well, while the Modern Garland wasn't the best looking in my opinion. The Quilted Corner worked really nicely, as well. 
Also, the size of the circle is really important too. For the Layered Arches, I used the Nestabilities small circle #1 and it worked out almost perfectly. I found that I could use the small circles with more success than the large. 
Here are a few pics that will illustrate how it's done. You can click on them to make them larger. 

Although the punches have these slide out tabs for easy alignment of corners, you can still slide your paper circle right over them without taking them apart like other corner punches. 
When lining the circle up along the edge of the circle, try to make sure the punch design is centered evenly. Be careful not to have it angled to the right or the left, instead, aim the center of the design towards the center of the circle. 

Each time you punch around the circle, make sure to line up the left side of the punch as close as you can to the previously punched design without actually overlapping. It takes some time, but I think the results are worth it! If you are careful, you will end up with a doily like the one pictured above, with small bit of paper still attached. Some corner punches don't come totally perfect, but it's close enough for government work, LOL! It's easy enough to snip these scraps off with small scissors, or a craft knife. 
That's it! Your own doily to coordinate with the edge punches! And you don't have to search high and low for the precut ones, because you can make different sizes on your own. 

So here's a finished card with one of the doilies:

        
Pretty, isn't it? Now dig out your corner punches and give it a try!

Thanks for stopping by!

Stamps: Stampavie
Ink: Memento
Paper: Heavenly White, Cosmo Cricket, Bazzill, PTI
Accessories: PTI twill ribbon, seam binding, Nestabilities, Martha Stewart punches, colored pencils, OMS

Tuesday, November 18, 2008

A Few Questions Answered..


WARNING: This post is long, and may bore you to tears, LOL!

I just want to take a minute to thank everyone who has left such wonderful comments. I can't express how good it makes me feel, and keeps me motivated to do what I love to do! You don't know how many times I have thought to myself, how futile all the time and effort I put into this hobby is! Sometimes I scold myself for taking the time instead of doing something 'productive'. But the way I look at it is like this. Life is not always much fun. It's working hard, taking care of children, doing all of the things that we need to do on a day to day basis. Cleaning, making dinner, doing laundry, driving a gazillion miles to get all the kids where they need to be. So, when I have a few hours in between all of these things, I sit down, I create, I paint, I listen to my audio book and let all things just be for a few moments. It calms and centers me, allows my brain to take a break from worrying how am I going to pay for my car insurance, or buy Christmas presents this year. It allows me to take pleasure in what would otherwise be a very dreary life. If I didn't have something creative to do, I would be in a mental institution by now, LOL! SO, because I take this time for me, I am happier and healthier. Because I am happier and healthier, I can be a better mother, a better spouse, employee, etc. etc.

Anyway, I have been asked how I made the card in my previous post without a stamp? Well, it's actually quite simple. When I used to paint with acrylics on all sorts of surfaces, wood, plaster, tin, paper mache, whatever, I would have a pattern of the design I wanted to paint. (This card was made using one of the free patterns from Plum Purdy, you can download the ZIP file here) You will get a few B & W line drawings. I re size them to the size I want on my computer, then print it out. I cut out the pattern to fit on the surface I want to transfer it to, in this case a small square of watercolor paper, and use transfer paper to trace the pattern. In my case, I didn't have transfer paper, I just used a soft pencil to trace the lines on the back of the pattern. This way I can just put it onto the w/c paper right side up, and use a stylus to trace the lines again. Once I have my image transferred, I can go over the lines with a permanent fine line pen like Sakura Micron or ZIG. I use a brown .05MM Micron. I erase the stray pencil lines, and start water coloring like any stamped image. Yes, it's more work, takes longer, and isn't as perfect as a rubber stamped image, but I like it. It also gives me an almost unlimited choice of images because there are thousands of painting pattern books out there by a lot of wonderful artists! I have a very particular style that I love, folk art, primitive, rustic, whatever you want to call it, and there aren't a lot of stamps out there like that! So, this is my solution. It works for me!

Wednesday, April 30, 2008

First Official Post and a Quick Tutorial. My version of a Post it Note Keychain.

  Ok, so I finally gave in and decided to start a blog. Why, you may ask? Well, I can't stick to a written journal, but I like the idea of documenting my creative process. Some day, in the future when I've moved on to another type of craft, I may want to go back and look at what I've done in the past. I'm not sure I'll keep up with the blog, but I'm going to try.
    I tried to make one of those adorable post it note keychains that I saw on someone else's blog, and just didn't like how it came out for me. I played around with it and came up with my own version. I think they came out pretty dang cute!
    You're going to need the following supplies:
    Double sided DP (or you can glue two of your fave DP's together)
    Glue
    Ruler
    X-acto knife
    Scoring tool (I use a bent knitting needle)
    About 2" Ribbon
    Eyelets or brads
    1/32" thick disc Neo magnets---I got mine here .
    1" ring clip or keychain embellishments stamps
    ink

Measure a piece of cardstock or DP as shown in the pic and score on vertical lines. Cut out.

Ink edges.
                                        

Using a hole punch, punch two holes about 1/4" in from the edge on the spine of the cover.

Fold a 2" piece of ribbon in half and punch a hole 1/2" from the edge. Insert an eyelet through the paper and the ribbon, and set.
                                             

These are the little magnets.
                                                 

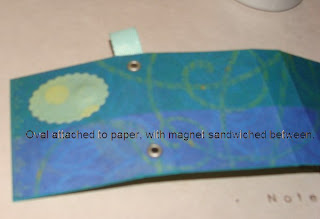
I used the smallest scalloped oval nestabilities to cut out two ovals from contrasting paper.


I stamped 'Notes' on one of the ovals, but left the other one blank. Using a little glue to hold the magnets in place, I attached the ovals/magnets to the front cover and the inside cover.


Use a repositionable glue on the back of the Post it Note book. Let it dry then attach it to the inside of the cover.

Attach a 1" ring clip (from an office supply store) or a key ring to the ribbon.

That's it! These are pretty easy, and they are so cute. Have fun making tons of them!

Simple Alphabet Stamp by Papertry Ink
Aqua Mist Twill ribbon by Papertrey Ink
Pallete ink
Nestabilities by Spellbinders
'Mira' collection paper by K & Co.
Ring clips from Staples