When I have time to scrap for "me", one of the first things I do is pick a certain collection or line of paper that I want to work with, and then go scope out that manufacturer's blog for challenges. Not only do I find some inspiration, I usually end up putting a dent in my stash, too! The other great thing is that many of them give away prizes and give you recognition like pinning your project to their boards. It is also fun to see what others have done for the challenge as well.
Some of my favorite blogs that have recurring challenges are: My Mind's Eye, Lily Bee, and Crate Paper, to name a few. (And YES, I have done a challenge for each of these blogs this month!)
I worked with this month's sketch from the Lily Bee blog and a mix of their latest "Pinwheel" and "Sweet Shoppe" collections.
I don't usually work with photos this large (or if I do, there is usually only one of them) so I kept my page fairly simple.
I stuck closely to the design of the sketch, except I changed it to two larger photos (although you can see behind the photos I still stitched the four squares. I even dug into my stash and found some older Lily Bee products to use on my page, too (the journaling card and the chipboard buttons).
So next time you want to slash some of your stash, pick a collection, and head over to the manufacturer's blog to get some ideas and find a challenge or two!
Thanks for stopping by today!
-Audrey Yeager
Showing posts with label audrey. Show all posts
Showing posts with label audrey. Show all posts
Thursday, May 30, 2013
Tuesday, December 11, 2012
A Paper Tree Tutorial
One of my favorite projects I recently did for GCD Studios was a simple little Christmas tree, and I'm going to share with you how I did it! You can view it and lots of other inspiration HERE in the latest edition or the GCD Studios Magazine "The Paper Cut".
1. Cut two circles of each size, starting with 7" as the largest, and going down to 1.5", in half inch increments. This will give you 12 different sized circles for your tree.
2. With wrong sides together, stitch around the circle, but leave about a 1.5" opening. Fill each circle with Poly Fill batting. (To give some weight to the base of your tree, you could fill the largest base circle with some dried rice or beans.)
3. Once all the circles have been stuffed, stitch the openings closed.
4. At this point, you can stack your circles. There are different ways to do this. You could run a string through all of the circles right up the center, starting at the bottom, and then leave some threads at the top so that you can hang your tree. You could also use a wooden bamboo skewer or dowel and pierce through the holes to provide some more stability. Or you could do what I did and just use glue dots to attach one circle to the next.
I have been doing a lot of Christmas decor this year on my blog, here are a few sneaks at some of the other projects I've done. Just click on the link to see more!
Thanks for stopping by today!
Friday, July 6, 2012
Stencils and Stamps
Hello! Audrey here to share my latest obsession. Lately I have been stalking Julie Balzer's blog. I love what she does with stencils! She just released coordinating stencil and stamp kits. I started simple and got myself this stencil and stamp:
stamp:
**Designer projects are not always linked in our posts, but you can always find their blogs in our sidebar or in the staff tab**
stamp:
stencil:
(I bought them from BlueMoon Scrapbooking where they have TONS of stencils and stamps!)
I have been playing around with them, but one of the easiest ways I found to use this was just to take a thin black pen and trace some of the circles in the stencil.
The simple outlines add just a little more interest to the page, and the way I arranged them helps your eye move up the page from the lower left to the top right corner.
I LOVE LOVE this Basic Grey PB&J collection!!!! I used some die cuts that came with the line and a few of the chipboard pieces (the navy bars at the top and bottom of the page, which I machine stitched over). I cut the chevron paper to make little banners and splattered some navy ink as well! (Page designed based on a sketch from Kristine Davidson).
And here is another page I did using a few of the stamps. You can see on the bottom right of the photo where I layered a stamp and a stencil (which I inked to make the yellow star). I really need to play with them more to feel more free when using them!
Thanks for stopping by today!!! You can see more fun layouts on my BLOG!
**Designer projects are not always linked in our posts, but you can always find their blogs in our sidebar or in the staff tab**
Monday, June 4, 2012
1O Things You Can Do With: Eyelets
Last week we tackled the dreaded loose glitter and this week we are back with another supply that many of us struggle to use: eyelets! Our designers have got some fabulous ideas today on how to use some of those eyelets up, imagine how surprised everyone will be when they see you using this oft neglected supply!
1. Create bubbles for a fish.
Practical Scrapper Kerri used her eyelets to create the bubbles leading to her sentiment on her fishbowl card. Don't just think fish though...you could do bath bubbles, outside bubbles...think of the fun!
2. Use them to bind and create handles on your mini albums.
You cannot see them, but Practical Scrapper Kerri used eyelets and wire to create the handle on this mini album. She then dressed up the handle with some tulle and ribbon to disguise the wire.
4. Make wheel rims and wheels for your vehicles.
Practical Scrapper Erin dresses up the trucks on this card using products from Momenta with eyelets and brads.
5. Use eyelets to make a corset or other item to lace
Practical Scrapper Jayma uses them to tie a corset on a Bridal Shower card.
6. Use them to decorate the center of circles or flowers.
Practical Scrapper Audrey added dimension to her layout using brads and eyelets on flat circles..

7. Arrange them in a pattern to create a small grid, thread some twine and use them as a photo corner or accent.
We can't show you the whole layout here because it's being used by a manufacturer later but Practical Scrapper Audrey. gave us a sneak preview of another neat way she used eyelets!
8. Add eyelets to the top of tags
Practical Scrapper Christine created her own tags and then added eyelets to them before tying bows around them and using the tags as an anchor for her title.
9. Use eyelets in the corners of a rectangle to create a frame.
Practical Scrapper Christine used green eyelets in the corners of her brown rectangle. She then threaded white embroidery floss thru those to create a unique border.
1O. Use them to create a swirl or trail
Practical Scrapper Alumni Jenny Titus created her ladybug trail with black eyelets, especially standing out on the green paper.
3. Use them to anchor embellishments.
Practical Scrapper Mary Pat uses them to randomly place embellishments on a page.4. Make wheel rims and wheels for your vehicles.
Practical Scrapper Erin dresses up the trucks on this card using products from Momenta with eyelets and brads.
5. Use eyelets to make a corset or other item to lace
Practical Scrapper Jayma uses them to tie a corset on a Bridal Shower card.
6. Use them to decorate the center of circles or flowers.
Practical Scrapper Audrey added dimension to her layout using brads and eyelets on flat circles..

7. Arrange them in a pattern to create a small grid, thread some twine and use them as a photo corner or accent.
We can't show you the whole layout here because it's being used by a manufacturer later but Practical Scrapper Audrey. gave us a sneak preview of another neat way she used eyelets!
8. Add eyelets to the top of tags
Practical Scrapper Christine created her own tags and then added eyelets to them before tying bows around them and using the tags as an anchor for her title.
9. Use eyelets in the corners of a rectangle to create a frame.
Practical Scrapper Christine used green eyelets in the corners of her brown rectangle. She then threaded white embroidery floss thru those to create a unique border.
1O. Use them to create a swirl or trail
Practical Scrapper Alumni Jenny Titus created her ladybug trail with black eyelets, especially standing out on the green paper.
**Designer projects are not always linked in our posts, but you can always find their blogs in our sidebar or in the staff tab**
Friday, April 20, 2012
Painting Techniques for your projects...
Hello everyone! Audrey here to share some ideas on different painting techniques to use on your pages and projects. I have been thinking about different ways to use paints on my pages because I love the way they add a bit of a "messy" element to my pages. I have been working with the Crate Paper Storyteller line, and I just LOVE it!
I created the chevron pattern on my page based on a quilt pattern. I simply cut 1.5" squares and cut some on the diagonals to form the individual squares. Then I glued them into the chevron pattern.
Now, for the painting techniques, I did a few things that I have never tried before on my pages. The light blue paint is actually applied with a wad of saran wrap. I just wadded it up, dabbed it in paint, and then dabbed it on my page. And the little black circles you ask??? Well I have these two techniques, plus EIGHT others on my blog today. I have put together a tutorial with TEN DIFFERENT ways to use paint on your pages!!
The page above has two of my favorite techniques, but I hope you will stop by my blog and check out the others! Thanks for stopping by Practical Scrappers!!!
Thursday, January 19, 2012
Trendy Technique: Machine Stitching
Get ready to be inspired to dust off all those sewing machines! I know it's been awhile since mine has been pulled out of the closet for scrapbooking (probably a year plus -- the last time we featured stitching on here). But what I love most about machine stitching is that 1.) it doesn't have to be perfect, 2.) it says handmade like nothing else and 3.) it's timeless. No matter how the trends may change, machine stitching is here to stay as long as some scrapbooker still owns a sewing machine. If you remember our scrapbooking styles feature we did almost a year now, you'll remember us talking about seeing machine stitching in the Sophisticated and Shabby Chic styles. From looking at these layouts and cards from our designers and readers you can see exactly how they fit to those categories. There is that air of handmade; timeless essence; and if you look real close you'll even see it's not always perfect...take a look!
Pin It **Designer projects are not always linked in our posts, but you can always find their blogs in our sidebar or in the staff tab**
Baby, I love you
Stop and Smell the Flowers with You
Who's ready to thread that needle and push that foot pedal full throttle? If you have a layout or card that you did and you'd love for us to take a look at, leave us a link in the comment section.
Remember: We only have today and Friday to feature our contestants in the running for our layout contest. Please be sure to stop by and vote for your favorites. Saturday we will be announcing the top 25!
Sunday, December 11, 2011
Little Yellow Bicycle Christmas Projects
Our designer Audrey was chosen to do some designing for Little Yellow Bicycle. I was so "wowed" by what she did I asked her if we could share some of them here! She worked with the "Wonder & Wishes" line.
A fantastically talented designer combined with a fabulous Christmas line...awesome combination isn't it!?! Thanks for sharing with us Audrey!
Pin It **Designer projects are not always linked in our posts, but you can always find their blogs in our sidebar or in the staff tab**
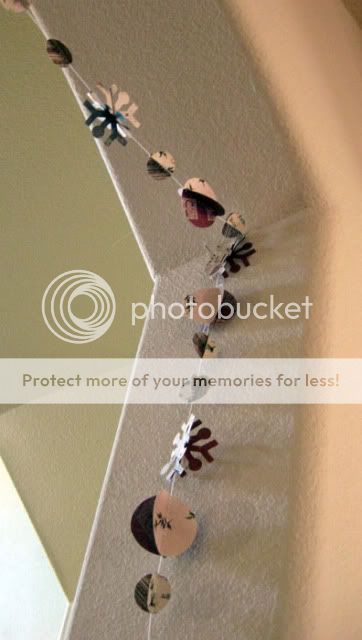
Paper Garland by Audrey
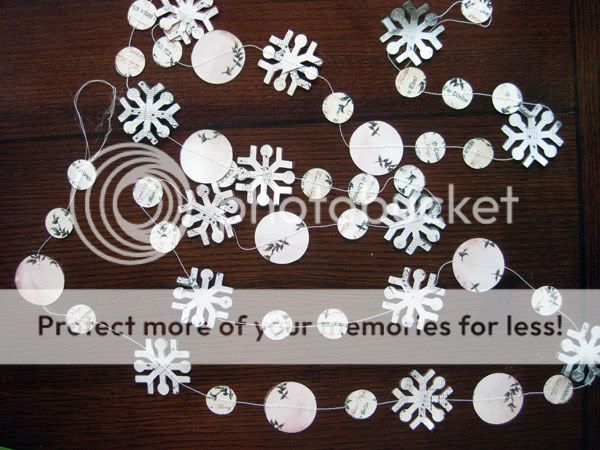
Hello everyone! I have a simple garland for you to make today which you make with your die cutting machine or just some punches and a sewing machine!
I first saw this tutorial by Ronda Pallizzari about a year ago-
http://rondapalazzari.typepad.com/helpmeronda/2010/11/ferris-bueller-youre-my-hero.html
She gives some great instructions and details on her blog.
I did the same thing, except I used different sized circles and some snowflakes. I cut everything out on my Cricut and it went really fast!!! My snowflakes are 2 1/2", and the circles are 1.75" and 1".
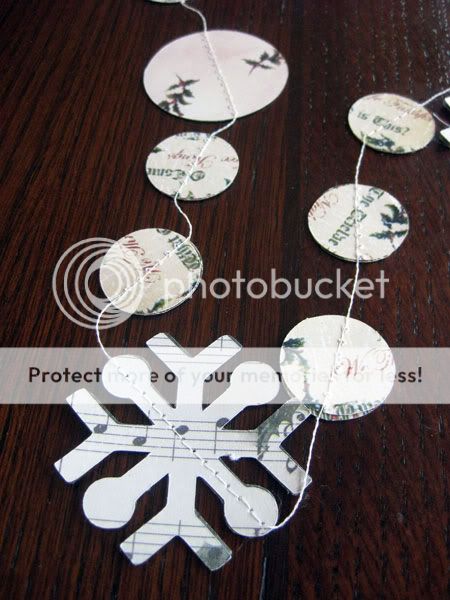
When putting your shapes together, make sure like patterns are touching on the inside if you are going to match your patterns. But you could also just have your patterns all mixed up, too.
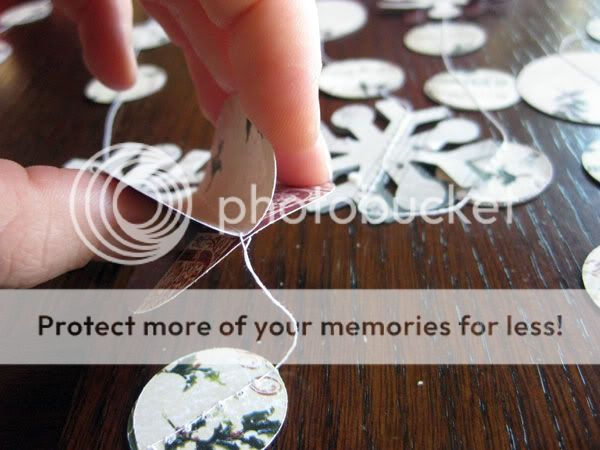
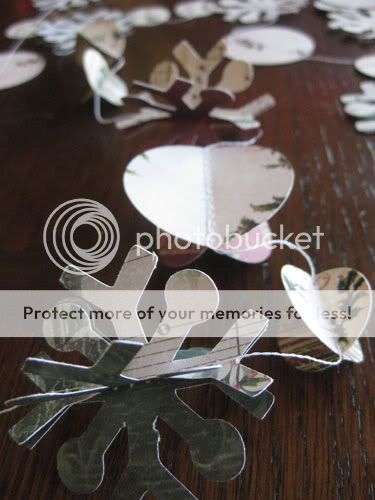
These garlands are SOOOO pretty when strung up! They would probably even look nice on a tree!
Pin It **Designer projects are not always linked in our posts, but you can always find their blogs in our sidebar or in the staff tab**

I first saw this tutorial by Ronda Pallizzari about a year ago-
http://rondapalazzari.typepad.com/helpmeronda/2010/11/ferris-bueller-youre-my-hero.html
She gives some great instructions and details on her blog.
I did the same thing, except I used different sized circles and some snowflakes. I cut everything out on my Cricut and it went really fast!!! My snowflakes are 2 1/2", and the circles are 1.75" and 1".

When putting your shapes together, make sure like patterns are touching on the inside if you are going to match your patterns. But you could also just have your patterns all mixed up, too.


These garlands are SOOOO pretty when strung up! They would probably even look nice on a tree!

Pin It **Designer projects are not always linked in our posts, but you can always find their blogs in our sidebar or in the staff tab**
Subscribe to:
Posts (Atom)


