Posts tonen met het label Terry. Alle posts tonen

maandag 24 juni 2019

POLKADOODLES UNIQUE STAMPING AND PAPERCRAFTS, TUTORIAL WITH LOTS OF STAMPS AND STENCILS IN MY ART JOURNAL XXX

Hey there, it is my turn, Terry, to give you some inspiration with the Stampsoup stamps, stencils and Flowerstamps from Polkadoodles....

Here I go...

What I did was, having loads of fun making 2 art journal pages, 


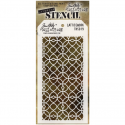
I started out with 2 art journal pages and worked with different colors of distress ink, magical powders and water, I sprayed the papers untill I was happy with it. I played with the butterfly stencil and colored the butterflies with distress ink....not to bright and not too much ink, but just enough....


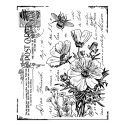
I then stamped some flowers in random order onto my art journal page and colored it with distress inks and acrylic paints. I used yellow, orange, gesso and the red color. 


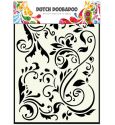
I took the dutch doobadoo stencil out and I was drawing the branches and leaves. 


Then I thought I would use my polychromos pencils and the leaves and branches myself how much fun is that. And I took the Graph'It white marker and placed some lines in the centre of the flowers


A black pen was used to place some lines aswell. 
At first I did not know what to place on the 2nd page but it did not take me long to decide to stamp the flowers overthere aswell. So the same ritual took place and I colored the flowers with distress inks and with acrylic paints. I must say that I am happier with the flowers on the right side. I think they turned out better then my first page. lol.....but oh well it is oke, cause it is in my art journal and you can play along in that and make whatever you want....that's the fun of working in an art journal 


So I took the Hello Friend stampset out and stamped the leaves from the Heart Sing Clear Stamp Set on top of the art journal page after that the Regal Peacock stampset and played with some flowers, Then I colored lots of different butterflies from different kind of Clear Stamp Sets and colored them with different colors so they would pop out of the pages....I think I did make them pop....


So after I stamped my flowers I played a bit further with the black pen and the white Graph'It marker, you keep on adding on to the pages when you are playing in it. It is so much fun, you really should try it. 


I added a stamp from the Honey Daisy stampset after I finished my background, I thought the honey combe stamp would make it look even better....


So this is page 1 with loads of colorfull flowers, flowers on top, butterflies and some sentiments that I stamped from the Heart Sing Stamp Set and I placed some lines all around the sentiments with a black pen. So much fun......


So this is Page number 2 and this one also has lots of flowers, nice vibrant ones, flowers on top and some butterflies colored with distress inks, polychromos pencils and some hearts from the Making Faces Clear Stamp Set, for this project it was all about how many stamps can I use to create 2 Art Journal Pages, I think I succeede my mission lol.....


And there ya go, my project that I made for your inspiration is finished, I can tell you I had such fun to figure out what stamps, colors etc. I would use and where to place them. It was a fun puzzle for me and I enjoyed myself a lot. I sure hope that I have given you lots of inspiration and hope that it will give you some Ideas HOW to work in your Art Journal.....let's get creative guys......

HAVE FUN XXX

The products that I have worked with are:
Belle Papillon A5 large Clear Stamp Set
Belle Papillon clearstamp set

Graph'It Shake WHITE pen duo
Graph'It Shake White Pen

Hello Friend A5 clear Stamp set. Stunning A5 sized Clear Polymer Stamp set - 16 stamps. Made in the UK

Hello Friend A5 Clear stamp set 
   
Every wish in the World clear stamp set
Every Wish in the World Clear stamp set
Brighter with You clear stamp set

Stamp Soup - Regal Peacock Large A5 Stamp Set
Regal Peacock clearstamp set
Timeless Butterflies creative craft stencil
        
Pretty Butterfly creative craft stencil
Stamp Soup - Lavender Tea Polymer Stamp Collection
Stamp Soup Lavender Tea
Honey Daisy Clear Stamp Set
Making Faces stamp set -  57 clear Polymer stamps
Making Faces stamp set

Heart Sing A5 clear Stamp set. Stunning A5 sized Clear Polymer Stamp set - 17 stamps. Made in the UK
Heart Sing A5 Clear Stamp Set


HUGS TERRY XXXX

dinsdag 26 april 2016

HOBBY ACTIEF NOTITIEBOEKJE....HOBBY ACTIEF A NOTEBOOK.....WITH STAMP FROM CRAFTY INDIVIDUALS

Hallo ladies speciaal voor jullie even iets leuks gemaakt.....tenminste ik vindt hem goed gelukt hoor.....

For the English ladies......Hey there Ladies, I made something nice for you at least I think it worked out pretty good....

Voor het blog van HobbyActief uiteraard, met leuke artikelen van Hobbyactief

For the blog of Hobbyactief offcourse with all kinds of fabulous products from HobbyActief....


En dat is dus dit.....
Wat heb ik gemaakt en notitieboekje....met de leuke stempel van Crafty Individuals....ik vindt ze echt TE GEK zeg.....en je kunt ze voor zoveel projectjes gebruiken....
Dit keer heb ik gekozen voor de Floral Postcard 

And that is this.....
What did I make....a Notebook....with the wonderfull stampset from Crafty Individuals...I think they are really FABULOUS...and you can use them for so many different projects....
This time I chose the Floral Postcard

Ik ben begonnen met de achtergrond te maken door middel van Gesso...eerst een basislaag aan te brengen...daarna heb ik Modeleerpasta gebruikt om samen met de Dutch Doobadoo Swirl stencil een aantal swirls aan te brengen....daarboven op heb ik wat crackle gebruikt en de achtergrond is ingekleurd met Pearlescent PanPastels.....dit keer de rose kleur......

So I started out with making the background....I used Gesso for a base layer.....after that I worked with the Modelling Paste together with the Dutch Doobadoo Swirl Stencil to create a few swirls on the background. On Top some crackle and I colored the background with Pearlescent PanPastels....this time the pink colour.
Ik heb de stempel ietsjes ingekort in de breedte aangezien hij anders niet op de voorkant van het Notitieboekje zou passen.....normaliter is hij dus ietsjes breder.....Ik heb de bloemen ingekleurd met potloden die ik nog in de kast had liggen

I have stamped the image on my paper and cut a bit off from the paper otherwise it would not fit the Notebook's front....so normally it is a bit wider, but you will see when you check out the Webshop.....I have colored the flowers and the little honeybee with pencils that were waiting for me in my closet to be used...
En als laatste heb ik nog een touw gespannen over het boekje om een beetje vintage gevoel te geven...
Last but not least I used a piece of rope to give it some more vintage feel.....

Mochten jullie bij de HobbyActief Winkel een kijkje willen nemen dan klik je gewoon op de onderstaande plaatjes van de producten en dan kun je nog veel meer moois zien bij HobbyActief.....

Veel Plezier en dank jullie wel voor het bezoekje aan het blog van HobbyActief....
Have fun and thank you for your visit on the blog of HobbyActief......


Een aantal producten die ik voor het notitieboekje heb gebruikt van HobbyActief
Some of the products that I have used for the Notebook are from HobbyActief


I would like to join into the following challenges:

zondag 7 juni 2015

WE LOVE TO CREATE CHALLENGE #12, ANYTHING CREATIVE/MIXED MEDIA GOES, AND A GIVEAWAY......

Hey there crafters, It is Sunday today, anddddd 
Today there WE HAVE a brand new challenge over at the 


Our generous sponsor is Premium Art Brands and wow she has a fabulous prize for one winner 

As a new twist on Love to Create Challenges, the DT thought it would be nice to share our pan pastels love with you all, so for this challenge each DT member is giving away their project; a postcard. The DT are taking this opportunity to say thank you for following both the challenges and us, so have created this RAK (random act of kindness) giveaway. One lucky commentator will receive my postcard at the end of this challenge (Sunday 28th June) so that gives you 2 weeks to enter both the challenge and also comment on my blog. The winner of my postcard will be both announced on the Love to Create challenge blog and here on my own blog.


Remember to be in with a chance to win my postcard, leave me a comment on this post and I will pick a random winner on Saturday 27th June with the winner being announced the following day. Don't forget to visit the other DT because if you do not win my postcard, you might win one of their fabulous postcards instead. And I am offering some stampbord too for the lucky winner......

Oke here we go....
The theme for the challenge is

ANYTHING CREATIVE/MIXED MEDIA GOES
 This is what I have made

I had fun making a Postcard 

I made a postcard with a background of Roses, colored with the Metallic Panpastels, covered with White Coarse Pearlescent Pans.

 On top a small postcard covered with Butterflies which I colored with the Metallic PanPastels. And last but not least I have stamped some images and sentiments. 
So if you wanna join into the fun, you even have a chance on winning a Postcard AND some Stampbord......
Thanks so much for visiting today, don't forget to leave a comment if you'd like to win my postcard and some stampbord!!


I would like to join into the following challenges
Simply Papercraft Challenge, Anything Goes, Challenge #6
The Artistic Stamper, Summer is on its way


zaterdag 11 april 2015

STENCILS.......HOBBYACTIEF BLOG

Hallo bloggers, hier even een berichtje van mij, Terry en wat je kunt doen met de mooie Tim Holtz stencils die te koop zijn bij Hobbyactief....

And for the English visitors....
Hey there bloggers, here is a little message from me, Terry, and what you can do with the nice stencils from Tim Holtz. You can purchase them at Hobbyactief.


Allereerst welkom bij het Hobbyactief Blog, wat leuk dat je even een kijkje komt nemen. Ik hoop dat ik jullie wat inspiratie kan geven wat je kunt doen met een stencil van Tim Holtz,  Dit keer heb ik gekozen voor de Latticework Layering Stencil.

First of all welcome at the Hobbyactief Blog, so nice of you to drop by and take a peek. I sure hope I can give you some inspiration what you can do with a stencil from Tim Holtz. This time I have chosen the Latticework Layering Stencil.


Voor deze lijst heb ik allereerst de lijst geverfd met Gesso, witte verf en daarover heen een laagje Weathered Wood Distress inkt van Tim Holtz en lichtblauwe PanPastel. 

For this photoframe I painted it with Gesso and White Paint and on top of that I worked with Weathered Wood Distress ink from Tim Holtz and Lightblue PanPastel. 

Toen de eerste laag droog was ben ik verder gegaan met de stencil. Voor de mensen die nog nooit een stencil gebruikt hebben, je legt de stencil op het stuk wat je wilt bewerken en daarover heen smeer je als het ware de Modeleer pasta of Modelling Paste totdat je een afdruk van de stencil in het papier hebt gemaakt. Voorzichtig de stencil eraf halen en laten drogen of je kunt gebruik maken van je Heattool.

When the first layer was dry I started with the Stencil. For the people who have never used a stencil before, you lay down the stencil on the piece of paper you want to work on. On top of the stencil you put the Modelling Paste and brush it over the stencil untill you have the print you want. After your done you take of the stencil from the paper carefully and you let it dry, you can even used your heattool to be even faster with it. 

Dit is het resultaat van het bewerken met een stencil. Je kunt er erg leuke resultaten mee bereiken. 
De tekst is geprint en op maat gemaakt voor het lijst. Om een vintage look ermee te krijgen heb ik het papier met water ingespoten, daar gaat het een beetje van rimpelen, gedroogd met de heattool en daarover heen distress inkt gedept en als laatste laag Matte Gel Medium....


This is the result from working with a stencil....You can acchieve fabulous results with a stencil. The sentiments are printed and placed inside the frame. To get a vintage look I sprayed water on the paper and that gives you a wrinkly look, I dried it with the heattool and on top I dabbed some distress ink. And for the last layer I used Matte Gel Medium.....


De rechterkant van de lijst heeft aan passepartout zodat je een foto erin kunt doen. En is aan de onderkant bewerkt met een paar radertjes van Dutch Doobadoo en de pennibs van Tim Holtz......

The right side of the frame has a passepartout so you can put a picture in it. The bottom is decorated with the Kraftpaper Art Gears and a pennib from Tim Holtz.


Ik hoop dat ik jullie een beetje inspiratie heb kunnen geven en veel plezier.
I sure hope I have given you guys some inspiration and have fun 
Dank jullie wel voor jullie bezoekje en veel plezier met freubelen.....
Thanks so much for your visit and have fun crafting.....

Een aantal producten die ik heb gebruikt zijn:


I would like to enter the following challenges:

Artbymiran Challenge, Challenge #29, Anything Goes
Creative Fingers, Anything Goes
Dragons Lair Design, Challenge #Add an animal