Hallo bloggers, hier even een berichtje van mij, Terry en wat je kunt doen met de mooie Tim Holtz stencils die te koop zijn bij Hobbyactief....
And for the English visitors....
Hey there bloggers, here is a little message from me, Terry, and what you can do with the nice stencils from Tim Holtz. You can purchase them at Hobbyactief.

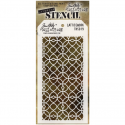
Allereerst welkom bij het Hobbyactief Blog, wat leuk dat je even een kijkje komt nemen. Ik hoop dat ik jullie wat inspiratie kan geven wat je kunt doen met een stencil van Tim Holtz, Dit keer heb ik gekozen voor de Latticework Layering Stencil.
First of all welcome at the Hobbyactief Blog, so nice of you to drop by and take a peek. I sure hope I can give you some inspiration what you can do with a stencil from Tim Holtz. This time I have chosen the Latticework Layering Stencil.

Voor deze lijst heb ik allereerst de lijst geverfd met Gesso, witte verf en daarover heen een laagje Weathered Wood Distress inkt van Tim Holtz en lichtblauwe PanPastel.
For this photoframe I painted it with Gesso and White Paint and on top of that I worked with Weathered Wood Distress ink from Tim Holtz and Lightblue PanPastel.
Toen de eerste laag droog was ben ik verder gegaan met de stencil. Voor de mensen die nog nooit een stencil gebruikt hebben, je legt de stencil op het stuk wat je wilt bewerken en daarover heen smeer je als het ware de Modeleer pasta of Modelling Paste totdat je een afdruk van de stencil in het papier hebt gemaakt. Voorzichtig de stencil eraf halen en laten drogen of je kunt gebruik maken van je Heattool.
When the first layer was dry I started with the Stencil. For the people who have never used a stencil before, you lay down the stencil on the piece of paper you want to work on. On top of the stencil you put the Modelling Paste and brush it over the stencil untill you have the print you want. After your done you take of the stencil from the paper carefully and you let it dry, you can even used your heattool to be even faster with it.

Dit is het resultaat van het bewerken met een stencil. Je kunt er erg leuke resultaten mee bereiken.
De tekst is geprint en op maat gemaakt voor het lijst. Om een vintage look ermee te krijgen heb ik het papier met water ingespoten, daar gaat het een beetje van rimpelen, gedroogd met de heattool en daarover heen distress inkt gedept en als laatste laag Matte Gel Medium....
This is the result from working with a stencil....You can acchieve fabulous results with a stencil. The sentiments are printed and placed inside the frame. To get a vintage look I sprayed water on the paper and that gives you a wrinkly look, I dried it with the heattool and on top I dabbed some distress ink. And for the last layer I used Matte Gel Medium.....

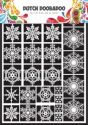
De rechterkant van de lijst heeft aan passepartout zodat je een foto erin kunt doen. En is aan de onderkant bewerkt met een paar radertjes van Dutch Doobadoo en de pennibs van Tim Holtz......
The right side of the frame has a passepartout so you can put a picture in it. The bottom is decorated with the Kraftpaper Art Gears and a pennib from Tim Holtz.
Ik hoop dat ik jullie een beetje inspiratie heb kunnen geven en veel plezier.
I sure hope I have given you guys some inspiration and have fun
Dank jullie wel voor jullie bezoekje en veel plezier met freubelen.....
Thanks so much for your visit and have fun crafting.....
Een aantal producten die ik heb gebruikt zijn:
 |  |  |  |  |

I would like to enter the following challenges:
Artbymiran Challenge, Challenge #29, Anything Goes
Creative Fingers, Anything Goes
Dragons Lair Design, Challenge #Add an animal