Chapter 5 - Deep Freeze
You appear now on a narrow ledge leading toward the familiar face that taunted you in previous chapters. Start forward and you'll notice that the giant head is flanked by two Jade Turrets. You can deflect their shots easily enough to eliminate them, and the face only fires a laser beam that is easily avoided. The main issue is that periodically, you may be frozen temporarily in place by icy gusts. Just shake free and keep moving.


Above Left: The giant head fires lasers you can easily avoid and the Jade Turrets pitch in with projectiles. Above Right: Hack apart the pillars with melee attacks. Doing so while airborne works best.
When you reach the base of the wall where the face is mounted, smash the wall with standard melee attacks and then pass through the opening that appears. A cutscene follows as your progress is automatically saved. Then you can start forward again.
In the next chamber, Ymir taunts you from behind another of the large heads. A number of giants appear in the area, along with weaker enemies. Your goal here is to smash four large columns apart so that Ymir has to fight you. Head to one corner of the room and start hacking away at the column. You will have the most luck if you whack its base a time or two, then leap into the air and mash the melee attack button. You can deal several blows while airborne and it makes you a harder target for your enemies to hit. Repeat the process several times to ruin the first pillar, then do the same to the other three pillars. Ymir will enter the arena as his cohorts disappear.
Ymir (Round 1) Boss Battle
The first thing you need to do is get a feel for Ymir's attacks. He'll start the battle by tossing a series of around four icy balls at you. These you should carefully reflect. They inflict mild damage if they strike Ymir, which is all that you're interested in doing at the moment. Once those attacks conclude, Ymir will circle for a brief while and then is likely to slam down against the floor. You want to watch him so that when he's about to land with such a blow, you can leap into the air to avoid taking damage from any resulting shockwaves.


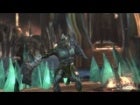
Above Left: Ymir is huge and motivated. Above Right: Climb onto Ymir's chest and hit him with a heart attack.
Circle around, avoiding Ymir's melee attacks by remaining at a safe distance. Deflect any projectiles and watch for Ymir to grow weak enough that a point appears on the ground indicating that you can grapple. Quickly move forward and take advantage of that window of opportunity. You may be frozen along the way, so be prepared to break free and continue forward. When you get the chance to grapple, quickly climb up onto Ymir's chest and then strike the exposed weak point that you find there. Then you'll fall to the floor and the whole dance must be repeated.
Once you deal enough damage (three strikes to the heart will do it), a scene follows and the battle concludes.
You're now standing in an underground chamber. Prepare yourself, then head forward toward the red light beneath the door. You'll initiate a second round of the battle with Ymir.
Ymir (Round 2) Boss Battle
Now Ymir is even more powerful than he was during the previous round. He has a few new moves. His projectiles seem more lethal and he also fires icy beams from his eyes that seek you out as they waver back and forth, crossing in 'X' formation on occasion. Your best bet to avoid the beams is actually to move in close, almost to the place where Ymir himself is positioned. Get in close and hold up your shield. He'll decide not to use his beams almost immediately after initiating them, if you're close enough.


Above Left: Keep at a distance to most easily avoid the icy beams. Above Right: You can jump around his body if you like, but Ymir's main weakness is still his chest.
After he fires his beams, Ymir will stick his fists into the ground and produce a field of icy shards or a cloud of mist. Get in close and watch for a grappling point, then leap up toward his chest. Though it's possible to climb around on him, you run the least risk if you immediately punch his chest again.
Once you have damaged Ymir enough (two punches to the chest should be enough), he will retreat and leave behind some energy that will slightly refill your life meter. Quickly rush over to the side of the area and start trying to open the door. As you hold the button, red energy will start to wash over the nearby wall. Then Ymir will reappear with his life refilled. Repeat the entire process outlined above, spreading red over the wall a little bit more with each successive attempt, until finally you win. It will likely take three rounds or possibly four, depending on how quick you are and the game's difficulty setting.
When you win the battle, a scene follows and then you can head through a circular green portal that appears. On the other side of that portal, turn around and find a Valknut floating in some debris. Then head forward along the passage toward some doors. You can save your progress ahead of them if you like. Hold the button indicated to open the double doors. Pass through them to arrive at the next chapter.
Grand Theft Auto IV: The Ballad of Gay Tony Cheats
Grand Theft Auto: Episodes from Liberty City Cheats
The Elder Scrolls V: Skyrim Cheats
Saints Row: The Third Cheats
Grand Theft Auto IV: The Lost and Damned Cheats
Red Dead Redemption Cheats
Call of Duty: Black Ops Cheats
Assassin's Creed III Cheats
Minecraft (Xbox 360 Edition) Cheats
Call of Duty: Black Ops II Cheats
NDS
Professor Layton and the Last Specter
X360
Forza Motorsport 4
Wii
Rune Factory: Tides of Destiny
NDS
Harvest Moon: The Tale of Two Towns
PS3
Dark Souls
PC
Dark Souls (Prepare to Die Edition)
X360
Warhammer 40,000: Space Marine
Web
War Commander
PS3
Ultimate Marvel Vs. Capcom 3
X360
Trials Evolution
|
Thor: God of Thunder at IGN
Thor: God of Thunder Guide at IGN
Thor: God of Thunder at GameSpy
Thor: God of Thunder at TeamXbox
Thor: God of Thunder at GameStats
|