Showing posts with label Tutorial. Show all posts

Wednesday 7 March 2012

Tutorial Wednesday


It's my turn to share with you a tutorial for Catch The Bug's Tutorial Wednesday!!!
I've decided to show you my quick and easy method for a rocker card. I love circular cards but I hate it when they have a straight edge at the fold.


Firstly, find a circle nestability which fits your envelope.


Cut a piece of plain cardstock and your backing colour.


Fold the plain one in half.


Use a strong glue/tape to attach the base colour to the rocker. I like to use a glue gel so that I can manouver it a bit.


And there we have it - nice and easy and adds a bit of fun too when you see the card rocking back and forth.

I'm going to enter this card into the Make It Monday challenge for this week.

Wednesday 28 September 2011

Tee-Pee Tutorial


I've shared a few Tee-pee cards before and have often been asked for more details. So I have decided to show a tutorial on how I go about it for my tutorial Wednesday as part of the Bugaboo team over at Catch The Bug.
 
 
So, you will need:
3 pieces of cardstock (5 and a half inches by 5 and a half, black in this pic)
3 pieces of cardstock (5 inches by 5 inches, the orange pieces)
3 pieces of designer paper (4 and a half by four and a half)
Double sided tape
Score board or ruler and scoring tool


Fold the 3 largest pieces in half diagonally


Cut both of the smaller pieces of card in half diagonally.
Take one of the pieces and cut it into quarters as shown.


Attach to the base pieces as shown.


Turn the base pieces over. Nestle one of the squares into another as shown above. Score a light line for reference to show where it ends.


Attach tape as shown making sure you do not cross over the score line.


Repeat the process with the third piece until you have the above shape.


When you turn it over, it should look like this.


Cut the designer paper in half diagonally.


Attach to the card base.


Attach a small piece of velcro as shown above.


And close the card. It should look like this! Now all you need to do is decorate it as you wish. In the pic I shared at the start, I stamped a PTI sentiment and attached a JJ image which I cut with nestabilities.

Hope you find the tutorial interesting. Hopefully it is interesting enough to maybe make you have a go at creating one. Thanks for looking and let me know if you have a go at it as I love to see how others interpret it.

Wednesday 20 April 2011

Bugaboo Tutorial Time

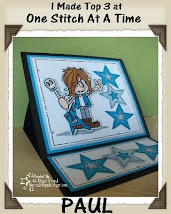
Welcome to my Wednesday Tutorial. Each Wednesday, the Bugaboo DT share tutorials over at the Catch The Bug Challenge Blog and today is my turn. I was playing about with a strip of card. I always cut up a 12 by 12 piece to craete my card blanks - 4" wide. Makes scoring and mats and layers easy to measure.  Anyway, was playing with my scoreboard and a spare piece and came up with this. It's not a new concept but a bit different to what I've seen.


I love the Stella and Gus digis and I know a lot of you do too. They come with the BEST sentiments ever. Make sure you head on over to the BUGABOO SHOP to see the entire collection - there's loads o amazing images there - fantastic characters (Stella, Gus, Dottie, JJ), cute animals, storybook characters, floral designs - you name, Bugaboo has it

And a side view of the card. As you can see, it's free standing and pretty sturdy. It will also fold flat to go into an envelope.


So what will you need to make one? Here's the list:
4" by 12" piece of cardstock
Scoreboard (not essential as it only involves 3 easy score lines)
Double Sided Tape
A Nestability which is 4" wide or slightly larger
(you could just cut out a rectangle of card though)
Cardstock the size of the Nestie
Items for decoration
Ink which is in this pic is optional


Score the cardstock at 5", 6" and 7" (such easy measurement). If you want to create a square version, score at 4, 6, 8.


Fold as shown:


Next, cut out your nestability shape or cut a rectangle from the cardstockk. I've embossed it and inked it before taking it out of the nesties do add some definition and interest.


Fold it in half.


Attach it to the top of the cardstock as shown. The light green card will act as an insert. It measures 4.5" by 3.5". The sentiment says:
We're one of those retired couples that never argue...

because neither of us can hear what the other is saying


Decorate the front (the green panel is the same size as the inside one) 


Now add a panel using 3D foam so that the top of the image overlaps the nestie. This will act as your closure. The nestie tucks behind the panel. I've used Gus and Stella on my panel but it could be anything!


Hope you like this tutorial and give the card a go. If you do, share the results with me so I can see the results.

I'm going to enter this card into the following challenges:
Top Tip Tuesday ~ Open Theme
Scrap Creations ~ Digital Image
Ladybug Crafts ~ Anything Goes
Crazy Challenge - Friendship
(I think the image and sentiment epitomise lifelong friendship)
Make It Monday ~ Anything Goes
Nettie G ~ Favourite Digi
(I just love Stella and Gus right now)
Squigglefly ~ How do you like to use your digi?
Crafty Hos ~ Digi plus Clear Stamp
(PTI stamps used for the Star background)
Kenny K ~ Anything Goes
Stampin Sisters ~ Tone on Tone
(Green Stars stamped on Green background)
Drunken Stampers ~ Tools That Don't Use Electricity

Wednesday 17 November 2010

Treat Box Tutorial for Tutorial Wednesday

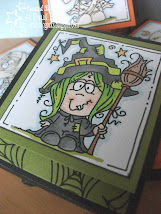
Wednesdays are Tutorial days over at Catch the Bug with Bugaboo. This week is my turn to share a tutorial. I'm going to show you how to make these very quick and easy treat holders. Here's a bunch I've shared before with you that I made for the Craft Class I go to for Halloween. They liked them a lot and I completed them all in a couple of hours - the time consuming part was the colouring in. If they'd been done ahead of time they'd have been very quick.


The one I'm showing you now is a different one I made for the Halloween period. I intend on making some Christmas ones though. So what to you need? How do you go about it? How long have some of you been waiting for this tutorial?

Firstly, you will need:
1 Piece of card for base, cut at 3" wide by 11" long
2 Panels 2.75" by 2.25"
1 Panel 2.75" by 1.75"
SU Oval Punch (I'm using the old style but the new one works exactly the same)
A scoreboard (not essential but makes this very quick)


Score the base card at 1", 2", 4", 4.5", 8" and 8.5"


Fold along each score line.


Punch a hole between the 1" and 2" folds. Line up the sides of the punch with the sides of the card to centralise it. If you don't have a punch, simply use a craft knife to cut out a hole.


Attach Double Sided Tape to the 1 inch wide piece.


Adhere as shown above.
The holder is now complete and ready to decorate.


I've stamped a pattern using my PTI stamps here before attaching to the base.
Attach one of the larger panels to the inside of the lid and the smaller on to the bottom panel of the holder.


Attach the other large panel to the front of the lid. It'll now be 3 pieces of carstock thick and so quite sturdy.
Attach your images/decorations/embellishments how you like. I've used this Bugaboo Mummy image on mine and a typed sentiment cut with the SU Window Punch.


Slide in your treat. I've used a Freddo bar in this one but I'm sure other items would fit too.

Hope you enjoyed the tutorial and maybe tempted to create your own. If you do, let me know so that I can come and see it.

Thank you

Thursday 22 July 2010

Door Hanger Treat Holder Tutorial

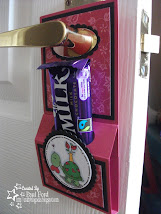
So here's another door hanging treat holder I made (and before anyone asks, yes I will show you a tutorial, in fact it's right underneath this pic ready and waiting!)

I've made this one for Papertake's challenge which is CUTE. I think that the image and the treat holder itself are cute. I've used some Stampin up card in Rose Red with the matching DSP. The image is another Bugaboo Turtle. I really like that the shells match the themes.


But if you've been waiting for the tutorial, here it is (I shall refer to the colours I've used here so that you can follow easier but you can use whatever you want):

What you will need:
1 piece of cardstock for the base cut at 3" by 11"
1 piece of black card cut at 2.75" by 3.25"
1 piece of black card cut at 2.75" by 1.75"
One piece of designer paper cut at 2.5" by 3"
One piece of designer paper ut at 2.5" by 1.5"
One topper (have used nestabilities to cut mine but be creative)
Stampin Up Oval Punch (this is the one I've worked the measurements around. I imagine it's possible to use other but then the measurements may need to be altered)
Double Sided Tape and Glue
A method for scoring (ruler and embossing tool or a scoreboard)

Optional:
Scallop Oval Punch

Firstly, take your base card and score it at 1", 2", 4" and 4.5". You will also note that I've made a light score line at 7.5" too which I will use for lining up later - DO THIS VERY LIGHTLY or use a pencil.

Fold along each score line well and use a bone folder to sharpen the folds (do NOT fold the 7.5" line)

Now take the oval punch and push it as far as it will go from the base of the card. Center it at the sides and punch. The aim is to create a hole between the 1" and 2" scorelines. How's this for an action shot! Just look at the rose red card jumping out!

Punch a whole at the top too. I have done this by eye with the depth, just made sure I've centralised it at the sides so that it hangs straight. Your base should now look like this.

Attach the two black pieces  onto the base as shown above. I attached mine using double sided for strength but when attaching the top one, make sure you put some glue around the oval cut out (just rub some pritt around the outside on the rose red base). If you don't, you may find the layer coming looose around the handle area.

Turn the base card over and align the punch over the hole you created earlier (so that only the black shows - no pink). Punch through.

Do the same again with the designer paper.
Attach double sided tape to the panel as indicated above and stick it down by lining it up with the score line you made at 7.5".
It should now look like this.

Attach your topper to the front. I have created a border for the handle  using the oval punch and then punched a scallop one around it and glued it on.

Now simply add your treat and hang. I've used Dairy Milk for mine but I know Galaxy bars (the caramel ones, my fave) also fit. If you make one and find other fitting treats, please let me know. Originally, I used the SU Window punch but found the hole too small for many treats.

Hope you enjoyed the tutorial, once you've made one, you'll find they are easy to make and great for mass production. I can imagine having these on a stall at a Christmas Fair as they are something a little different.

IF YOU USE MY TUTORIAL, PLEASE LET ME KNOW SO THAT I CAN COME AND VISIT YOU TO SEE WHAT YOU MAKE!

This is my own tutorial and design. I made these treat holders using my own measurements and had to go through many test versions to get the proportions right (I have a bin load of scrapped versions). If you do use it, please show your appreciation by crediting me. Thank You.