Showing posts with label dessert. Show all posts

Semolina Honey Almond Pudding

Monday, July 4, 2011


I have a kilo of semolina that i 've only used about 100g + for a failed cake recipe and a traditional kuih talam ( i got the kuih right but the portion of it is big for my small family size. i had to 'donate' it out for the thankful neighbors). So what else is semolina flour is good for? other than cake, & traditional kuih, apparently its pudding. But obviously the recipe DID NOT call for a 900g worth of semolina flour. Again we are only using it for about another 100g, it seem like its gonna take forever to use up all the semolina flour, right? I keep my semolina left over flour in the fridge so that i can hold on to its 'freshness' longer or at least until figure out what to do with them.

I came up with this recipe inspired by the middle east dessert of rice pudding, the texture and taste i basically based on the 'cake' and 'kuih' i supposed and that is why i have the idea of the honey and almond in the mix. its good combo i must say and i must add that its a VERY comforting food (*whispering* and filling too) well at least to me it is.

if you ask me about its origin, i'm not sure but i think its probably be Greek? coz if i am not mistaken, the word semolina derived from a Greek word 'semidalis' weird huh? well more directly it was from Italian word 'semola' that was borrowed from a latin word 'simila' which means flour that borrow from the Greek word....heh am i making any sense? well if you don't just google semolina origin i'm sure you'll get the appropriate info about this.

anyways...my dessert is inspired by the middle east rice pudding. I suck at making rice pudding and hate tasting it coz its just weird having rice as dessert. I am pretty sure that Malaysian palate is not accustom to sweetened rice *blurgh* but then again maybe its just me.

Ok Ok moving on...here is the recipe:

500ml milk (this is a plus minus please add more if the mixture is too thick)
knob of butter ( i actually put in about a table spoon of quality butter it really makes the difference)
60g semolina
1c water
5tbsp honey
11/2tbsp ground almond
a tiny pinch of salt

- soak semolina in 1 cup of water. until it swollen and less watery. this should take about 10-15minutes. but if your mixture is thick after few minutes of mixing, add in a couple table spoon of water.( the idea is to swollen the grain,this step will make the cooking time a lot faster)

- heat milk & butter until it gently simmering. then add in the 'swollen' semolina mixture.

- cook it until it have that ALMOST 'custardy' texture then add in the ground almond, honey, salt. Stir and mixing it thoroughly under a med-low fire.

- the mixture texture should be thick but slightly runny. the pudding will set further after chill time. So your mixture should not be too tight and thick. you get what i mean? if you don't just ask, i'll be happy to help. ;)

- place your mixture in a ramekins of your choice and let it chill! well i personally like it when its still warm ^_^

Chocolate Mint cake - adaption -

Tuesday, September 28, 2010

this is a recipe originated from kak Ummi's kitchen. My children loves this cake much to my suprise i thought kids hate minty flavor but i suppose the combo of mint and chocolate is a palate pleaser.

My verdict:-
its a rather moist cake provided that you do not over beat the batter. fairly easy to make, its a no brainer just follow the instruction to the letter. and you'll be OK. ;) Our family loves this cake so its a keeper. I highly recommend you to try - if youre up to something different ;)

MY adaptation to the recipe:
200g flour
2tsp baking powder
1/2 tsp baking soda
230g butter
180g granulated sugar
3 large eggs
1tsp vanilla essence
21/2tbsp dutch processed coco powder
50ml fresh milk
few drops of green coloring
few drops of peppermint essence/extrat (do not go overly EXCITED with this one or you'll end up having toothpaste flavor cake *L0L*)

preheat oven to 175c. line a 8"x8" cake tin with parchment paper.
sift flour, baking powder and baking soda then mix butter and flour into a paste consistant batter. set aside.
in a different bowl beat eggs with sugar until thick then add in vanilla.
then mix together the flour mixture and the egg mixture. beat until fluffy, the batter will look shiny/glossy at this point.
devide the batter into 2 portions. portin A mix it with coco powder then portion B mix it with peppermint and green coloring - mix well.
then pour the batter alternately onto the center overlapping with each other, this will create the marbeling effect. then tap the pan to let any bubbled out and bake for 45mins or until the cake test done. if the top of the cake browns too fast, cover it with aluminium foil.

NOTE: for the coco powder, its best if you were to dilute it with a table spoon or two of water for easy mixing.

Cream Puff Au Chocolat: cream puff with chocolate cream fillings

Friday, March 26, 2010


Cream Puff...its our family favorite dessert or tea time snack...made these babies yesterday...actually yesterday i had a pudding craving (i know what's with me and cravings?) been searching the net looking for the best pudding recipe but most of it were way to complicated for me...i was feeling a tad bit lazy at the same time...

then...i decided to just use custard powder and start mixing with milk, a pinch of salt and loads of melted chocolate and a dash of vanilla...the chocolate kinda mask the 'custard powder' taste, you know the instant custard powder can sometimes have that powdery and somehow uncooked custard taste (well thats just how i think it taste like...uncooked coz its still taste powdery)
it turned out great only my only dissatisfaction its too sweet for my liking. i didn't add additional sugar because i thought since i'll be adding loads of melted chocolate that its be just right for me...but i was right not to add in extra sugar because it turn out too sweet for me and i feel that i can't eat the pudding alone or on its own...

so i spent half of the day thinking what can i do with it and i thought of cream puff... well i thought of making strudel at first but i don't have any puff pastry, too lazy to make from scratch (although it would be nice though with the combination of sour-ish fruits and non sweetened cream and the crispiness of puff pastry that would be marvelous indeed) ...so cream puff it is.

this is the recipe that i have kinda perfected over the years and letting you in on my so called secret to my choux pastry recipe for cream puff.

1c water
90g butter - cubed

1c flour - sifted
1
tsp salt

1tsp sugar

3 eggs

  1. pre heat oven at 180C. and prepare greased baking pan/tray and lined with parchment paper.
  2. in a pot (preferably medium-large pot for easy handling) heat water until almost simmer then add in the butter. stir until all dissolves
  3. when you see that the butter mixture starts to simmer then add in the flour and start stiring until it forms a dough and did not stick to the pot.
  4. remove from heat.
  5. add in eggs one by one. and stir until the egg is completely combined in dough then add another egg and repeat the step until all eggs are incorporated.
  6. now you can start dropping a dollop of dough you may use spoon or pipe it into place. i just use 2 spoons..
  7. then bake for 30-40minutes or until golden brown.
TIPS:
~ Do not open oven to check on the choux pastry with in the 1st 20 minutes. this may cause your pastry to not rise properly.

~ make sure that the pastry is golden brown to make sure the doneness if you take out the pastry pre maturely it'll deflate and loose its nice round shape/puff.
...although for this one i did took the pastry out prematurely and it deflate like crazy but i re bake it immediately and it puff back into shape...but this was not always the case...i think i just got lucky, don't purposely try this ok!

~When you simmer the butter mixture, don't let it go to the boiling point...i find that if you let it boil, it somehow effects the dough...and it didn't quite have that beautiful puff to it...

I hope this will help you baking a better choux pastry...HAPPY BAKING!

p/s: the cream custard filling i don't have the recipe i just simply dump all the ingredients i've mentioned earlier and thats it... sorry..^_^

Bubur Cha Cha / Cha Cha Porriage

Monday, March 22, 2010


i suddenly have this crazy craving of bubur cha cha so i thought today i just go and make some...and since the cha cha dried dough can be bought from the local market i thought "this should be eazy and i'll have my cha cha in no time"

to my luck, i went all over bangi market...well almost all they were out...OUT i tell you but i can't shake the craving...argh so i went back home and go straight online to find a recipe for making the cha cha dough...and guess what? there was none...only recipes that uses the store bought cha cha dried dough....at that point i feel like pulling my hair off coz i keep thinking about 'bubur cha cha'

in desperation i called my mom (she knows everything...lucky me) and ask if she knows how...crossing my fingers she said " owh...thats ez you just need....." heheheheh~
awwww~ suspen kah? ok i'll share the recipe because i'm nice and generous....=p

so here is what you need to make the cha cha dough:

1c rice flour
1tbsp tapioca flour
1tbsp corn flour
1/2tsp salt
1tsp lime paste (air kapur) * if you don't like the alkaline taste yo can reduce to half teaspoon.
1cup water (plus minus add more if the dough is tough)
colorings

mix all ingredients in a pot. in a medium heat mix until it forms a dough and didn't stick to the pot. divide into 2 or 3 portions and give some colorings to the respective dough. take another clean pot boil water and then by using cha cha mold press it until it comes out noodle like . if you don't have the mold you can always use your seive (one that have bigger holes) or your ladle with little holes which is what i use for mine...the cha cha noodle is ready when it floats. take it out and put it in a cold water to prevent it from sticking from each other.

Cha cha gravy:

250ml coconut milk
1/2c water
1/2tsp salt
150g palm sugar (the sweetness is up to your liking reduce if you don't like it too sweet)
2 screwpine leaves knotted

dissolves palm sugar with water in a heated pot. then add in the coconut milk. reduce heat to medium - low . stir constantly to avoid the coconut from breaking oil. add in salt and screwpines.
stir...as it simmers add in the cha cha noodles. let it boils a while then remove from heat.

the view from the pot...

TIPS:
  1. if the coconut gravy is too thick you may just add in water but remember to have a taste and make sure that it didn't turn bland.
  2. sometimes the coconut milk curdles when heated, don't panic you can just pour the coconut milk in a blender and blend away...just the coconut milk, not the cha cha noodles ok!
  3. always add salt in you coconut base dish to enhance the coconut taste.
  4. you can also add in 1tbs of pearl sago, or sweet potato in this dish, it'll sure add some texture...i add my leftover sweet potatoes in mine ^_^
  5. if you can't find palm sugar, i suppose you can substitute it with brown sugar...but it won't have that distinctive aroma and color of the palm sugar though...or perhaps using molasses sugar is better...

Kelantan Traditional Snack: Squid stuffed with glutinous rice

Friday, March 19, 2010

you can see that the glutinous rice is nicely cooked inside the squid


This popular snack during tea-time. the squid is stuffed with glutinous rice and bathed in an aromatic coconut milk gravy. The stuffing is basically soaked in coconut milk before it is stuffed into the squids.

this is my dad's favorite dish. it is sweet with a hint of savory taste. store bought stuffed squid is never as good as homemade, its always too sweet and you usually can't really appreciate the flavors.

anyway i made this today since yesterday's pasar tani (market) only have cute petite squid. my mom once told me that to make this dish the best squid is the young squid or the smaller squid rather than the large one. this is probably because if you were to use large squid you may risk the flesh of the squid being tough as the process of cooking this is rather long (coz you need to make sure that the glutinous rice is cooked inside the squid) besides smaller portion is somehow fun to eat.

what you need:

1 can/pack coconut milk
12 small squids (you can make more)
100g glutinous rice (you may add more if needed)
1.2 cm ginger
1 screwpine leaf (daun pandan) - [optional but with this it'll be more fragrant]
2 shallot
100g palm sugar/brown sugar
a pinch of salt
toothpicks to secure the squid.

This is how you make it:
  1. wash glutinous rice and soak it in the coconut milk for a minimum of 30minutes (the longer the better) then toss it and keep the coconut milk aside for later use.
  2. mean while wash and clean squids. discard all dark ink and its bone. Do not remove the skin.
  3. stuff the glutinous rice 1/3 full in the squid and attach back their heads and secure it with a toothpick. this is to allow the glutinous rice to expand and cook in the squid.
  4. heat the coconut milk and add in ginger, shallots and screwpine.
  5. then add in the stuffed squids cook until the stuffing is thoroughly cooked. to know when the glutinous rice is cooked, the squid will look expend and when you touch it, it should feel soft yet firm due to the expended cooked glutinous rice and the texture of the squid.
  6. once cooked take out the squids and set a side.
  7. then add in palm sugar and salt into the coconut milk stir constantly so that the coconut milk won't break and become oily. do this at a medium to low heat.
  8. the gravy should be thicken after awhile. have a taste making sure that it is sweet with a hint of saltiness. then remove from heat and add in the cooked squids and let it sit for several minutes, then ready to serve.
TIPS:
  • you can adjust the thickness of the gravy to your liking by adding water.when you do this make sure you check back your taste (sugar and salt)
  • use fresh coconut milk is always better than using packed/instant coconut milk.
  • palm sugar is the original ingredient but you can substitute with brown sugar or white sugar. but using white sugar will loose its beautiful brown color on the gravy. so perhaps you can try and caramelized the sugar first just to get the color although this may render the original taste slightly.
any questions you may ask me and i'll be gladly answer your questions.

Apple pie - lattice top

Thursday, February 18, 2010


just last week (during the lonely CNY) i finally have the mood to bake...mmm i'm sorry for letting this blog go idle for a long time, but i was kindda busy...or more accurately in a vaca mode ^_^
i went to Bandung with my parents and sister and her fiance...she wanted to look for her wedding invitation card coz apparently our printers can't print less than 3 weeks their estimation time was 4-6 weeks! due to CNY holiday bla bla...and my sister's wedding is set in April! then we heard that Indonesian can handle fast printings minimum of 3 working days...how great is that? so without thinking we all book ourselves tickets to Indonesia...for me, i was there just to have a shopping frenzy...and the result is that i'm broke now...i can literally see my card puffed with smoke =p...hubby wasn't that happy too and that's my dear is why i'm baking stuff ...you may say that this is my rather pathetic attempt to cheer him up hehehehe~ which by the way worked like a charm!!! (then again he always smiles whenever i put effort-ful (is there such word?) homemade food on the table)

anyway... this apple pie is one of my attempt to put back smiles in his face....coz i know that hubby loves apple pie especially when topped with vanilla ice cream!

Apple pie fillings:

5 medium sized granny smith green apples - peeled and cut into wedges
1/2tsp cinnamon
1/2tsp nutmeg
1/2cup brown sugar
1tbsp lemon juice
3tbsp flour or custard powder
30ml water (plus minus this will depend on how loose you want your filling be)

  1. combine all ingredients and cook until the apples are almost tender. adding water gradually controlling consistency to your liking. then remove from fire let it cool.
  2. it is important that you don't over cook your apples or it'll loose its flavor.

Flaky Pie Crust Recipe

  • 3 1/2 cups all-purpose flour
  • 1 tsp salt
  • 1/2 cup solid vegetable shortening
  • 1/2cup cold unsalted butter cut into chunks
  • 1tsp salt
  • 1tsp sugar (this is optional)
  • 3/4 cup ice water

How To Make a Perfect Flaky Pie Crust

1st Step:

  • Measure flour and salt into a large bowl making a well in the middle. Put shortening and butter into the well.
  • This is an important step. Do not let the heat of your hands melt the shortening. The least amount of contact with the shortening the better. i use pastry cutter for this step. you need to work on it coating and cutting the butter and shortening with flour until...
  • It should look like a small peas, with the butter and shortening being totally incorporated into the flour.

2nd Step:

  • Pour water bit by bit, until it comes together in a soft dough. You may need more or less water depending on the humidity. Do NOT knead the dough as in bread making though as this will encourage the formation of gluten which we don't need.
  • Work the dough and form in a ball and flatten it to a disk. this is to ensure an even chill.
  • Cover the dough and refrigerate. let it rest for at least 10 minutes.
  • you may keep longer than 10 minutes. i usually make a large batch and keep the balance for future use. the dough keeps well in a zip lock bag up to a month.
3rd Step:
  • Take a handful of flour and throw/sprinkle it down on a counter top. Put the dough in the middle of the flour.
  • Coat your rolling pin with flour. Start rolling the dough with the pin, turning the dough to get a round shape. This may take several passes over the dough, turning this way and that. Flip the dough over carefully, adding flour to your surface as needed. Finish rolling on this side to make a circle that is 4" bigger than your pan.
  • Fold the dough in half, place it in the pan unfolding to fit. Trim if necessary, but not too much. You want to have enough to fold the edges under.
  • Fold the edges under, turning the pan and pressing the edge as you go.
  • You now have a choice as to how you want to finish the crust. If you are making an open pie as in pumpkin or pecan, press the edges down with a fork to seal the edge and give it a nice pattern.
  • Or, you can crimp the edges using your thumb and forefinger of your left hand and the forefinger of your right hand, and go around the edge of the pie making a v-shaped pattern, all the while keeping the edge slightly higher than the pie pan.
  • or in my case i just let it hang a little, then i start working on my lattice top then will i trim the edge for a clean finish.
  • at this point you may have some extra dough, roll it and stamp it with you fave cookie cutter and make decorations on top of your pie...
  • use 1 egg yolk + 1tbsp of water and a drop of egg yolk coloring for glazing.
  • bake at 180c for 30-45minutes or until the pastry is golden brown.

Aztec Cookies: Deep Chocolate & Green Tea Cookies

Friday, January 15, 2010


this checkered cookies is still not 'perfect' as i am still learning on how the 'check' it ;)

nice huh?


last night i stumble upon some blogs that bakes absolutely gorgeous cookies. and i'm one of those people who will wonder how to make those gorgeous cookies and will have little sleep (i mean this literally) thinking about the how of the cookies, cakes or whatever the subject of the obsession will be at the point of time. and that 'point of time' now is the checkered cookies and those a like. I call this aztec cookies because i use lots of chocolate powder in it and it taste fabulous (aztec is known for their chocolate its a royal food or something) its very dark and chocolatey and the green tea is just a flavor that i wanted to explore. you can put any other flavour you want actually.

about the recipe, i just simply use any sugar cookie recipe and in my case i use martha stewart's recipe devided the dough into 2 portions and cocoa powder to one part and green tea powder to the other part. quantity? errr...i'm not sure coz i was just experimenting and i forgot to jot down . mmm perhaps next time i'll give you the recipe, a proper and improoved recipe coz at the moment this recipe needs some tweeking.

ok this was supposed to be checkered cookies but i got creative and start to create new designs so ....feast your eyes with ,my new creations...

oh here's some tips on how to make this cookie.
  1. to have a nice round shape i find that you should chill the dough first before you cut it (i didn't so my cookies are a tad bit out of shape.

  2. then you a VERY SHARP knife to cut the dough to ensure a clean cut

  3. and dust some flour on your work space when rolling the dough to avoid sticking.

chocolate souffle

Sunday, November 15, 2009

this souffle is actually a lot higher but it deflate a little while i was trying to take a picture and fyi i made this in the middle of the night say at 11pm ish...crazy huh?
then i've found out that i don't have any powdered sugar to drizzle it so this look less impressing.
non the less the satisfaction eating it just priceless!
souffle in the oven..look at it rise!! beautiful ain't it?

this is a borrowed recipe...so click here for the recipe

Sugary Cloud: PAVLOVA

Wednesday, April 22, 2009


this is my first time making pavlova, and i have always wanted to make one but never really had the chance...well actually i was afraid to make it coz me n white eggs just don't get along that well...but today i have gathered my strength and make this fabulous dessert...altho the recipe was inspired by Nigella coz it was her who made me wanna make this so much. as i was watching her the other day she said (and this was her tips on making pavlova) i love putting white wine and cornstarch as it give that delicious spongieness to it. but me beinga muslim i can't drink or eat wine or any alcohol for that matter.

so i've altered the recipe to my liking hehehe~ and i hoped and prayed that it turned out right.
and wallah~ it turned out FANTASTIC!(well, at least to us) everybody loves it and it was gone in just a blink...even hubby nearly didn't get the chance to taste the dreamy cloud....>_< style="font-weight: bold;"> anyway this is what i use:
4egg whites
1/2tbsp corn starch
1tsp balsamic vinegar
4tbsp powdered sugar
1tsp vanilla essence

cream:

1 small box of whipping cream
3tbsp sugar ( i reduce to 1tbsp for mine coz i think the pavlova is already sweet)
1tsp vanilla essence
1 can fruit cocktail <---the best is to use berries : strawberries/blue berries/blackberries etc but if you don't have it or in a tight budget like me i just use fruit cocktail. whisk the egg whites until soft peaks then add in the sugar bit by bit, then sprinkle in the vinegar and vanilla essence, mix well then sprinkle in the corn starch fold it in. then on a tray line in a parchment paper then dunk it in and make a round shape about 23" of size. mine i did it using a tray (bottom part) of my spring form pan the size of 20" so my pavlova turned out thick and less crunchy. but i think if i were to use 23"tray i'll end up with a more crunchy surface. then bake the mixture in a preheated 180c oven. but you turn down the heat to 150c when putting it in the oven. bake for 20-30 mins or until all the surface are creamy brown n crisp. let it cool in the oven with the oven door slightly open. this is to prevent too much cracking. for the cream just whisk til stiff then add in the sugar and vanilla, then spread a luxurious amount on top then top it with the cocktail fruits. to those whos afraid of egg whites like me, here's some tips to make a perfect pavlova:

  • use scrupulously clean utensils (keeps them fluffy)
  • beat the whites to soft peaks before adding the sugar (keeps them from weeping)
  • add the sugar slowly (same)
  • make individual portions (keeps them from browning)
  • use enough, but not too much, initial heat, plus partial cool-down in the oven (keeps them from cracking)
  • know your oven (keeps you from freaking)
this tips are from maiapapaya. indeed pavlova is 'stupidly good'
more about pavlova at joy of bakng.

Homemade Ice Cream - Dolce Vanilla Chelin Style

Tuesday, January 20, 2009


I've actually made this sometime ago using my brand new ice cream maker. yeah, now i have an ice cream maker. it was my birthday gift from hubby...he didn't figure it out by himself but i did told him about my wish list and the ice cream maker is one of them. We had a hard time finding it. apparently they didn't keep stock (they as in Seng Heng, Best Genki, Courts Mammoth and other appliance shop and this also including Metrojaya kitchen department) they only have display set. I initially wanted Kenwood but since we went and search coutless shops with no avail i was about to settle with any brands that they might have. then we went to this one store i can't remember the name was it Hup Seng or something can't remember, it was our last try and lucky for me they have 1 at stock. And hurray for me...

After getting that, i ran to the grocery shop and purchace ingredients for ice cream to experiment. And this is my 2nd try. the 1st try didn't freeze well coz i didn't wait for the mixture to cool... (ya lah too gang ho to try new gadget..excited maaa~) BIG mistake!!!

Anyway there are basically 2 type of ice cream custard base and non custard base. custard base are those with egg in the mixture and there are also sorbet which i will eventually try and make some too...the recipe that i'm posting is the custard base and it call for a lot of egg yolks.... ^_^
you can imagine that custard base is alot richer and creamier that those are not custard base and of course its not suitable for those on diet!

what you need:
9 egg yolks
500ml whipping cream
250ml milk
30ml/2tbsp vanilla extract
100g sugar (you can add more sugar if you like it sweet)

  1. Prepare the ice cream make as instructed by the manufacturer.
  2. heat milk and whipping cream on a gentle heat until simmer then remove from heat.
  3. while doing that, mix egg yolks and sugar until creamy.
  4. then add in 1/3 of the milk mixture in the egg mixture while you constantly whisking the mixture. then add in slightly more of the milk mixture, whick well. then pour in the egg mixture in the milk mixture and mix well. (this will reduce chances for the egg to scramble)
  5. cook in a medium heat until the mixture thickens like custard.
  6. cover the custard with cling wrap right on to its surface to prevent skin forming. let it COOL completely <---make sure you cool it or it won't freeze well..
  7. once the custard is cooled, on the ice cream maker then slowly pour in the pixture while the paddle of the ice cream make is moving.
  8. let it churn until the ice cream is ready.
  9. the ice cream should be spoonable. transfer the ice cream and let it freeze for at least 2-3 hrs before consuming for better result
this presentation, i topped it on a tart crust and sprinkle with chocolate shavings.

For Variation:
you can add in fruits like strawberry or blueberry jem just when the ice cream is almost ready, then it'll be a strawberry ripple/bluberry ripple...yummy..

i actually made the strawberry ripple ice cream but forgot to take pictures...

Chewy Gooey Brownie Delux

Saturday, December 27, 2008


this is my favorite kind of brownies...its chewy and gooey great with vanilla ice cream...mmmm yummmmmmmmmmmmmm~^_^ been craving for brownies lately so i bake this excellent brownies to satisfy my cravings and it hits right on the spot. my family simply loves this, the brownies didn't had chance, it didn't even last for a day...if you're not a brownie lover, you should try this one this might get you hooked and addicted =p and if you ARE a brownie lover, what the hell are you waiting for TRY it!!! but gotta warn ya, its definately not suitable for those on diet *lol*

you'll need...
1c flour
3/4c unsweetend cocoa powder
1/2 tsp baking powder
1/2tsp salt
2sticks / 1/2pounds unsalted butter @ room temperature
2c sugar
1tsp light corn syrup
4 large eggs
2 tsp vanilla essence

  1. Preheat oven at 180c. butter & flour a 9x9" baking pan; set a side
  2. In a medium bowl, whisk flour,cocoa powder, baking powder and salt until well combined. set a side.
  3. in a larger bowl, cream butter and sugar at med speed until pale and creamy and thick...i'd say about 5mins or so. beat in 1 egg at a time, making sure its entirely incorporated before you add in the next egg. after beating the last egg for about a minute, stir in vanilla.
  4. then with a wooden spoon fold in the flour mixture until just combine - the batter will be quite thick but thats ok. then just spread in the batter in the prepared baking pan and level it.
  5. bake for about 20minutes or until done. let it cooled for 1 hr before cutting then ready to serve with ice cream vanilla ...
Tips:
- This brownie can be kept frozen up to 2months; allow them to thaw in a room temperature before serving.
- To freeze the brownie tightly wrap it in wax paper and seal it in a freezer bag or zip lock bag.. other wise it'll stay fresh for 3 days.
- And ALWAYS ALWAYS ALWAYS use quality chocolate when baking such decadent desserts with chocolate ingredients otherwise you might end up MISREPRESENTED

p/s: today is my 28th birthday heheeheh waaaaaaaaaaaaa i'm officially 1 year older....

Pumpkin Layered Cake / Talam Labu Lapis

Thursday, December 11, 2008

Today i'm in the mood of making some 'kuih' (desserts). At first i thought of making french bread coz my mom just came back from cambodia and she brought back yummy breads but then I don't have bread flour and i'm too lazy to go out and buy coz today its been raining all day since noon here. then i thought of making a cake again i don't have enough ingredients *long sighh* then while i was rummerging my fridge i found some coconut milk and pumpkin and i thought i better use this before it expires! then my sister told me to make extra so that she can sell it at my aunt's restaurant.

so i started cooking and making pumpkin layered cake, lucky me it turned out GREAT hubby ate bulk of it its a compliment coz he hated pumpkin so it must be good...

here's what you need to make this lovely kuih

70g shredded pumpkin
100g cooked pumpkin flesh (just steam it until tender)
100g rice flour
125g sago flour
300ml thick coconut milk
200ml water
200g sugar
250 water
4 blades of screwpine leaves / daun pandan

  1. to make syrup, cook sugar with water and screwpine leaves until sugar dissolves.
  2. combine rice flour, sago flour, thick coconut and water. mix well then add in the syrup. strain the batter reserve 200ml batter mixture.
  3. cook the rest of the batter mixture in a non stick pan over low heat until it begins to thickens. add shredded pumpkin, mix well.
  4. pour shredded pumpkin mixture in a greased 8" cake tin lined with plastic sheet. level the surface, cover and steam over high heat for 15 minutes.
  5. blend the reserved batter with steamed pumpkin flesh until smooth. remove then pour into no.4. cover and steam at medium heat for 15-20 minutes till cooked. let cool before cutting
=> this recipe was actually taken from my mom's cook book...i can't remember the title of the book but its a good recipe...worth trying!

all packed for the restaurant! hope people like it ...;)

Serikaya Labu / pumpkin with egg custard

Thursday, December 4, 2008

I bought this pumpkin last week and had forgotten about it coz our family had a terrible flu and all of us was just so tired and lazy (you know how it is with the spinning headaches, muscle sores, running nose etc) so today i was cleaning my fridge and i saw the pumpkin and lucky for me the pumpkin is still in a good shape. then i was wondering what can i do with the pumpkin then i remembered a pumpkin dessert i had in a thai restaurant. so i thought 'ok let try and do that...couldn't be that hard...'

It turned out great and try this recipe:
you'll need...
1 fairly ripe pumpkin - medium size
8 eggs
200g brown sugar
50g granulated sugar
250 thick coconut milk
1/4tsp ground cinnamon
1/2tsp salt

method

  1. cut the upper part of the pumpkin, together with the stem, to a diameter of about 12cm. set aside the cut portion.
  2. Remove the pumpkin seeds to create a hole. clean it and drain the excess water.
  3. in a bowl, beat eggs and brown sugar and the granulated sugar well until dissolved.
  4. Add in the coconut milk, ground cinnamon and salt, stirring well.
  5. in a sauce pan heat the custard mixture until slightly thick or when you see steam coming out from the custard - use medium heat. then set a side whilst continuing stiring.
  6. sieve the custard and pour it into the pumpkin shell filling it to the brim. cover with the cut piece.
  7. Steam in a medium heat for about 45mins to an hour. leave cool before cutting
=> note: If the pumpkin is huge you'll need to steam it a head for about 15 mins then pour in the custard mixture.

Caramel Pudding Cake

Wednesday, October 15, 2008


This I have to give credits to yani from MYR. Its her recipe and its great to i highly recommend it! I made this for last night dinner party. the strawberry deco looks awful coz it was a last minute deco as i initially don't want to decorate it but when its done, it looks too plain for my liking. luckly i still have some leftover strawberries & kiwi but one problwm, i don't have any glaze so my mom she substitute the piping jelly with strawberry jem...the result is not as flattering...
the recipe you can check it here http://www.myresipi.com/top/detail/910

Apple Custard Crumble

Monday, October 13, 2008


The other day our family friends came to visit us, we had Nasi Dagang (Terengganu style) coz we ran out of nasi dagang rice so we had to use the regular rice and made it Terengganu style. Then i've made this great apple crumble with custard that you could serve with vanilla ice cream and its a superb way to end a lovely dinner...and it was a crowd pleaser too everyone was impressed (not just because of the taste but also the presentation) its was a simple dish but with great impact...what more can u ask??
You need... (makes 6)
  • 1 cup milk
  • 1 teaspoon vanilla extract
  • 2 1/2 tablespoons vanilla custard powder
  • 1/2 cup caster sugar
  • 800g can pie apple
  • 1 cup plain flour
  • 1 teaspoon ground cinnamon
  • 1/2 teaspoon ground nutmeg
  • 100g butter, softened
  • double thick cream, to serve

Method

  1. Preheat oven to 180°C. Combine milk and vanilla in a saucepan. Bring to the boil over medium heat.
  2. Meanwhile, whisk 1 1/2 tablespoons custard powder, 2 tablespoons caster sugar and 2 tablespoons cold water in a heatproof bowl until smooth. Whisking constantly, pour in hot milk mixture in a thin stream. Return mixture to saucepan.
  3. Cook, whisking constantly, over medium heat until custard comes to the boil. Reduce heat to low. Stir for 3 minutes or until reduced slightly (this cooks out the raw custard powder flavour).
  4. Spoon apple into six 1-cup capacity dishes or one 6-cup capacity baking dish. Pour over warm custard.
  5. Combine flour, cinnamon, nutmeg, remaining custard powder and sugar in a bowl. Stir to combine. Add butter.Using your fingertips, rub into dry ingredients until mixture resembles coarse breadcrumbs. Scatter crumble over custard. Place on a baking tray bake for 30 minutes or until golden. Serve warm with cream or in my case vanilla ice cream *wink*

Kuih Ketayap / Kuih Gulung

Saturday, September 27, 2008


this is one of the tradisional kuih / dessert. Rolled pancake with palm sugar coconut flakes filling. This recipe i got from Mat Gebu's blog http://tiffinbiru.blogspot.com/ <-- you can find it there under kuih muih. Thanx ya MG, everyone loves this kuih even those who never liked this sort of kuih loves it...the pancake texture is different than that of the store bought kuih.

so check the recipe out (i'm a tad bit lazy to re-type). Thanx again MG!

Kuih Bakar Bijan

Monday, September 15, 2008


I'm not sure about the origin of this kuih but as i remember it is one of the staple kuih in Kelantan, my hometown ^_^ together with Lompat Tikam, Akok, and most of the kuih made out of glutinous rice...(correct me if i'm wrong) this is because Kelantan has alot of the Siam's influence therefour the food is more or less the same...altho' the Kelantanese food tends to be sweet even in their savory food...yeah i know wierd...like my dad whenever he eats chicken curry he'll add sugar God know why...but i don't...probably because i was not raised in Kelantan, maybe...

So here's the recipe (makes about 4pcs):
250ml thick coconut milk
250g sugar
250 flour
250ml water
200ml Pandan juice(air pandan)/screwpine leaves
1/4tsp salt
3 eggs gred B/medium
4tbs ghee
4tbs sesame seeds

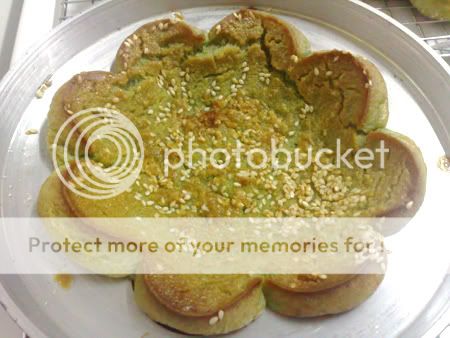
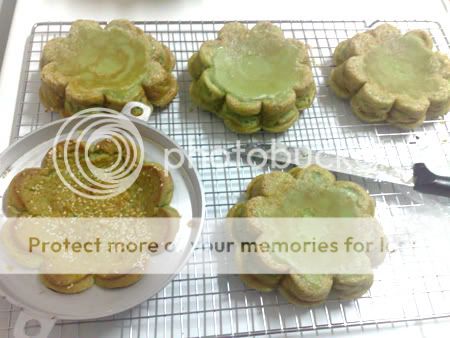
Preheat Oven and the kuih mold at 180c. When heated add in 1 tbs of ghee to each molds to gether with the sesame seeds (1tbs/mold). then continue heating, let the sesame seeds brown abit. Add all and mix well then blend the mixture to ensure smooth texture.
Then when the sesame seeds are nicely browned pour in the mixture and bake for about 45minutes or until done. Remove from oven and let it set, then ready to serve.

Fantacy Seascape Jelly


This is such a beautiful jelly to make and it taste great too. I think i'll make this as one of my dessert for Aid celebration...
For Colorful Layer:
30g Hoen Kwee flour
60g sugar
100ml coconut milk
200ml water
1/8tsp salt

  1. Bring above ingredient to boil, stiring at all times. Once it come to highboiling point, turn off heat. divide mixture into 3 portion. color each portion with your favorite color. pipe it in a ice cold water to prevent sticking. Remove the color strips once it has set.
Bottom Layer (A):
Translucent layer 1
31/2tsp jelly powder
160g sugar
800ml water
2 pandan leaves knotted/screwpine leaves

  1. Bring above ingredients to boil, discard the pandan leaves. divide mixture to 2 portion,
  2. pour in the 9" jelly round mold (i use bunt cake pan)
  3. arrange the colored strips and let jelly partially set...(so that the layers will stick together)
  4. next pour in the 2nd portion and arrange the sea coconut pulps and leave it to set(partially)
Upper Layer:
21/2tsp jelly powder
100g sugar
100ml coconut milk
350ml water
2 pandan leaves /screwpine leaves
1/4tsp salt

- Bring to boil and pour into the above jelly. let it set and serve chilled.

Nyonya - Cutie Chilled Kuih (Cantik Manis)

Tuesday, September 9, 2008


Today i have the urge on making my own Nyonya kuih. And this came to mind coz its the easiest to make...trust me...This Cantik Manis kuih is i supposed a hybrid between a kuih and jelly (my hubby said its just jelly) its not exactly jelly coz we do not use any jelly powder yet the texture is somewhat colse to jelly...odd huh?if you don't know what i'm trying to say...you'll just have to try and make them and see for yourself...

What you need:
(A)
80g Indonesian Hoen Kwee flour (buy white variety)
110g caster sugar
200ml concentrated coconut milk
600ml water
1/4tsp salt

To make colored dice:
100g water chestnuts
100g tapioca flour
a drop for 3 of your fave colorings.

This is how you do it:

  1. Dice the water chestnut and divide into 3parts
  2. color each part with your fave colorings and leave it for 30 mins to allow color to set.
  3. Coat no.(1) with tapioca flour and plunge it into a boiling hot water. (i didn't have tapioca flour so i use corn flour it does give the same effect but not as nice looking)
  4. Once it floats, remove them and place them in a ice cold water
  5. Combine ingredient (A). mix well, and make sure there's no lump. transfer it into a non stick pot and cook until the mixture thickens. Remove from heat
  6. Drain the colored dice and add them in (A). Arrange several molds and pour it them let them set and keep chilled until serve.
See told ya its easy...but my regret is not having the tapioca flour *sob sob* but it still taste great! the richness of the sweeten coconut mixture and the tenderness of the water chestnut just makes my mouth waters yummmmmmmm~

Pineapple Tart / Tart Nanas Bungkus


This is my first time making these and i must say it does turned out well! *ponder* actually i wanted to do the rolled pineapple tart but i didn't know how...tried but it didn't turned out right so i made this type. The recipe i got from my mom's recipe collection book which she loves so much...where she got the recipe? highly likely from her friends...

so here's the recipe:
What you need for the pastry:
200g flour
20g custard powder
150g unsalted butter

=> mix all the ingredients until it forms a soft dough. let it rest for 10 minutes then you can start making the tart.

What you need for the filling:
1 pineapple (pick one that's young and almost ripe)
1cup sugar
1 screwpine leave
1inch cinnamon stick
5pcs of clove

this is how you make em:

  1. grate the pineapple.
  2. cook the pineapple (do not drain the pineapple) in a medium heat until dried
  3. add in the sugar, screw pine and spices.
  4. stir occasionally, cook until the pineapple jam became thick and rather glossy.
  5. set a side to cool.
  6. the right consistency is when you can make a small ball out of the pineapple jem.
assemble:
take a teaspoon of the dough press with your hands making a disk then put the jem ball in the centre, close it gently. roll into a ball then shape it oblong or like the alien face then you cut the surface to make the thorny effect then brush egg wash on top of it. simple! Now you try..;)