Chirp は、Google の次世代の Speech-to-Text モデルです。長年にわたる研究の成果として、Chirp の最初のバージョンが Speech-to-Text で利用できるようになりました。Google では、Chirp の改善と他の言語およびドメインへの展開を予定しています。詳しくは、Google USM の論文をご覧ください。
Chirp モデルは、現在の音声モデルとは異なるアーキテクチャでトレーニングされています。1 つのモデルに複数の言語のデータが統合されています。ただし、モデルで音声認識を行う言語はユーザーが指定します。Chirp では、他のモデルが提供している Google の音声認識機能の一部がサポートされていません。詳細なリストについては、以下をご覧ください。
モデル ID
Chirp は Speech-to-Text API v2 で使用できます。他のモデルと同様に利用できます。
Chirp のモデル ID は chirp です。
認識ツールを作成するときにこのモデルを指定できます。また、同期認識リクエストまたは一括認識リクエストにおいて、インラインでこのモデルを指定できます。
利用可能な API メソッド
Chirp は、他のモデルよりもはるかに大きなチャンクで音声を処理します。そのため、リアルタイムでの使用には適さない場合があります。Chirp は次の API メソッドを介して利用できます。
v2Speech.Recognize(1 分未満の短い音声信号に適しています)v2Speech.BatchRecognize(1 分から 8 時間までの長い音声信号に適しています)
次の API メソッドでは Chirp を利用できません。
v2Speech.StreamingRecognizev1Speech.StreamingRecognizev1Speech.Recognizev1Speech.LongRunningRecognizev1p1beta1Speech.StreamingRecognizev1p1beta1Speech.Recognizev1p1beta1Speech.LongRunningRecognize
リージョン
Chirp は、次のリージョンで利用できます。
us-central1europe-west4asia-southeast1
詳しくは言語ページをご覧ください。
言語
サポートされている言語については、言語のリストをご覧ください。
機能のサポートと制限事項
現在、Chirp では STT API 機能の多くがサポートされていません。具体的な制限事項は次のとおりです。
- 信頼スコア: API は値を返しますが、実際には信頼スコアではありません。
- 音声適応: 適応機能はサポートされていません。
- ダイアライゼーション: 自動ダイアライゼーションはサポートされていません。
- 正規化の強制: サポートされていません。
- 単語レベルの信頼: サポートされていません。
- 言語検出: サポートされていません。
Chirp は、次の機能をサポートしています。
- 句読点の自動入力: 句読点はモデルによって予測されます。無効にすることもできます。
- ワード タイミング: 必要に応じて返されます。
- 言語に依存しない音声文字変換: モデルは、音声ファイルの音声言語を自動的に推測して結果に追加します。
始める前に
- Sign in to your Google Cloud account. If you're new to Google Cloud, create an account to evaluate how our products perform in real-world scenarios. New customers also get $300 in free credits to run, test, and deploy workloads.
-
Google Cloud Console の [プロジェクト セレクタ] ページで、Google Cloud プロジェクトを選択または作成します。
-
Speech-to-Text API を有効にします。
-
Make sure that you have the following role or roles on the project: Cloud Speech Administrator
Check for the roles
-
In the Google Cloud console, go to the IAM page.
Go to IAM - Select the project.
-
In the Principal column, find all rows that identify you or a group that you're included in. To learn which groups you're included in, contact your administrator.
- For all rows that specify or include you, check the Role colunn to see whether the list of roles includes the required roles.
Grant the roles
-
In the Google Cloud console, go to the IAM page.
[IAM] に移動 - プロジェクトを選択します。
- [ アクセスを許可] をクリックします。
-
[新しいプリンシパル] フィールドに、ユーザー ID を入力します。 これは通常、Google アカウントのメールアドレスです。
- [ロールを選択] リストでロールを選択します。
- 追加のロールを付与するには、 [別のロールを追加] をクリックして各ロールを追加します。
- [保存] をクリックします。
- Install the Google Cloud CLI.
-
To initialize the gcloud CLI, run the following command:
gcloud init
-
Create local authentication credentials for your user account:
gcloud auth application-default login
クライアント ライブラリは、アプリケーションのデフォルト認証情報を使用することによって、Google API で簡単に認証を行い、これらの API にリクエストを送信できます。アプリケーションのデフォルト認証情報を使用すると、ベースとなるコードを変更することなく、ローカルでのアプリケーションのテストやアプリケーションのデプロイが可能です。詳しくは、<atrack-type="commonincludes" l10n-attrs-original-order="href,track-type,track-name" l10n-encrypted-href="WDE63JFVMK0YqIWBqG8nCycgwkRfOeEqRvzYs1N+2tJUEhcZvE5VtDH5LoWw0lj/" track-name="referenceLink">クライアント ライブラリを使用して認証する</atrack-type="commonincludes">をご覧ください。
また、クライアント ライブラリがインストールされていることを確認してください。
Chirp を使用して同期音声認識を実行する
Chirp を使用してローカル音声ファイルに対して同期音声認識を実行する例を次に示します。
Python
言語に依存しない音声文字変換を有効にしてリクエストする
次のコードサンプルは、言語に依存しない音声文字変換を有効にしてリクエストを行う方法を示しています。
Python
Google Cloud コンソールで Chirp を使ってみる
- Google Cloud アカウントを登録して、プロジェクトを作成していることを確認します。
- Google Cloud コンソールで [Speech] に移動します。
- API が有効になっていない場合は有効にします。
Chirp を使用する STT 認識ツールを作成します。 a. [認識ツール] タブに移動し、[作成] をクリックします。

b. [Create Recognizer] ページで、Chirp の必須フィールドを入力します。

i. 認識ツールに名前を付けます。
ii. モデルとして「chirp」を選択します。
iii. 使用する言語を選択します。テストする言語ごとに 1 つの認識ツールを使用する必要があります。
iv. 他の機能は選択しないでください。
STT UI のワークスペースがあることを確認します。ワークスペースがない場合は作成する必要があります。 a. [音声文字変換] ページにアクセスし、[NEW TRANSCRIPTION] をクリックします。
b. [ワークスペース] プルダウンを開き、[NEW WORKSPACE] をクリックして、音声文字変換用のワークスペースを作成します。
c. [Create a new workspace] ナビゲーション サイドバーで [参照] をクリックします。
d. クリックすると新しいバケットが作成されます。
e. バケットの名前を入力して、[続行] をクリックします。
f. [作成] をクリックして Cloud Storage バケットを作成します。
g. バケットが作成されたら、[選択] をクリックして使用するバケットを選択します。
h. [作成] をクリックして、Speech-to-Text UI 用のワークスペースの作成を完了します。
実際の音声に音声文字変換を行います。
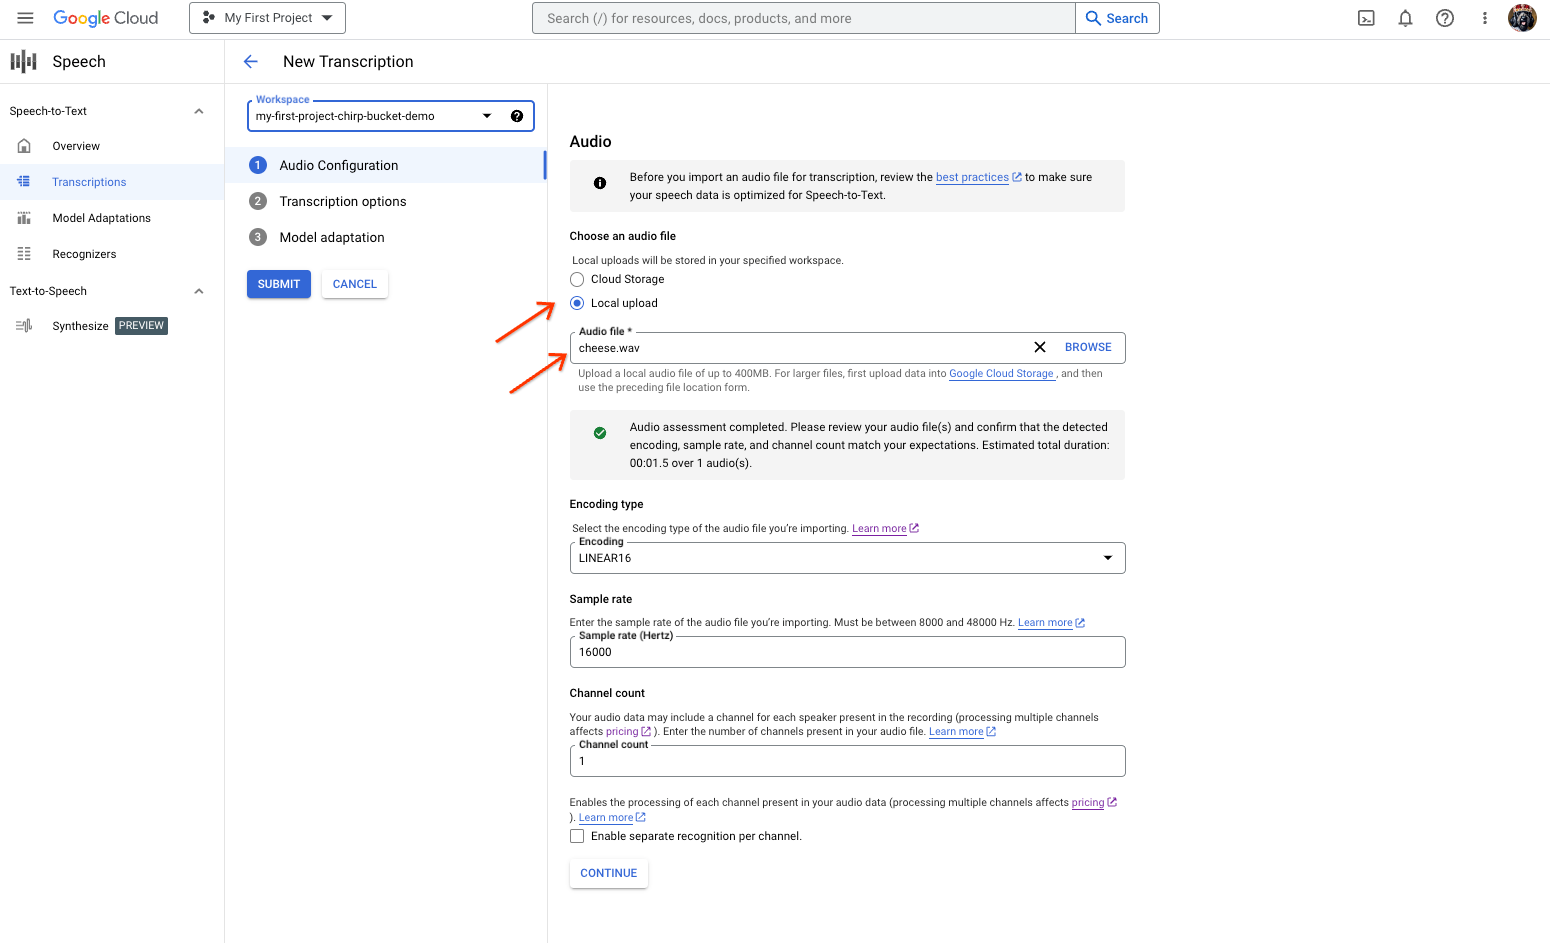
a. [New Transcription] ページで音声ファイルを選択します。[Local upload](アップロード)または [Cloud Storage](既存の Cloud Storage ファイルの指定)を選択します。注: 音声ファイルのパラメータは自動的に評価されます。
b. [続行] をクリックして、[Transcription options] に移動します。

c. 以前に作成した認識ツールから、Chirp で認識に使用する音声言語を選択します。
d. [モデル] プルダウンから、[Chirp - Universal Speech Model] を選択します。
e. [Recognizer] プルダウンで、新しく作成した認識ツールを選択します。
f. [送信] をクリックし、Chirp を使用して最初の認識リクエストを実行します。
Chirp の音声文字変換の結果を表示します。 a. [音声文字変換] ページで、音声文字変換の名前をクリックして結果を表示します。
b. [Transcription details] ページで、音声文字変換の結果を表示し、必要に応じてブラウザで音声を再生します。
クリーンアップ
このページで使用したリソースについて、Google Cloud アカウントに課金されないようにするには、次の操作を行います。
-
作成した認証情報を取り消して、ローカル認証情報ファイルを削除します。
gcloud auth application-default revoke
-
(省略可)gcloud CLI から認証情報を取り消します。
gcloud auth revoke
コンソール
- In the Google Cloud console, go to the Manage resources page.
- In the project list, select the project that you want to delete, and then click Delete.
- In the dialog, type the project ID, and then click Shut down to delete the project.
gcloud
Delete a Google Cloud project:
gcloud projects delete PROJECT_ID
次のステップ
- 短い音声ファイルの文字変換を行う。
- ストリーミング音声を文字に変換する方法を学習する。
- 長い音声ファイルを文字に変換する方法を学習する。
- ベスト プラクティスのドキュメントで、最高のパフォーマンスと精度を実現するための方法やヒントを確認する。
-
-