

This repo is the java conversion of the well known chatGPT + Enterprise data code sample originally written in python. It demonstrates a few approaches for creating ChatGPT-like experiences over your own data using the Retrieval Augmented Generation pattern. It uses Azure OpenAI Service to access the ChatGPT model (gpt-35-turbo), and Azure Cognitive Search for data indexing and retrieval.
The repo includes sample data so it's ready to try end to end. In this sample application we use a fictitious company called Contoso Electronics, and the experience allows its employees to ask questions about the benefits, internal policies, as well as job descriptions and roles.

- Chat and Q&A interfaces
- Explores various options to help users evaluate the trustworthiness of responses with citations, tracking of source content, etc.
- Shows possible approaches for data preparation, prompt construction, and orchestration of interaction between model (ChatGPT) and retriever (Cognitive Search)
- Settings directly in the UX to tweak the behavior and experiment with options

This repo is focused to showcase different options to implement semantic search using RAG patterns with Java, Azure OpenAI and Semantic Kernel. It is still under active development. Below you can find the status of the python original repo convertion and the planned features.
| RAG Approach | Description | Java Open AI SDK | Java Semantic Kernel |
|---|---|---|---|
| RetrieveThenRead | Use Cognitive Search and OpenAI APIs directly. It first retrieves top documents from search and use them to build a prompt. Then, it uses OpenAI to generate an answer (completion) for the user question | ✅ | ❌ |
| ChatReadRetrieveRead | Use Cognitive Search and OpenAI APIs directly. It first uses OpenAI to generate a search keyword for the chat history and then answer to the last chat question replicating RetrieveThenRead same steps. | ✅ | ❌ |
| ReadRetrieveRead | Use java Semantic Kernel framework to orchestrate Cognitive Search and OpenAI as native and semantic functions respectively. A sequential planner is used to generate steps orchestation for answering the user question. | ❌ | ✅ |
| ReadDecomposeAsk | Like ReadRetrieveRead but use Java Semantic Kernel built-in vector storage and search capabilities to simplify RAG implementation when vector similarity search is used to retrieve relevant documents to answer a question. | ❌ | 🔜 |
IMPORTANT: In order to deploy and run this example, you'll need an Azure subscription with access enabled for the Azure OpenAI Service. You can request access here. You can also visit here to get some free Azure credits to get you started.
AZURE RESOURCE COSTS by default this sample will create Azure App Service and Azure Cognitive Search resources that have a monthly cost, as well as Form Recognizer resource that has cost per document page. You can switch them to free versions of each of them if you want to avoid this cost by changing the parameters file under the infra folder (though there are some limits to consider; for example, you can have up to 1 free Cognitive Search resource per subscription, and the free Form Recognizer resource only analyzes the first 2 pages of each document.)
- Java 17
- Maven 3.8.x
- Azure Developer CLI
- Python 3+
- Important: Python and the pip package manager must be in the path in Windows for the setup scripts to work.
- Important: Ensure you can run
python --versionfrom console. On Ubuntu, you might need to runsudo apt install python-is-python3to linkpythontopython3.
- Node.js
- Git
- Powershell 7+ (pwsh) - For Windows users only.
- Important: Ensure you can run
pwsh.exefrom a PowerShell command. If this fails, you likely need to upgrade PowerShell.
- Important: Ensure you can run
NOTE: The initial cognitive search documents indexing process (triggered as post provision task by azd) is still using the original python scripts. That's why python is still required to run this java example.
NOTE: Your Azure Account must have
Microsoft.Authorization/roleAssignments/writepermissions, such as User Access Administrator or Owner.
Execute the following command, if you don't have any pre-existing Azure services and want to start from a fresh deployment.
- Run
azd auth login - Run
azd up- This will provision Azure resources and deploy this sample to those resources, including building the search index based on the files found in the./datafolder.- For the target location, the regions that currently support the models used in this sample are East US, France Central, South Central US, UK South, and West Europe. For an up-to-date list of regions and models, check here
- After the application has been successfully deployed you will see a URL printed to the console. Click that URL to interact with the application in your browser.
It will look like the following:

NOTE: It may take a minute for the application to be fully deployed.
- Run
azd env set AZURE_OPENAI_SERVICE {Name of existing OpenAI service} - Run
azd env set AZURE_OPENAI_RESOURCE_GROUP {Name of existing resource group that OpenAI service is provisioned to} - Run
azd env set AZURE_OPENAI_CHATGPT_DEPLOYMENT {Name of existing ChatGPT deployment}. Only needed if your ChatGPT deployment is not the default 'chat'. - Run
azd env set AZURE_OPENAI_GPT_DEPLOYMENT {Name of existing GPT deployment}. Only needed if your ChatGPT deployment is not the default 'davinci'. - Run
azd up
NOTE: You can also use existing Search and Storage Accounts. See
./infra/main.parameters.jsonfor list of environment variables to pass toazd env setto configure those existing resources.
- Run
azd login - Change dir to
app - Run
./start.ps1or./start.shor run the "VS Code Task: Start App" to start the project locally. - Wait for the spring boot server to start and refresh your browser to localhost:8080
You can run this repo virtually by using GitHub Codespaces or VS Code Remote Containers. Click on one of the buttons below to open this repo in one of those options.
- In Azure: navigate to the Azure WebApp deployed by azd. The URL is printed out when azd completes (as "Endpoint"), or you can find it in the Azure portal.
- Running locally: navigate to localhost:8080
Once in the web app:
- Try different topics in chat or Q&A context. For chat, try follow up questions, clarifications, ask to simplify or elaborate on answer, etc.
- Explore citations and sources
- Click on "settings" to try different options, tweak prompts, etc.
if you don't want to use azd to build and deploy the app, a GitHub automated CI pipeline is provided in .github/workflows/app-ci.yml. Some notes about the CI pipeline design:
- It uses a "branch per environment approach". The deploy environment name is computed at 'runtime' based on a git branch. You can check branch/env-name mapping logic in the "set environment for branch" step (line 29). The current implemented logic maps everything to a dev like environment. Therefore on each git push on the
main branchthe pipeline is triggered trying to deploy to an environment calledDevelopment. For more info about GitHub environments and how to set specific env variables and secrets read here. - GitHub environment variables and secrets are used to configure development environment specific configuration. They need to be configured manually in github repository settings:
AZUREAPPSERVICE_PUBLISHPROFILEis used to store the azure app service publish profile configuration securely.AZUREAPPSERVICE_APP_NAMEis used to store the azure web app resource name generated during infra arm deployment.
To properly configure automated build and deploy for both backend and frontend components follow below steps:
- Go to your forked repository in GitHub and create an environment called 'Development' (yes this is the exact name; don't change it). If you want to change the environment name (also adding new branches and environments, change the current branch/env mapping) you can do that, but make sure to change the pipeline code accordingly in
.github/workflows/app-ci.yml(starting line 29) - Create 'Development' environment secrets for the azure web app hosting both frontend and backend publish profiles. You'll need to copy paste the xml content from the .PublishSettings file into the secret value:
- Create a secret with name
AZUREAPPSERVICE_PUBLISHPROFILEand set the Value field to publish profile of the azure web app
- Create a secret with name
- Create 'Development' environment variables for azure web app resource name:
- Create a variable with name
AZUREAPPSERVICE_APP_NAMEand set the Value field to the azure web app resource name
- Create a variable with name
- For each commit you push check the status of the triggered pipeline in the GitHub Actions tab, you should see a pipeline has been triggered for the specific commit. If everything is ok you should see green checkmark on both build and deploy jobs in the pipeline detail like below:

Azure Devops can also be used to build and deploy the app. Azure Devops automated CICD pipeline is provided in .azdo/pipelines/app-ci.yaml. Some notes about the CICD pipeline design:
- Similar to Github action above, this pipeline uses branch per environment approach as well.
- Azure Devops library variable groups and variables are used to configure environment specific configuration. They need to be configured manually in Azure Devops Pipeline Library.
- Navigate to Pipeline / Library
- Add new variable group
azureSearchOpenAiDemoJavaDevand variableazureAppServiceName. Put the name of the Azure App Service for development as the value. - Add new variable group
azureSearchOpenAiDemoJavaProdand variableazureAppServiceName. Put the name of the Azure App Service for production as the value.
Connect Azure Devops to the Github Repo:
- Create a new pipeline.
- For 'Where is your code?' Select Github.
- Go through the Github App authentication process Github App.
- Select Existing Azure Pipeline YAML file.
- Point dropdown values to the path
.azdo/pipelines/app-ci.yaml. - Do not Run but Save the pipeline. Once saved, you will see dev and prod enviornment got automatically created under Pipeline / Enviornments. You can setup Approvals and Checks within enviornments if necessary.
Connect Azure Devops to Azure:
- Add a Service Connection following this guide to allow Azure Devops pipeline to connect to your Azure resources /App Service.
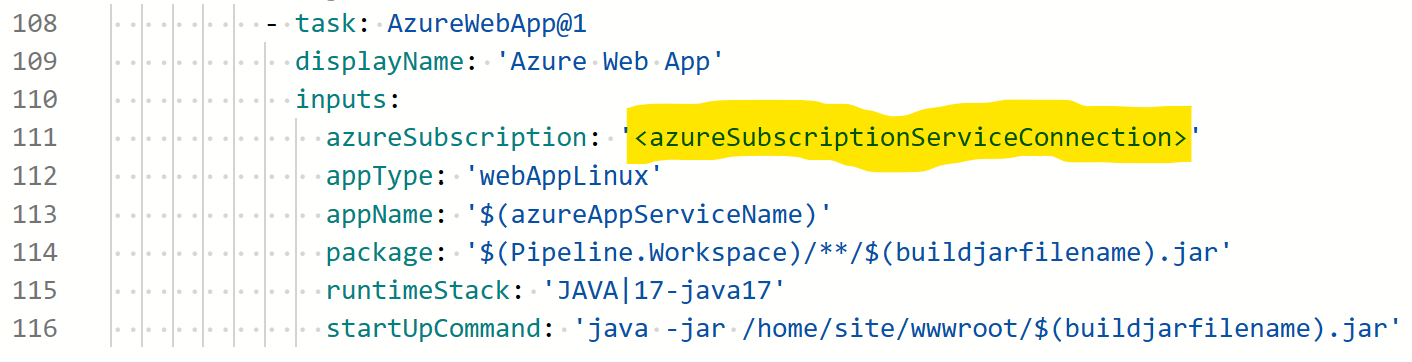
- Modify
.azdo/pipelines/app-ci.yaml'' and replace it with the name of the Service Connection.


You can now either run the pipeline manually or commit to a branch to trigger the pipeline.

The repo includes sample pdf documents in the data folder. They are ingested in blob container and indexed in azure cognitive search during infra provisioning by azure developer cli post provision hooks (see line 23 in azure.yaml)
If you want to chat with your custom documents you can:
- Add your pdf documents in the data folder.
- Open a terminal and cd to repo root folder. Example
cd path/to/your/custom/dir/azure-search-openai-demo-java - Run
./scripts/prepdocs.ps1if you are on windows or./scripts/prepdocs.shon linux - Wait the script to complete. This is not a 'delta' process, it's not updating only the new files you've added. Instead on each run all documents in data folder will be ingested.Feel free to add new files you want to ingest and delete/move the old documents from the data folder. Once you've run the script and it completes successfully, cognitive search index have been updated and stored (until you want to manually delete it from your azure cognitive search instance)
- if ingestion and indexing is completed successfully you should see a message like this


- Revolutionize your Enterprise Data with ChatGPT: Next-gen Apps w/ Azure OpenAI and Cognitive Search
- Azure Cognitive Search
- Azure OpenAI Service
Note: The PDF documents used in this demo contain information generated using a language model (Azure OpenAI Service). The information contained in these documents is only for demonstration purposes and does not reflect the opinions or beliefs of Microsoft. Microsoft makes no representations or warranties of any kind, express or implied, about the completeness, accuracy, reliability, suitability or availability with respect to the information contained in this document. All rights reserved to Microsoft.
Why do we need to break up the PDFs into chunks when Azure Cognitive Search supports searching large documents?
Chunking allows us to limit the amount of information we send to OpenAI due to token limits. By breaking up the content, it allows us to easily find potential chunks of text that we can inject into OpenAI. The method of chunking we use leverages a sliding window of text such that sentences that end one chunk will start the next. This allows us to reduce the chance of losing the context of the text.
How can we upload additional PDFs without redeploying everything?
To upload more PDFs, put them in the data/ folder and run ./scripts/prepdocs.sh or ./scripts/prepdocs.ps1. To avoid reuploading existing docs, move them out of the data folder. You could also implement checks to see whats been uploaded before; our code doesn't yet have such checks.
Here are the most common failure scenarios and solutions:
-
The subscription (
AZURE_SUBSCRIPTION_ID) doesn't have access to the Azure OpenAI Service. Please ensureAZURE_SUBSCRIPTION_IDmatches the ID specified in the OpenAI access request process. -
You're attempting to create resources in regions not enabled for Azure OpenAI (e.g. East US 2 instead of East US), or where the model you're trying to use isn't enabled. See this matrix of model availability.
-
You've exceeded a quota, most often number of resources per region. See this article on quotas and limits.
-
You're getting "same resource name not allowed" conflicts. That's likely because you've run the sample multiple times and deleted the resources you've been creating each time, but are forgetting to purge them. Azure keeps resources for 48 hours unless you purge from soft delete. See this article on purging resources.
-
You see
CERTIFICATE_VERIFY_FAILEDwhen theprepdocs.pyscript runs. That's typically due to incorrect SSL certificates setup on your machine. Try the suggestions in this StackOverflow answer. -
After running
azd upand visiting the website, you see a '404 Not Found' in the browser. Wait 10 minutes and try again, as it might be still starting up. Then try runningazd deployand wait again. If you still encounter errors with the deployed app, consult these tips for debugging Flask app deployments and file an issue if the error logs don't help you resolve the issue. -
After running
./app/start.ps1on windows power shell you getThe file C:\path\to\azure-search-openai-demo-java\app\start.ps1 is not digitally signed. You cannot run this script on the current system. Try to runSet-ExecutionPolicy -Scope Process -ExecutionPolicy Bypassand try to re-run./app/start.ps1 -
After running
./app/start.ps1or./app/start.shyou getFailed to execute goal org.apache.maven.plugins:maven-compiler-plugin:3.10.1:compile (default-compile) on project myproject: Fatal error compiling: invalid target release: 17it means you are not using JDK 17 but a previous versions. Be sure to setJAVA_HOMEenv variable to your java 17 installation directory and update your 'PATH' env variable to have java 17 bin folder as first occurence in the executables directories. more info here