Showing posts with label Tutorial. Show all posts

Wednesday, December 21, 2011

...Retro nyer Rabu #2...

Salam,

ehh..laju nyer dah rabu! Dah nak dekat hujung minggu. Yay! Tapi...saya masih belum bersedia untuk entry 'Retro nyer Rabu'...Adeh!

cool puan terompah.. cool.. mix & match je baju yang ade. Janji kite rasa retro! Then orang lain akan turut rasa retro kottt.. teehee

So, hari ni... attire saya ke office:

Tampak biasa je kan.. tapi ape yang menarik, korang boleh DIY skirt yang saya pakai nih. Jimat!


Kalau ade yang ingin menghasilkan skirt ini sendiri, boleh lah rujuk tutorial 5-minute skirt  atau Half a circle skirt sewing tutorial . Sangat mudah & murah!


Happy sewing~~~ d[^_^]b


Friday, February 18, 2011

...Managing my ka-ching...

Salam & Hi to all my readers.. Apa khabar? I'm so sorry for my long silent as for the time being I'm busy with school & all tahlil activities.  However, after 3weeks without update, I feel like loosing u..Rasa dull je hidup. cewah.. As for that, today I had force myself to write something useful for you. So please read until the end. (Penat nih menaip hingga homework pon di anak tiri kan ;)

First of all, in my opinion having a business is easy but to maintain them are far from easy. Agree?

One of the key element that every businessman have to take care is the accounting part. No matter how small ur business was, managing your money is the most critical part to indicate whether ur business are making money or losing money. Every cent is counted.

Cash fuel drives you in business just as jet fuel keeps a plane aloft. A pilot is very careful to accurately predict the fuel requirements. You should place the same importance on cash flow control because if, at any point in the future, you run out of fuel, like the pilot, you've got a BIG problem.

Cash flow control is a simple method of projecting your future needs for cash. However, in handling these cash, discipline is highly needed to keep business on track & save money for the sake of company's future growth. Not our personal growth je ye... Each money that come in & out must be carefully noted in your account. Kalau duit asyik out je, parah tu...

So, here I provide u a simple example of account that may help you. (click here for original source)


Base on the picture above, for example in January. It stated that your starting cash in hand is RM1000, plus your sales (IN)  is RM1000. To this you add IN items and subtract the OUT items, which results in the cash at end of the month (RM1000+1000-800 = RM1200). The cash at the end of month becomes the starting cash for the next month. 

At the end of the day, these great tool would help you predict your future needs for cash before the needs arise.Best kan?


Good Luck~~~ d[^_^]b


p/s: Here are my personal jugment on my account:
  • If I sees that my cash balance is positive = Good business
  • If I sees that my cash balance is 0 = Just continue my business & work harder
  • If I sees that my cash balance is negative = I'll feel that close or change my core business is better before disaster happen ;)

Sunday, November 28, 2010

...Blog's BMI...

ape khabar? sihat? blog sihat? bagi yang kurang pasti dengan kesihatan blog anda, ape kate kite cuba gadget yang menjadi kegemaran saya ini..  'Penimbang berat badan untuk masa hadapan'...*sebut dalam nada doremon ye..ehehe

cara-cara menggunakannya:

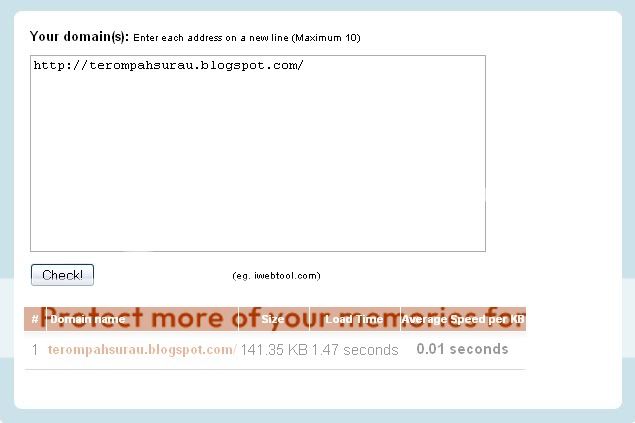
1) masuk kan alamat blog anda dalam kotak yang disediakan
2) tekan button check seperti dalam gambarajah dibawah,

penimbang

if result nyer <150kb, then blog anda masih dalam lingkungan BMI = UNGGUL...tapi kalau lebih, tindakan drastik perlu diambil seperti mengurangkan widget-widget sampingan yang tak penting, saiz picture yang di upload, jumlah entry per page dan mungkin bagi yang lebih advance pengetahuan nyer, boleh lah praktik kan ilmu SEO yang anda ada..


Your domain(s): Enter each address on a new line (Maximum 10)


(eg. iwebtool.com)


Selamat mencube~~~ d[^_^]b


p/s: Selain daripada content yang menarik, masa loading adalah sangat critical dalam menarik minat pengunjung kerna Penantian satu penyeksaan

Tuesday, April 20, 2010

...22 more wish to go...

at last, saya berjaya memasak sebiji kek tanpa setompok pon kesan hangit..horay~~
semua atas jasa baik Guru ku yang garang lagi bengis, syahira.. rarr.. *jgn marah babe, aku tulis mengikut arahan ko je. ko yang nak pangkat ni kan. Jadi nah aku bagi ^^

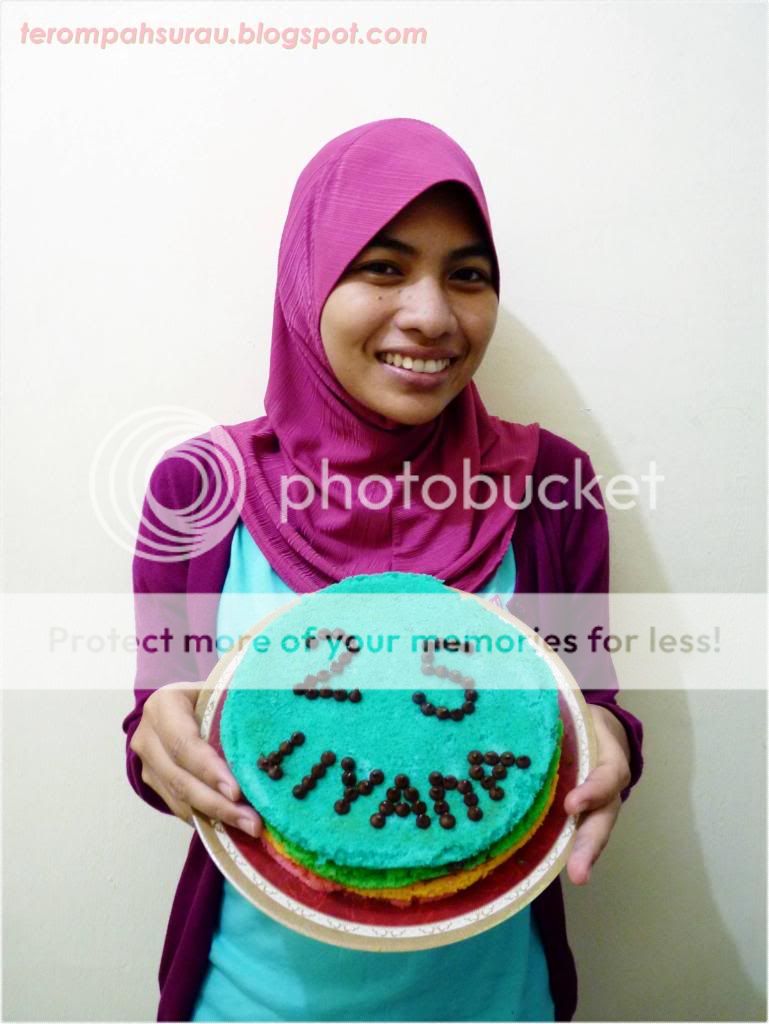
Anyway, moh kiter usha kek hasil air tangan saya buat julung-julung kali ini  ^_^

siap
jeng je jeng..
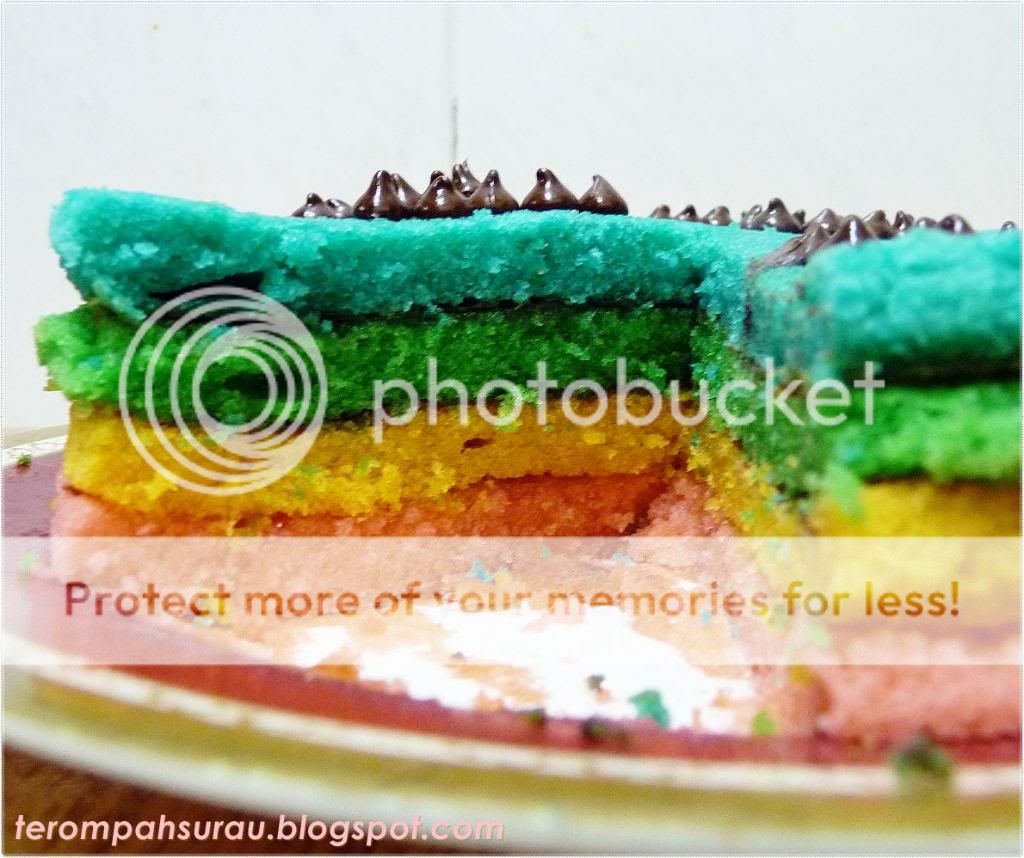
my rainbow cake..100% made by Liyana. wiii~~~~ 
*bukan kek nila ye.. korang jangan edit lak name iyer  ^.^


sebenarnyer kek ni kek butter biasa je, tapi hasil editing dengan pertambahan warna, kek butter yang dulu nyer dull kini tampak lebih ceria dan lazat untuk dinikmati seisi keluarga..cewahh..macam iklan kek tv1 lak..ahaha.. jadi sempena masih dalam mood beria ni, suke lah saya untuk berkongsi resipi kek pelangi kegemaran ramai ni ~_^


bahan2
bahan-bahan nyer:
250 gram mentega
200 gram gula kaster
250 gram tepung naik sendiri
4 biji telur
secubit bicarbonate
4 pewarne kesukaan (cth: merah, kuning, hijau, biru)
choclate chip
whipping cream or jem


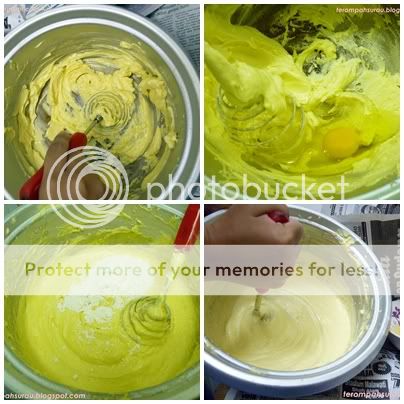
putar bahan
Mula-mula gaul mentega dengan gula kaster dan secubit bicarbonate dengan hand mixer sehingga putih dan lembut. *tapi sebab rumah bujang ni serba kekurangan, kiter pukul lah mentega dengan mixer manual je ye ^.^  Pastu, kiter masukkan telur dan diselang seli dengan tepung.  Campur sedikit susu UHT supaya adunan anda menjadi cair sedikit (optional)


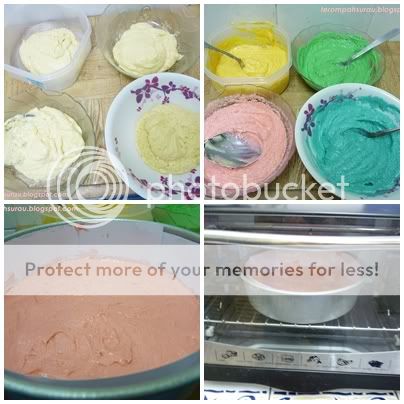
lapisan
Bila semua bahan adunan sudah bergaul mesra, kiter bahagikan adunan kepada 4 bahagian. Siap je dibahagi, korang boleh lah titikkan adunan dengan pewarna kegemaran korang seperti dalam gambar diatas. Kemudian, masukan adunan korang kedalam acuan yang siap disapu mentega untuk mengelakkan kesusahan pengeluaran kek yang telah dimasak nanti..Bakar dalam ketuhar selama 10 min pada suhu 180 selsius..dan untuk pastikan kek dah masak, cucuk kek korang dengan garfu. If ade lg tepung yang terlekat digarfu,makne nyer kek tak masak lagi.Jika garfu yang dicucuk bersih bila ditarik, kek dah masak~~ Tapi Ingat, setaip warna adunan dibakar secara berasingan untuk mendapatkan wajah kek yang jelita ^-^


nyum nyum
Lastly, setiap lapisan yang sudah dimasak berasingan ini akan di'glue' bersama menggunakan jem atau whipping cream kegemaran anda. Dan untuk menambah hiasan topping, just taburankan saja choclate chip diatas permukaan kek.. hurmm..lazat   >.<


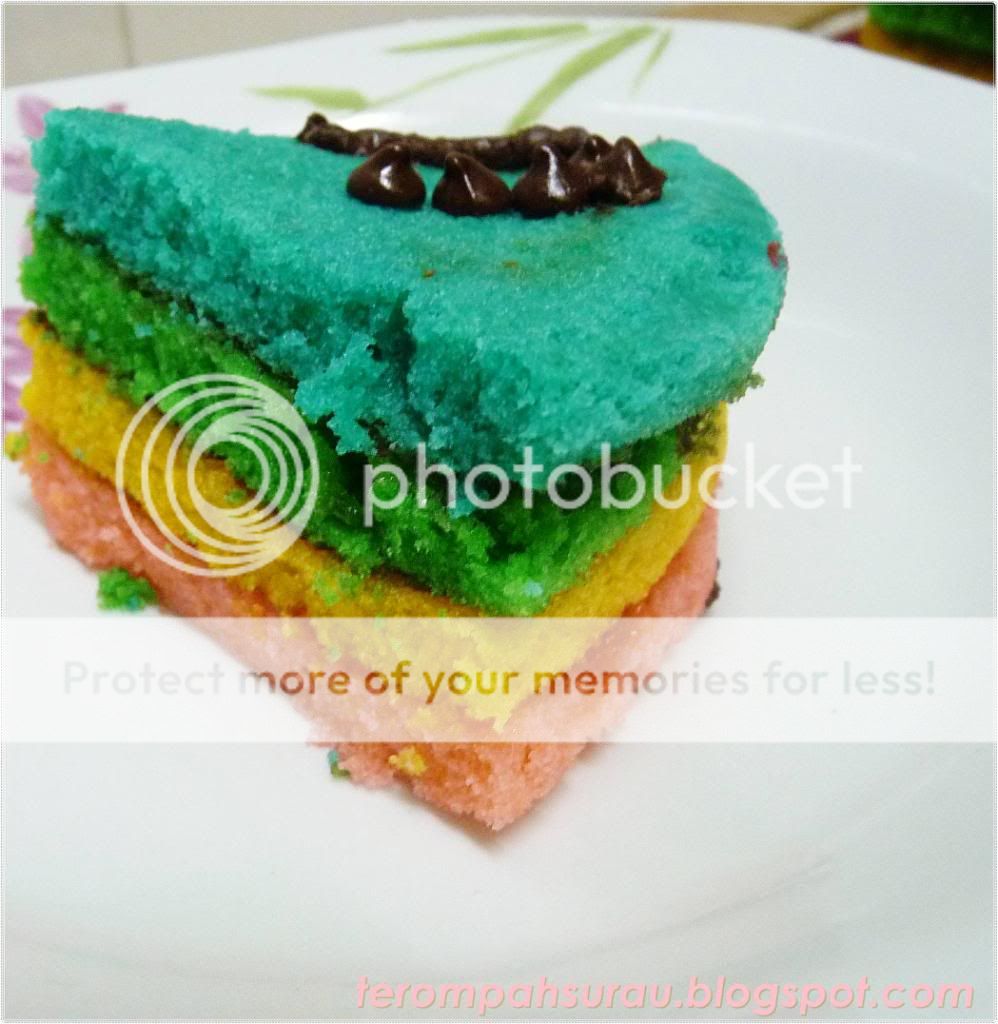
my piece
Now, kek ini sedia untuk dimakan. nyum nyum~~~

Selamat mencuba~~~ d[^_^]b

p/s: to read last entry on my full wish list. click here  

Thursday, December 24, 2009

...My craft class AGAIN!...

A good news to any of u that have miss my last class...


Thanks to JUNK + LEVI'S , this weekends, i'll be handling another craft class at:

Levi’s® Store @ Suria KLCC, KL
( 26 Dec, 3pm-6pm)
&
Levi’s® Flagship Store @The Gardens,Mid Valley City,KL
(27 Dec, 3pm-6pm)


to share my ideas on how to full use ur old jeans..
come COME COMEEEE everyone~~~
lets meet up and enjoy our weekend with this one of a kind class ;)


See you there~~~ d[^_^]b

Wednesday, December 16, 2009

...Liyana's craft class in Harian Metro...

Just a small sharing with Harian Metro's readers on
how to make ur own flower pot's skirt..
(kalau ade yg xbrape clear dgn arahan nyer, just let me know k :)


Enjoy~~~ d[^_^]b

Friday, August 28, 2009

...Make ur own Handphone sleeve...

Nk menguji bakat terpendam korang tak ujung mgu nie?? nak nakK NAKK (jwpn yg di'angan2'kan :)

ye lah, nk kuar umah malas sbb dlm orientasi puasa lg kan.. pastu nk buat kuih raya lak, awal lg.. kang ade bakat kuih abis sblm raya.. jadi apekah yg perlu dibuat ujung mgu nie?? ehehe.. Jengjejeng..

ape kate kiter buat baju raya utk handphone@ipod kite.. pasti menawan utk dibuat melaram lebaran ni..ecece.. ayat xleh blah.. sabar je lah korang yea..

k lah.. masa sgt mencemburui kiter.. Jd, ayuh kiter mulakan kelas jahitan kiter pada hari ni.


1. Firstly, measure your handphone's size (leght, width & tall).. Then cut your Felt and Cotton material as needed.. (jgn lupe lbh kan lah sket ukuran supaya muat mengikut ketebalan hs korang ye)

2. Then decorate front & back view of your sleeve to make your sleeve one of a kind.
(kat sini, cik terompah agak malas.. deco belah depan je..pastu letak butang kat blakang utk close casing nanti. Plus, utk lbh sempoi lg, just gune skill jahitan jelujur ye rakan2)

3. After all of your decoration process end, lets combine this pieces together.. Chaiyo!
(last jahitan, jgn lupe jahitkan tali utk close casing. n kalau xpandai cantum, sile lah besar kan mata anda m'ngusha cara jahitan diatas.. tp mcm xnmpk je kan, buat2 lah nmpk ye rakan2. kedaifan kamera amatlah dikesali)

4. Now, your last product ready to be carry everywhere..Congrats! wiiii~~ (Haruslah riak pada masa nie ye :)

n let me show off my pair..ecece (1 for maxis no, & 1 for digi no.. haha.. silap sbnr nyer.. patot makhluk tu yg wane kuning, background ijau..tp terbalik lah puloks..so, abaikan je lah ye)
Slamat mencube!

Enjoy~~~ d[^_^]b

p/s: Ape? nk cik terompah buat kan?? oooo..boleh boleh bolehh.. email ye..ihiks

Saturday, December 27, 2008

...add emo @ ur shout box...

emm..walaupon ilmu ni dh agak lapuk..tp xkire..kene share jugak..sbb ade lg teman tp mesra ku yg br belajar mcm aku..haha..lg pon utk note simpanan sendiri juge..hihi

Firstly, credit tu chokilala.. atas ilmu nyer..kalu note ku ini kurg difahami, sile lah ke page beliau utk lbh pemahaman..hihi..

k lah, cik tora mula kan kelas ye..
  • mula-mula sediakan bahan2 nyer ye..pastikan kamu ade akaun bg ShoutMix..kalu xde, sile lah daftar d[^_^]b
  • then, at the main page settings, ade 4 pilihan menu–Quick Start, General, Display & Security..Kiter kasi tekan itu button menu Smileys under Display ye rakan-rakan.hihi


  • After dah click, masukkan url image yg kamu nak guna pada bahagian Smiley Image URL. (sila host image sendiri. direct linking x digalakkan sbb takut image xkuar. antara free image hosting adalah PHOTOBUCKET dan IMAGESHACK. kamu just upload emoticon yg telah di kidnap dr web ke free image hosting ni, then copy paste url yg dihasilkan)
  • Pada kotak code utk image tu plak boleh la diisi ikut kesesuaian sendiri.. cthnya :gediks:
  • Pada kotal optional, just tinggal'n kosong
  • click add utk upload emo kamu. proses yg sama diulang utk memasang emoticon yg lain & diingat kan,bg basic shoutbox mcm cik tora punyer ni, max 10 smileys teratas je yg akan digunakan.
  • lastly, “SAVE SETTINGS”. Semoga bergumbira bermain di shoutbox sendiri ye..tata d[^_^]b

Thursday, December 4, 2008

...Making a skirt for your flower pot...

I bet that many of us (girls especially) love flowers and skirt...why??? because they are cute =)

So, after a long thought...for my entry in Gisele's Birdie-Know-it-All Tutorial contest, i choose to have a tutorial on how to make a flower pot's skirt.

I can confirm you that it will be the simplest, nice,unique,economic and fun tutorial. What is more important..this tutorial can be accomplished by everyone!!Even though you are not a pro in sewing..like me..:mHihi: or you do not have a sewing machine, you still can make your own pot's skirt in just a few hours.
Before we start our tutorial, i would like to introduce to all of you with Gisele's Birdie-Know-it-All Tutorial contest...

Did you all ever checked out about this great contest? Actually, it is superb because it's not only for sewing craft, it also include for those who love to cook, designing home decoration or even making handmade cards and dolls. If you are into handmade, I think you should join too. Click the cute logo to find out more about the contest and amazing prizes!


Now, we can start our sewing class...

step 1:

collect all the tools we need


step 2:

then, sketch our own flower pot's skirt..


step 3:

Take the measurement of our flower pot and make a draft for the skirt's component.


step 4:

Now, we can cut our jeans according to the measurement (reminder; don't cut your favorite jeans) If you don't have any wasted jeans, you can always buy this pieces of jeans from any jeans outlet... You can also use any other fabric that you like.


step 5:

Now, we can start to sew our pot's skirt =) You can choose threads from any colour as long as it can make your skirt look more gorgeous..

Firstly, sew the skirt flirty and each of skirt's end
Then, sew the skirt and belt together

Next, we can sew the button at each end of the skirt..It is optional, you also can use Velcro or zip for the skirt.


wow..we are almost in the finishing step. Don't you excited?? =)
Now, to decorate the pot's skirt, we can make our own ribbon by a piece of jeans and sew it.

step 6:

For the final touch, I choose to put some diamond on it because I love Bling Bling..hihi.. if you do not have a diamond it can be replaced by buttons, flower stickers or beads to make the skirt look more glamorous...it depends on your creativity... Lastly, give a big round of plows to ourselves...wiiiiii

Bling Bling skirt


Before After


My flowers looks lovely on my favorite desk..

p/s: I can't get it on video as I don't have any video cam =(

anyway, I'm very happy to hear comment from all of you..enjoy!! d[^_^]b

Monday, December 1, 2008

...Makanan favourite cik liyana..ahaks...

letih nyer belajar set up kedai online ni..ye lah..org serba xtau pasal biz alam maya ni kan..n xde tok guru..so I have to take a long run..sume kene wat sndr n effort yg besar..byk policy n prosedure perlu di ambil port..

ehh...berbalik pada tajuk post..ari ni nk share mknan kegemaran cik liyana..ihihi..

nasi puteh panas berlaukkan ikan singgang goreng dengan kacang botol segar dicicah dgn budu & tempoyak....

wahhhh..lazat U.. betul, I tak tipu.. senang je jage I ni.. pandai msk ikan singgang goreng je yg penting.. gerenti I tak cari lain..ahaha..( silap dialog ni..patot nyer dialog ni future husband aku ckp kat aku...ahaha..biar lah..layan je lah aku berdrama)

so, cik liyana nk share mcm mane nk msk ikan singgang goreng..sbb ni je yg aku terror wat ms ni..hihi.. (kpd calon2 bakal suami yg ade aweks minat mknan yg same..blajar2 lah ye)

bahan-bahan nyer:

3 bijik bawang puteh
1 bijik bawang merah (nk letak lbh pon bleh)
4 ekor ikan selar kuning yg dh dibersihkan ye (optional...xkisah jumlah n jenis ikan)
lengkuas (agak-agak besar ibu jari)
garam secukup rasa
gula merah secukup rasa (nk gune gula pon ok)

cara-cara nyer:

campak je sume bahan2 dlm periuk belanga mak kiter..pastu tambah skit air sampai ikan kiter tu leh berenang.. then kiter rebus sampai ikan tu masak... bg yg suke mkn secara berkuah.. sampai tahap ni pon dh ok..sedap di mkn..tp aku suke amik ikan yg siap disinggang ni utk digoreng pulak..sbb biler goreng, rs masam manis ikan lebih terasa..

emm...sempoi je kan..ye lah..org bujang..kepada yg berminat. selamat mencube d[^_^]b

Monday, November 10, 2008

...Sharing is caring...

seperti yg dipinta rakan2.. klas make-up blog bermule (hehe..padahal tiru org jugak)..xkisah la, janji blog korg meletup..hehe
:mBom:

cloud label tu dipanggil blogumus secara technical nyer..thanks to amanda yg mereka coding yg telah di edit dr penggunaan kat wordpress ke dlm blogspot.. K, 1st skali korang kene ade function label, kalu xde g buat dl ye..then, g layout n edit html. utk keselamatan, save dulu html templet coding lame sblm sebarang perubahan!! (utk save, click at download full template)

slps itu, cr ayat ni dlm karangan html korang


after dh jupe, copy sume coding (click here) ni n paste menggantikan ayat td

coding ni bleh diedit ikut kreativiti korg k..

utk edit edit lebar, tinggi, warne background cloud..bleh usha kat coding ni
 "tagcloud", "200", "160", "7", "#ffffff");

as for wane abjad die lak ade kat sini...
so.addVariable("tcolor", "0xCC0033");

utk saiz huruf lak, usha kat coding ni (dh diset font 14)....
expr:href='data:label.url' style='14'

after sume process copy paste n edit selesai, preview dl, kalu cloud tag berjaya walaupon xberpusing2 lg, maknenyer TAHNIAH..anda berjaya..bleh la save template..jika xberjaya, bleh la merujuk trus ke page blogger buster or blogger ni.. mungkin ade perbezaan cara skit, tp basicly coding lebih kurang sama..selamat mencube d[^_^]b

credit to:
amanda
wa2nlinux

Related Posts Plugin for WordPress, Blogger...