Showing posts with label Stars. Show all posts

Wednesday, December 15, 2021

Festive Fun

Hi!  Back with some inspiration for the holidays!  The Funkie Junkie Boutique Challenge team is sharing some inspiration for festive fun. Here is how Jenny describes it: 

"As it gets so busy this time of year we will not be setting a challenge theme or requesting submissions - in it's place the Design Team are sharing some fun festive makes with you. Enjoy!"

I am fascinated with gold embossing powder.  I love the idea of adding a luxury feel with gold embossing powder.  This idea started with gold embossing powder, stars, and stamps.  

This idea led to many stars with many layers of gold embossing powder.  After that I inked up the stamp I wanted to imprint with Versamark watermark ink.  I then heated up the star until the embossing powder was liquid.  Then quickly stamp into the embossing powder. 

After it cools you can pull the stamp out and you will have a beautiful imprint.  I did this multiple times with different stamps and sizes of stars. 

That led to many sizes of stars with a variety of imprints of leafy greens and holly.  Then I needed to pull them together somehow.  Why not a floral pick?  That could be placed in a bunch of flowers or even a poinsettia?

I couldn't get a picture without a flash but you get the idea. :)  It looks beautiful against the vibrant poinsettia flowers.   I can't wait to get a bunch of flowers to mix it in with to put on our holiday table.  

Thanks for stopping by and please pop over to the Funkie Junkie Boutique Challenge Blog to see all the holiday inspiration from the fabulous design team! 

Happy Holidays! 

Suzz

Products: 


Wednesday, January 8, 2020

Let's Play Tic Tac Toe

Happy New Year!  The Funkie Junkie Boutique Challenge is back with Cec hosting a fun game of Let's Play Tic Tac Toe!
Stampers Anonymous Christmastime #2 Stampers Anonymous Tiny Toadstools Ranger Embossign Powder Tinsel For the Funkie Junkie Boutique

Here is Cec's description of the challenge:

"Let's play a game of Tic Tac Toe for this first challenge of the year. Choose any vertical, horizontal or diagonal line from the graphic below and create a vintage or shabby chic project using all three items on your chosen line. In addition to using all three items you must include a copy of the graphic in your post and tell us which line you chose."


There were a variety of choices here and I was inspired by the Layers, Bling and Die Cuts.  Although I had lots of the squares covered!!

Stampers Anonymous Christmastime #2 Stampers Anonymous Tiny Toadstools Ranger Embossign Powder Tinsel For the Funkie Junkie Boutique

 I was so inspired I made two versions of the same card....

Stampers Anonymous Christmastime #2 Stampers Anonymous Tiny Toadstools Ranger Embossign Powder Tinsel For the Funkie Junkie Boutique

These cards started with bits of crochet lace die cut that was accidentally glued to some white cardstock when working on my holiday tags.  I was applying glue and glitter on the die cuts on top of a sheet of white cardstock.  When I pulled up the lacey diecut some stuck to the white cardstock.  I thought it would be fun to incorporate that into a background.  Hence the torn lace. 

I then had some stars laying around on my table and a deer cut out already and everything came together very quickly.  The stars were embossed with silver tinsel embossing powder.

I stamped over the background with music stamps and script stamps.

The rest was just assembling bits and pieces together.  I love when the various bits from projects come together beautifully into a card.

I hope this has you inspired to come play along in our tic tac toe!  The winner will earn a chance to be a Guest Designer at a future date at The Funkie Junkie Boutique blog, and everyone who enters and follows the rules will go into the draw for the chance to win a $25 spending spree at The Funkie Junkie Boutique. There are also Top 3 Badges for three additional outstanding entries, chosen by the Design Team.

Thanks for stopping by!

Suzz

Products: (The Funkie Junkie Boutique)
Sizzix Thinlits Chapter 2 Crochet Tim Holtz
Ranger Distress Stickles Dry Glitter Clear Rock Candy
Idea-Ology - Metallic Droplets
Stampers Anonymous - Christmastime #2
Stampers Anonymous - Tiny Toadstools 
Ranger Embossing Powder - Silver Tinsel 
Ranger Archival Ink - Watering Can
Ranger Distress Oxide Ink - Vintage Photo 
Sizzix Swirling Stars
Jingle Bells
Twine
Idea-Ology Metallic Stickers
Sizzix Stars Dies
Sizzix Winter Wonderland
Memory Box Music Stamp


Wednesday, July 24, 2019

Birthday Candles!

Hi!  The summer is flying by here!  I can't believe we are near the end of July!  The birthday parade is still happening this month so a perfect time to share a few projects with the new Darkroom Door Eclectic Stamp - Candles!

Darkroom Door Eclectic Stamp Candles Rubber Stamp Set Simple Sayings Vol 1 for DarkRoom Door
 I love the simple pattern of them and the fun polka dots!  I started by creating a few mini bags for either party favors or gift cards!   I used a die to cut out the bag shape which required some simple scoring and taping together.  I used a larger paper bag as my material.

I then left them flat and unfolded to play around with the surfaces.  One was painted white acrylic paint on the surface with a splattering of pink dye ink.  The other was stamped with white acrylic paint.   I did the same thing on both sides of the bag. 

I then took out some tissue paper and stamped the candles multiple times on the tissue paper to use as filler for the treat bags.

To add a little whimsy I created mini tags and stamped the happy birthday sentiment.  (I could have used the Thank You sentiment for party favors.) 

I also wanted to create a bigger tag to use as a gift card holder. 
Darkroom Door Eclectic Stamp Candles Rubber Stamp Set Simple Sayings Vol 1 for DarkRoom Door

 I stamped a fun frame stamp first onto the tag and then stamped the candles inside of the frame.  After that I added the sentiment on the top.   I had a leftover sentiment on a piece of cardstock that made a perfect gift card pocket on the reverse side.


I then just stuck the tag inside of the bag to give as a gift with a gift card for a local restaurant.  The recipient is going to be very happy!

Darkroom Door Eclectic Stamp Candles Rubber Stamp Set Simple Sayings Vol 1 for DarkRoom Door

 After I played with the pinks and hints of purple I wanted to play with blues and greens and these two cards formed themselves!

I pulled out the Rubber stamp Set Stars and started stamping stars in a mix of green and blue.  I then stamped the candles in the same colors.  I cut them out and started layering and mixing them up.
Darkroom Door Eclectic Stamp Candles Rubber Stamp Set Simple Sayings Vol 1 Rubber Stamp Set Stars for DarkRoom Door
I thought wouldn't it be fun to give a candle background inside of the outline star.  I stamped a series of the stars and stamped over them with the candles.  I then just cut out the stars that I wanted to use and paired them with a coordinating candle.

I inked up some twine and colored some sequins with alcohol markers to coordinate.  The cards probably took me a lot longer in composition than anything I did for the individual pieces. ;)

I then decided to try a pretty violet color and did a layering of candles with a simple sentiment.

Darkroom Door Eclectic Stamp Candles Rubber Stamp Set Simple Sayings Vol 1 for DarkRoom Door

I stamped the candles multiple times across the card base.  I stamped the candles on another piece of cardstock and then cut them out.  I added a hint of shadows on the base card with a gray watercolor pencil and a waterbrush.  I pop dotted the top layer and alternated the candles. 

The final touch was to add the stickles to give light to the candles! 

Darkroom Door Eclectic Stamp Candles Small Stamp Birthday for DarkRoom Door
I wanted to finish with the card I shared the other day to show how fun it is to use markers to color the candles different colors. 

Thanks for stopping by!

Suzz

Products:  (Linked to Darkroom Door Site)
Darkroom Door - Eclectic Stamps - Candles 
Darkroom Door - Rubber Stamp Set - Stars
Darkroom Door - Rubber Stamp Set - Simple Sayings Vol 1 
Darkroom Door - Frame - Emulsion
Darkroom Door - Small Stamp - Birthday
Ranger Archival Ink - Violet, Thistle, Magenta Hue, Forget-Me-Not, Leaf Green
White Acrylic Paint
Staedtler Watercolor Pencils
Waterbrush
Copic Alcohol Markers
Sequins
Twine, Raffia
Ranger Distress Watercolor Markers
Stickles

Sunday, December 23, 2018

Christmas Cookies

Alas! Today is the day before Christmas Eve and nary a homemade Christmas cookie to be found in the house.   Instead I have been funneling my decorating into some Stars for the Vintage Journey "Star Light Star Bright Challenge".

My stars a mix of styles and designs because I had originally just started playing with stamps that I haven't played with in awhile to create a variety of star tags.

I then realized I only had a few days to wish all of you a beautiful Christmas. I decided to create a few stars to use as decoration on my Christmas dinner plates.
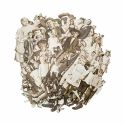
 I love this Artistic Outpost Santa and used him with a glaze of Seth Apter's Vintage Beeswax.   He is stamped on some very old ledger pages from a ledger book and glitzed up with some sparkle and gold bells.

I then pulled out one of my favorite Madonna and Child Stamps.  I have two which are both retired stamps.  This one is from Hero Arts.  I adore this stamp and the original artwork it replicates.
I created the same star with some slight variations. I colored them differently and added a different sticker. Both were glazed with the vintage beeswax and edged with gold krylon pen.

I started with this star just playing with the juxtaposition of the stamps and words.   The funny black strips of cardstock are there because I made this a two sided star with this funny fellow on the front:

The next one is just a mix of stamps highlighting happy memories.
 My last star is all about the twinkling and shining our on lights.  I love the look of joy on the little girl's face:

 My wish for you and your family is to have a blessed holiday with someone you love.  A very Merry Christmas and a Happy New Year!

Suzz

Wednesday, January 10, 2018

Dance

Happy New Year!  I can't believe it is already the 9th and this is my first post for the new year!  I have been creating but not sharing. :)  Today I am sharing a card created for the Frilly and Funkie Challenge hosted by the talented Cec.  The challenge is called Three is Not a Crowd.  Cec describes the challenge as:

"Create a vintage or shabby chic project that includes three of something. Examples of three of something could be three different patterned papers, three colours, three layers, three flowers, three bows - the list goes on. This would be a perfect time to use some of the new supplies you received for Christmas or to make space in your stash by using up old supplies. Just remember to think in multiples of three."

The team will choose their top four picks with the winner being invited to join us as a Guest Designer here at Frilly and Funkie and the next three will receive Top 3 badges to display on their blogs. Everyone who enters and follows the rules will be entered into the draw to have the chance to win a $25 spending spree at The Funkie Junkie Boutique.

I love using multiples of three.  I think it was one of the first lessons I learned in designing my cards was to use three to give it more balance.
The hard part was to decide what three items to showcase on my card?  I  pulled out the Paper Dolls and sorted through the images grouping them by the images.

I was looking for something fun and whimsical because I already had this lovely grungy background I wanted to highlight.  I found these adorable ballerina's in varying size and knew they would be perfect with my background.
I started with a large sheet of mixed media paper for this project.  I pulled out a variety of products I wanted to play with that haven't gotten any use or love for awhile.  And I created these pieces with a few different times of playing with the inks, pastes, and sprays.

I am going to save this tutorial for another time. Creating this background was a lot of fun and I loved pulling out all the various inky supplies and splattering, pasting and splashing the gold and browns!

Come play along with us in this challenge!  There is another week left and all you have to do is show us three of anything on your art!

Suzz

Friday, August 4, 2017

16 Candles

Happy Friday! 

I am sharing a few birthday cards made for some upcoming 16th birthdays.  I went for a mixed media approach on one and a shaker card on the other.


I wanted to splatter it up with some pretty colors and I mixed a few distress oxide inks together and picked it up on my cardstock from the craft mat.

I then stamped the circle (wendy vecchi) and the numbers.  I added the sentiment and then went looking for something to add a little more details and found the old Hero Arts definition stamp for birthday and added that.

I stamped a few stars which then got outlined in black watercolor and white gel pen.  The funky girl was stamped and cut out and pop dotted to give her a little definition along with a few balloons for fun!

Next is a shaker card with a watercolor wash over the surface.


I water colored the paper first with a blend of colors an then cut out the stars in random places. I created a box underneath with foam tape to put my sequins inside of and attached it with a layer of acetate between.

I stampe dthe sentiment before layering and splattered white paint over the surface and added sequins outside as well.

Well I wanted to share the only crafting I have done since my last post!  The summer is flying by and so many family things happening which makes me happy as we get so much time spent together before school starts again.

Suzz


Wednesday, November 9, 2016

Golden Stars

Hi!  Time for the Funkie side of the DT of the Frilly and Funkie Challenge to share their projects.  Pamellia is hosting the current  challenge with a theme of What a Mesh.  She would like you to create a vintage or shabby chic project using  any type of mesh (crinoline, cheesecloth, tulle, burlap, canvas etc).

The team will choose their top four picks with the winner being invited to join as a Guest DT spot  at Frilly and Funkie and the next three will receive badges to display on their blogs. Everyone who enters and follows the rules will be entered into the draw to have the chance to win a $25 spending spree at The Funkie Junkie Boutique.


My project started from a little bit of leftover drywall tape.


We were having a bit of drywall work done and the contractor left a few pieces of drywall tap hanging off of spare piece of plastic.  Of course after he left for the day I had to go and investigate it and happen to take those pieces back to my craft room.

I left them hanging off of my shelf out of the way until I saw the challenge was mesh and then I was thinking of how to use that tape on a project.

Here is he evolution of my drywall tape:

1. Sticky drywall tape. (Hard to see but basically a white/clear color and sticky on one side.)
2. Lay said tape on paper and paint it up with gold paint.
3. Pull up tape and consider the possibilities. (Keep paper with grid painted on for future projects)   
    Place tape on acetate and line up tape pieces to make wider tape pieces.
4. Decide that gold mesh stars would be cool for Christmas card and cut out mesh stars.  Ink up
    edges of stars with gold paint.

Once I had the gold stars I wanted to give depth between them when I overlapped them and decided to place them on pins.  I took a few older button topped pins and broke off the buttons and used the base for my stars. I painted the pins to turn them gold.  I then just used glue dots to attach the stars to the pins.

After that I used gold embossing paste and the music stencil to stencil a background onto white cardstock.

I then painted some tulle to turn it gold and created a tulle pom pom to place in the center of my starburst.  I stuck the various stars into the tulle and layered in white die cut leaves and branches to make the gold pop.

I inked up the sentiment with gold and stamped it onto a tag shaped piece of cardstock.

Don't forget to play along with us in the "What a Mesh" challenge! 

Thanks for stopping by!

Suzz