Showing posts with label Flowers. Show all posts

Friday, March 17, 2023

Spring Frolic

 Hi!  Today I am sharing a card inspired by Spring Frolic!  The Funkie Junkie Inspiration this time around is highlighting spring!  

I started this project with the inspiration of the beautiful new Tim Holtz Transparent Layers. 

The subtle flowers through the beautiful acetate lends itself to a beautiful window.  

I started with a few gentlemen die cut from various backgrounds.

I used embossing paste which was sprayed with a pretty distress ink.  I then cut out a second gentlemen who was sprayed with the mica stain spray. 


The window gave the perfect opportunity to have a shaker card filled with shimmery coordinating bling.


Then the flowers were died in coordinating pink spray mixed with white acrylic paint.  They were layered around the edge of the window. 

Then a mix of sequins and pearls were randomly scattered around the edge.   The background of the card was sprayed in coordinating mica stain spray. 

The sentiment was stamped in the same ink as the flowers and attached to the front of the shaker card. 

Hope this has you thinking of spring flowers and sunny days to come! 

Suzz

Products: 


Saturday, June 27, 2020

Saturday Showcase - Flowers

 Happy Saturday!  The whole design team at the Funkie Junkie Boutique Challenge blog is sharing a special Saturday Showcase!  Everyone is creating a tag with flowers to share with you.  Hop over here to see all the wonderful inspiration.
The challenge was to be inspired by flowers and create a tag.  I love these flower stamps by Dina Wakely as they are outline stamps and you can use different prints, stamps, or coloring to fill the inside of the flowers.


 I knew I wanted to use up some of my index cards from the Positively Pensive challenge. I had created probably 30 index card backgrounds.  :)  I don't usually put all my scraps up on the blog unless they end up in a project or have some type of technique. 

I had spent some time mixing paints (new dylusion paints and distress ink paints) on my craft mat  and then picking up the paint colors on index cards.   I swirled together the colors and then used an acrylic block to ink it up and put it on the cards or I placed the cards directly into the paint on my craft mat.

For this index card, I painted the background with a bright pink.  I let it dry completely and then painted over with a stencil partially using a light orange color.  After that dried I outlined the painted area with a ball point pen on some of it to give it extra texture.

I used all my different painted backgrounds to create my flowers and leaves. I stamped the flowers and petals on different sections of the painted cards and cut them out to layer them. 


Here are the remnants of the petals and leaves stamping and cutting. I was using up almost every piece of about 4 index cards of paint. 

After that it was a matter of just putting the petals on a base flower. I used glue dots to attach the base of each petal to layer them and create a 3D flower.  I then used another inky background as the base for my flowers.  I stamped the flowers onto the background to give me a placement and then built out the flowers.

I finished the tag with the lovely sentiment that comes with the stamp set and stamped it on the same background as the tag and cut it out and layered it in.

Thanks for stopping by to see the flowers!

Suzz

Products:
Dina Wakley - Always Flowers Stamps
Ranger Archival Ink - Jet Black
Dylusions Paints - Bubble Gum Pink, Vanilla CustardBalmy Night, Lemon Zest
Ranger Ink Paints - Carved Pumpkin, Wild Honey
Stampers Anonymous Layering Stencil - Bouquet
Ranger Distress Stain Spray - Antique Linen, Milled Lavender
Dina Wakley White Gesso

Wednesday, October 9, 2019

Halloween Fun!

Time for a new challenge at The Funkie Junkie Boutique Challenge!  The talented Sara Emily has challenged us this time with It's Halloween!

Here is how she described the challenge:

"I love Halloween! With Halloween just a few weeks away, I challenge you to create a vintage or shabby chic project with a Halloween theme. Your project can be as silly or creepy as you like, but just have fun!"

I started working on tags and cards with the intent of making a spooky card.  But instead I went shopping. :) 
Sizzix Tattered Pine Cone Ranger Distress Oxide Fired Brick Peeled Paint Fossilized Amber Stampers Anonymous Glorious Bouquet For The Funkie Junkie Boutique
I like browsing at home decor stores because I get inspiration that I want to go home and try to create. :)  This time it was a beautiful pumpkin covered in corn husk textured flowers.  It was all neutral but I couldn't get over the texture on the pumpkin. 
Sizzix Tattered Pine Cone Ranger Distress Oxide Fired Brick Peeled Paint Fossilized Amber Stampers Anonymous Glorious Bouquet For The Funkie Junkie Boutique
 I hurried home to try to create many many roses. :)  I cut about 30 pine cones from some scrap paper used to wrap up items from the store.  It is like a heavy newsprint.  I wanted something with some texture. 
Sizzix Tattered Pine Cone Ranger Distress Oxide Fired Brick Peeled Paint Fossilized Amber Stampers Anonymous Glorious Bouquet For The Funkie Junkie Boutique
 After I cut all the flowers and leaves I laid them out on my craft mat and gave them a coat of gesso.  I was hoping it would help give more firmness to the flowers / leaves and soften the effect of the sprays. 

Next was to let them dry and clean up the paint. After they dried I sprayed all the flowers with a mix of Fired Brick and Fossilized Amber. 

I let them all dry again and stamped them with black ink using the Glorious Bouquet stamp.  The stamping was imperfect and partial in places which works fine because of the shaping of the flowers.

Next I got the glue gun out and made the roses. 
Sizzix Tattered Pine Cone Ranger Distress Oxide Fired Brick Peeled Paint Fossilized Amber Stampers Anonymous Glorious Bouquet For The Funkie Junkie Boutique

I sprayed the leaves with a mix of ground espresso and peeled paint. 

The pumpkin I purchased was a white pumpkin.  I gave it a coat of gesso and then sprayed it with abandoned coral distress spray ink. 

I used hot glue to apply the roses along the side  and sprinkled in a mix of the leaves.  In doing so it left the glue strings all over the roses.  I decided to leave it to give it the webby effect from my spider. 

I added a coat of frosted crystal embossing powder over the surface of the roses and the pumpkin.  I took the versamark embossing powder and sponged it all over everything and then coated the entire project with the embossing powder.  I heat set it. 

To finish off the project a little black bird, spider and charm.

Come join in the fun and share your Halloween inspired art!   The winner will earn a chance to be a Guest Designer at a future date here at The Funkie Junkie Boutique blog, and everyone who enters and follows the rules will go into the draw for the chance to win a $25 spending spree at The Funkie Junkie Boutique. There are also Top 3 Badges for three additional outstanding entries, chosen by the Design Team.

Thanks for stopping by!

Suzz

Products (Linked to the Funkie Junkie Boutique)
Sizzix Tattered Pine Cone Die
Ranger Distress Oxide Sprays - Peeled Paint, Fired Brick, Fossilized Amber 
Ranger Distress Spray - Ground Espresso, Abandoned Coral 
Ranger - Embossing Antiquities - Frosted Crystal Embossing Powder 
Idea-Ology - Tim Holtz Adornments Halloween Words
Silvertone Spider Charms
Stampers Anonymous - Glorious Bouquet 
Ranger Archival Ink - Jet Black
Dina Wakely Mediums - White Gesso 


Wednesday, May 1, 2019

Spring is in Full Bloom

Hi!  Welcome back, just in time for the Funkie Side of the Challenge "Spring is in Full Bloom"!   The talented Maggi is hosting the challenge and here is her description of the challenge:

"This is my favorite time of the year. Here in the south the trees and shrubs are all blooming and showing their splendor. Many are busy planting their vegetable gardens. The migrating birds have returned to build nests and raise a new family. Your challenge is to create a vintage or shabby chic project that illustrates the magic of spring in bloom!"

I have to confess we are sitting in 3 inches of snow right now. A late snowfall for us but it is definitely hiding the spring flowers right now!  :)  I played around with a variety of things but ended up with a vintage inspired spring card.

I love looking at magazines. I work all day on a computer and getting back onto the computer to scroll through ideas is usually not on the agenda for me. But give me a stack of magazines I am happy to browse through them and get inspired.  I was inspired by a series of all neutral layered cards and used that as my starting point for this card. 
Tim Holtz Idea-ology collage paper travel Stampers Anonymous Entomology Dina Wakely Media Tape Sizzix Wildflowers Stems #1 Distress Stain Spray Picked Raspberry Ranger Layering Stencil Nordic Holiday Knit for The Funkie Junkie Boutique
 I started with making some tissue paper flowers.  My first attempt I used on the card with was more of a round flower without too much layering.  I thought it turned out cute but wanted to see if I could get more layering.  I tore a strip of the collage paper and added a thin strip of double sided tape along the edge. 

I used the strip with the tape to fold over the tissue paper into a circle and I ended up with these fun flowers:


The flowers needed a center and I used a button to give them a focal point. I then used a heavy duty needle and stitched twine through the  button. I decided to use a thin wire to make stems for the flowers and I also pulled the wire through the button holes to keep the stem and the flower together. 

I also played with Dina Wakely mixed media tape. I acquired this tape awhile ago and have been wanting to play with the tape and finally got the chance! 

The tape is like tissue tape but with a surface that you can decorate.  I put embossing paste through the stencil onto the tape, I stamped on it, I painted it with gesso and I spritzed it with distress stain spray.  

I was really pleased with the effect. You can see pieces of it on the card in the background. 

I hope you are inspired to share your spring flowers with us at the challenge. 

 The winner will earn the chance of a Guest Designer spot here at Frilly and Funkie, and everyone who enters and follows the rules will go into the draw for the chance to win a $25 spending spree at The Funkie Junkie Boutique. And there are Top 3 Badges for three further outstanding entries, chosen by the Design Team, because choosing just one winner is so hard! 

Thanks for stopping by! 

Suzz 

Products: 

Ranger Distress Stain Sprays - Antique LinenPicked Raspberry
Ranger Distress Inks - Forest Moss, Antique Linen
Ranger Archival Ink - Coffee, Jet Black 
Buttons


Wednesday, April 4, 2018

Bloomin' Marvellous

Hi!  Today is the Funkie side of the DT to showcase their beautiful pastel flowers for the latest Frilly and Funkie Challenge Bloomin' Marvellous.  The talented Zoe is our host and she challenged us with:

"As spring pokes it's head through the frozen ground, let's celebrate the season and create a vintage or shabby chic project with flowers as the focus and in vintage muted pastel tones, (no brights)."

What a delightful challenge as the weather is flickering between winter and spring for us right now.  We definitely are inspired by the crocus and tulips poking their little faces towards the sun!  I have two projects inspired by the challenge. 

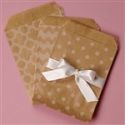
This little bag was actually my second project and happened very quickly after my mini-vases.  My husband had gone to the hardware store to get a few keys made.  When they gave him the keys they put them in this little kraft bag with the quantity and price.  I saw it on the counter and asked for the bag.   I loved how it looked.  He left it for me on my craft desk.

As I was working through the mini vases I created a big mess of things out on my desk.  It made creating this bag very easy.  I took the paint and painted the center of the bag.   After it dried I took a plain white butterfly previously cut and glued it in the center.  I then took one of the collage word sheets and collaged it over the background.  I stenciled with embossing paste around the edges.  I wanted them to pop so I spritzed the entire surface with a soft mist of lavender.  After that I splattered more on to give more color.  I took one of my roses from the previous project and placed it with the stem onto the bag.  

The rose color needed to blend more so it received a coat of the same purple as the background. I then found some little glass stones to add as my final accent.  This little bag was one of the quickest things I have created in awhile and I loved how it turned out!


For my original project I started with mini-vases:

These were inspired by some crafty time with a good friend.  I spent most of the time talking (ha ha)  and cutting tons of flowers and butterflies in anticipation of the this challenge.

I started with piles of plain white cut out flowers, branches, and butterflies.  I looked at my pastels and was thinking tattered rose, worn lipstick, peeled paint. 
But then my eye caught the shaded lilac and I started thinking of soft hues of lavender.  It didn't hurt that when I spent the time with my good friend she was inking up in layers of purple!

The flowers are the lovely pine-cone die from Tim Holtz - Sizzix.   I inked up half of the flowers with the distress oxide smeared directly on the die cut before I rolled them up.  

I spritzed the excess ink and used another flower base to pick up the excess ink.  I repeated until I had 5 ready to roll flowers. 

I wrapped the die cut around the base of a tiny paint brush and then flattened, squished and bent the edges until I got the shape I wanted.  The Tim Holtz video of this is always my go to as he makes it so easy to follow. 

While the flowers were drying I repeated the inky process with the butterflies.  The detailed butterflies were completely inked and the backgrounds were used to pick up the excess ink. 

Last summer at an antique mall I had found 5 mini milk glass containers. The were very cheap as I don't think they were that old. They were the perfect vase for my mini flowers!  I pulled out some bits and pieces of think wire from leftover plastic flowers and other things.  I painted the wire with white acrylic paint.  And then I hot glued the wire stems to the flowers, branches and butterflies.   


I also had pulled out the Dina Wakely Collage Words and thought how fun it would be to collage those inspiration words onto the vases.  I used some decoupage and applied them to the vase.

I finished it off with painting with the white acrylic paint the edges and back side of the vase.  All that was left was to die some seam binding and assemble the vases. 
 
I hope you come and share your fabulous flowers with us! The winner will earn the chance of a Guest DT spot here at Frilly and Funkie, and everyone who enters and follows the rules will go into the draw for the chance to win a $25 spending spree at The Funkie Junkie Boutique. And there are Top 3 Badges for three further outstanding entries, chosen by the Design Team, because choosing just one winner is so hard!

Thanks for stopping by!

Suzz


Sunday, June 25, 2017

Happy 3D Birthday!

Happy Sunday!

I wanted to share a card I made from leftovers from my last project with the butterflies and tiny tattered florals.


 After I finished my canvas with the butterflies and flowers,  I cleaned up my desk.  While cleaning I  found the long strip of cardstock with the negative images of the flowers I had cut out.

I thought what a pretty strip of paper.   I decided to use it as a stencil and laid it over another piece of cardstock and sprayed a mix of yellow orange and red. 

The beauty of that was I ended up with two strips of cardstock one with the sprayed flowers. (I haven't used it yet) and the other the die cut strip with a mix of flowers.  I decided to take that and cut off a section and foam dot it up onto a white cardbase and voila a card!

 All I had to do was stamp a sentiment and add some seed beads as the centers and add a sentiment to the inside.

A different angle to show the shadowing of the cut-outs.

Have a blessed sunday!

Suzz


Wednesday, March 8, 2017

Spring

Frilly and Funkie Time!  Nancy is hosting the challenge this time around and it is all about welcoming spring.  Here is how Nancy describes the challenge:

"Our theme this time around is 'Welcome, Spring!' It's fresh, soft breezes and fragrant blossoms have finally arrived. Create any vintage or shabby chic project that welcomes the advent of this glorious season. Think budding trees, birds and nests, butterflies, and beautiful blooms!"

At the end of the challenge the team will choose their top four picks. The first place winner will be invited to join as a Guest DT spot at Frilly and Funkie. Three additional talented participants will receive badges to display on their blogs. Everyone who enters and adheres to the challenge guidelines will be entered into a drawing to win a $25 spending spree at The Funkie Junkie Boutique!

I decided to create a card celebrating the beautiful blooms of spring that are wonderful to capture and put in a simple mason jar on the table. 

I started playing with a mix of the Wendy Vecchi products that were just released.  I was inspired by Wendy's style of cardmaking and tried to emulate the patterns she mixes so beautifully into her designs.


I started with using her squares stencil and layering in a soft shading of antique linen in the background.  I then used the Archival ink to stamp the vintage test through the stencil in various areas to add a little depth. 


I decided to cut that panel out and then stencil the edges of the cardbase  using the leaf green archival ink.  After I finished that and layered the panel on top of the card base I decided I wanted to add that same green to the top and bottom of my panel.  I sponged over my original antique linen with a green row of ink.

I then stamped the mason jar on acetate using Stazon ink.  I colored the backside of the jar with an alcohol marker to give it a hint of blue.

I cut out the mason jar.  I then stamped the flowers and stems a few times and colored them with distress markers and the same ink used on the background.  I cut them out and added a crackle glaze to the flowers.  The flowers got a smattering of glass beads for the center.

I stamped the lovely sentiment in coordinating ink on my background which decided where my flowers and jar were going to be placed.

Thanks for stopping by and please come join us in the challenge on the Frilly and Funkie blog!

Suzz