It's Wednesday and that means it's time for a new challenge at Word Art Wednesday! This week we're focusing on a verse from one of the minor prophets, Micah. Micah 7:18 says, Who is a God like unto thee, that pardoneth iniquity, and passeth by the transgression of the remnant of his heritage? he retaineth not his anger for ever, because he delighteth in mercy." The Israelites were in bondage because of their sin and it was because of God's incredible pardoning that they would come out of bondage. God is always ready and waiting to extend pardon and mercy whenever His children turn to Him in repentance. While we still have to face the consequences of our sin, He will always forgive. Why? Because He loves us and delights in showing us mercy. What a wonderful God we serve.
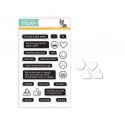
Our sponsor this week is the fantastic one-stop-shop, Simon Says Stamp. I used their Soft Navy Cardstock for the frame of my quilt as well as the blue cardstock matting. The hearts from the Texting stamp set were stamped on patterned paper with Versamark ink and embossed with SSS Fine Detail Embossing Powder in white. The hearts were fussy cut and accent the verse panel. The finished card is just under 5" x 7". Small pearls accent the quilt top.
When I stamped and cut the hearts, I had enough to do a little interior decorating.
As usual when using a quilt die, I had enough pieces to make multiple quilts. I also made these two A2 cards and used the Simon Says Stamp Many Thanks stamp set for the sentiment. I kept these cards flat for easy mailing.
To do the paper piecing, I found a product I love to use for the adhesive. I purchase this pack of adhesive sheets at my local Hobby Lobby in the fun foam aisle. The package comes with three sheets of double sided adhesive and costs just over $2. I was able to cover all three of the quilts in today's cards with just one sheet of adhesive and without any waste.
This past weekend, a good friend and I attended the StampAway show in Cincinnati. While there I was able to stock up on some Gina Marie Dies. This Quilt Die #4- Circle Die is my favorite of all her quilt dies. It cuts so easily and is so fun to paper piece. I purchased a metal cutting plate at the Our Daily Bread Designs booth and when I used it with this die I was amazed at how easily all the little pieces came out of the die. If you haven't checked out Gina Marie Dies, I'd highly recommend them. I love to support small businesses and I was thrilled to see her booth busy all day long.
Supplies from our Sponsor Simon Says Stamp:
Other Supplies:
Cardstock: The Paper Studio Heavy Weight (white for A2 card bases), Georgia Pacific (white),
Tools/Embellishments: Gina Marie Designs (Quilt Die #4 - Circle Die, Ivory Pearls), My Favorite Things Die-namics (Mini Scallop Edge - retired), Silly Winks Adhesive Sheets
I'm entering this card in the following challenges:
Tuesday Throwdown Challenge #356 - Anything Goes
Crafty Hazelnut's Patterned Paper Challenge - Must Use Patterned Paper
Crop Stop Linky Party #31 - Use items/brands from the Crop Stop Store (I used Fiskar's trimmer, Tsukineko, Cuttlebug, and Ranger)
Simon Says Stamp Wednesday Challenge - Add a Sentiment
Thanks for visiting with me today. Please be sure to pick up your free digi at the Word Art Wednesday blog and check out the projects from the rest of the Design Team while you're there. Also please come back later and I'll have a new project featuring one of the stamp/die duos from the Our Daily Bread Designs August Release.
Showing posts with label paper piecing. Show all posts
Wednesday, August 16, 2017
Wednesday, July 29, 2015
God Can Do Anything
It's time for a new challenge at Word Art Wednesday. This week our focus verse comes from the book of Job. This verse is such a statement of Job's faith in the Lord. In Job 42:2, Job states, "I know that thou canst do every thing, and that no thought can be withholden from thee." The first part had to be such a comfort to Job. When you look at Job's life, you see that except for his wife, he'd lost his entire family, he'd lost his wealth and he'd lost his health. Yet by reading the beginning chapters, we can see that this wasn't because of wrong-doing on Job's part, it was actually a way of proving how strong his faith was. You see, in Job 13:15, Job states, "Though he slay me, yet will I trust in him..." Wow! So by this last chapter in the book, Job is saying (my paraphrase), "Lord, I know that you can do every thing and anything and that you know every thought." You might wonder, what was God's response to Job's faithfulness. Verse 10 of chapter 42 tells us that God gave Job twice as much wealth as he had before. He'd lost 10 children and the Lord gave him 10 more. What about his health? Well, after this he lived another 140 years and was able to see his sons' sons to the fourth generation! Yes, I'd say God can do everything! We serve the same God Job did. He can still do wonders today. As the song we learned in Sunday School says, "God can do anything, anything, anything. God can do anything but fail!" I don't know about you, but this verse is a great reminder for me this week!
One of our sponsors this week is All Dressed Up and they generously provided some images for us to use. I was able to play with Little Flower Girl. I chose to paper piece her dress, hat and basket and Copic color her skin, hair, flowers and the little bird. She was fussy cut and popped up over the lacy doily die cut. The finished card size is approx 4" x 8.5".
Copic shading adds some depth to the paper pieced items. An enamel dot was used on the flower center. Stickles add some sparkle to her hat, the bow on her basket, and the flowers. Her hairbows and the butterflies were coated with a Wink of Stella glitter brush marker and the butterflies have Stickles bodies.
Popping the girl up over the doily and sentiment adds some dimension. The rhinestones on the doily and the banners add additional sparkle. Every girl needs a little sparkle!
Supplies:
Cardstock: Papertrey Ink (image and sentiment), Georgia Pacific (cardbase and doily), unknown pink cardstock from my scrap basket
Patterned Paper: My Mind's Eye (Dolled Up 6x6 pad)
Stamps: WORDart by Karen (Job 42:2); All Dressed Up (Little Flower Girl)
Copics: Skin (E00, 11,50; R20), Hair (YR21; E33, 35, 37; Y21), Bird (B000, 21, 23), Flowers (Y15, 17; R20, 22, 83, 85; YG03, 05), Shading (N0, 1, 3, 100, Colorless Blender)
Tools/Embellishments: Fiskar's punch (Butterfly), MME enamel dot, Sakura Gel Pen (black), Staedtler fine tip marker (black), Cheery Lynn die (French Pastry), Want2 Scrap Baby Bling, Stickles (Star Dust)
I'm entering this card in the following challenges:
Through the Craft Room Door - Anything Goes
Eureka Stamps Challenge #151 - Anything Goes
Shopping Our Stash Challenge #212 - Use bling
Papertake Weekly Challenge - Take Your Pick (I chose to use the product choice and used a lacy doily die)
Fussy and Fancy Challenge #144 - Things with Wings (I have a bird and 5 butterflies on my card)
Mod Squad Challenge - Anything Goes plus a die brand that sponsor One Happy Cut carries (I used a Cheery Lynn French Pastry Doily die)
Simon Says Stamp Wednesday Challenge - Anything Goes
Crafty Creations Challenge #294 - Use 4 of something (I have 4 fishtail banners)
Thanks for stopping by to visit with me today. I hope you'll come back often!
Labels:
Cards,
Challenge,
Copics,
Dies,
Digi Stamp,
Nestabilities,
paper piecing,
Scripture,
Word Art Wednesday
Monday, March 9, 2015
Sweet Happy Birthday!
Today's card is for a sweet little girl, my great-niece, that just turned one. I used my new Mama Elephant Pandamonium set and my favorite balloon stamp set from V's Sweet Ideas. I paper pieced the balloon and heat embossed the #1 on it with white embossing powder. The sentiment was also heat embossed with white embossing powder. After dry embossing the panel behind the panda, I used distress inks to add color. I used a direct to paper technique to add some white pigment ink to the clouds. More cardstock was inked to make the grassy area and this panel was popped up over the patterned paper background. Some bakers twine and some sequins (also from V's Sweet Ideas) finish off the front.
The interior has more paper pieced balloons and another sentiment. I used the same die cut on the interior and more of the plaid patterned paper.
Supplies:
Cardstock: Bazzill (pink), Georgia Pacific (white)
Patterned Paper: Recollections
Clear Stamps: Mama Elephant (Pandamonium), V's Sweet Ideas (Birthday Wish), Simon Says Stamp (I don't know the name of it but the #1 came in it)
Ink: Versafine (Onyx Black), Versamark, Distress Ink (Tumbled Glass, Peacock Feathers, Bundled Sage), Colorbox Pigment Ink (Frost White)
Tools/Embellishments: Hemptique baker's Twine, Zig Wink of Stella (Clear), Multi Medium Matte, My Favorite Things Die-namics (Blueprints 1, Wavy Edge), Stampendous embossing powder (White Opaque), Sequins (V's Sweet Ideas - Peony Foral 5mm), Darice embossing folder (Cloudy Sky)
I'm entering this card in the following challenges:
Addicted to Stamps Challenge #99 - Use a number
Simon Says Stamp Monday Challenge - B is for... (birthday & balloons)
Craft Your Passion Challenge #252- Anything Goes
Eureka Stamps Challenge #131- Anything Goes
Simon Says Stamp Wednesday Challenge - Girly/Feminine
Penny's Paper Crafty Challenge #217 - One for the girls/Female Cards
Chocolate Coffee & Cards Challenge #86 - For a child
ABC Challenge - E is for Exceptionally Cute
Outlawz Twisted Thursday - Add Texture (dry embossing folder, twine, and sequins)
Thanks for stopping by today. I hope you'll come back again soon.
Labels:
Birthday,
Cards,
challenges,
Chocolate Coffee Cards,
Dies,
Family,
paper piecing
Wednesday, September 17, 2014
Keep Thy Heart
It's Wednesday, so that means it's time for a new challenge at Word Art Wednesday. This week we're focusing on Proverbs 4:23, "Keep thy heart with all diligence; for out of it are the issues of life." This verse carries the same thought as Proverbs 23:7, "For as he thinketh in his heart, so is he..." We need to be careful what we allow into our hearts and meditate about because those are the things that will establish how we act. If we want to act in a Christ-like manner, then we need to guard our hearts and minds and make sure we're thinking about things that are true, honest, just, and of good report (Phil. 4:8). Our world constantly bombards our minds with negativity, immorality, and compromise. We need to be diligent in protecting our hearts and minds.
Deedee's Digis is one of our sponsors this week. She generously provided the DT with digis to use this week. I paper pieced the outline heart from Deedee's Digis From the Heart set. This set also has some cute mouse images that would look cute with a verse in the middle too. While this is typically a Valentine's Day set, I enjoy finding ways to make sets like this work all year round. After all, love is never out of season. :)
After paper piecing and fussy cutting the red heart, I coated it with two layers of UTEE. The verse was fussy cut and then accented with a pale blue copic. The verse panel was then popped up on the red heart. Scraps of patterned paper were used to make a quilt background. The quilt was popped up off the background. A zig-zag stitch stamp was used to make the stitches. Some buttons, twine, and a bow finish it off. The finished card is 5.5" square. The quilted panel is 5" square.
Supplies:
Cardstock: Recollections (black), Georgia Pacific (white)
Patterned Paper: My Mind's Eye (Quilting Bee)
Stamps: WORDart by Karen (Proverbs 4:23), Deedee's Digis (From the Heart), Sassafras clear stamp (Stitched Borders)
Ink: Versafine (Onyx Black), Versamark
Tools/Embellishments: Ultra Thick Embossing Enamel (UTEE), Copic Markers (B000, 100, Colorless Blender), buttons from stash, The Twinery baker's twine, May Arts ribbon
I'm entering this card in the following challenges:
Clear It Out Challenge - Crazy for Polka Dots
Inky Chicks Challenge #38 - Anything Goes
PDE Linky Party - Stitching (Real/Faux)
Thanks for visiting today. I hope you'll come back soon. If you stop by the Word Art Wednesday blog, you're sure to find lots of inspiration from the DT and a free digi. Please play along with us for your chance to win some stamps from Deedee's Digis.
Labels:
Cards,
challenges,
DeeDee's Digis,
Digi Stamp,
paper piecing,
Scripture,
Word Art Wednesday
Tuesday, July 1, 2014
Espressly for You
I was asked to make a birthday card for a female coffee lover. A coffee cup seemed like a good chance to use one of my favorite techniques....paper piecing. I used the Cocoa's Coffee digi from Sweet 'n Sassy stamps and via Photoshop elements removed Cocoa. The cup was then paper pieced and the Feminine Birthday Greetings sentiment was printed right on the pink band. For my tutorial on paper piecing with digi stamps click here. Some copic markers provided a little shading for the cup.
Dots from a white gel pen add interest to the scalloped mat. It is popped up over the cardstock/patterned paper/ribbon strip. A matted sentiment and some rhinestones finish off the front.
A little interior decorating with a stamped birthday wish and the card is complete.
Supplies:
Cardstock: Georgia Pacific (white), Recollections (kraft)
Patterned Paper: Simple Stories (Vintage Bliss 6 x 6 pad)
Stamps: Daydream Designs digi set (Coffee with Friends Sentiments), Sweet 'n Sassy Stamps digi stamp (Cocoa's Latte), Stampendous (Birthday Wishes clear stamp set)
Ink: Versafine (Onyx Black)
Copics: C0, C-1, 100
Tools/Embellishments: Spellbinders dies (Petite Ovals Large and Small, Petite Scalloped Ovals Small), ribbon (Michael's), Uniball Signo White gel pen, Fiskars border punch (Apron Lace), rhinestones (The Paper Studio)
Challenges:
Scrapbook Blessings Club Challenge #23 - Anything Goes - focus on a challenge from April - June (I chose to focus on Challenge #21: use digi stamp)
Craft Your Passion Challenge #220 - ribbon (use at least one)
Papertake Weekly - Anything Goes
Fan-tastic Tues Challenge #42 - Anything Goes
Tuesday Throwdown Challenge #202 - Anything Goes
Thanks for stopping by today. Be sure to come back tomorrow for the next Word Art Wednesday challenge.
Wednesday, May 7, 2014
Happy First Mother's Day
This card is obviously designed for a brand new mom. I wanted to make it very girly so I kept it pink and white. I included the feminine touches of a doily, pearls, scallops and ribbon. The sentiment was computer generated.
I used this adorable Sweetie Bear from StampArt Design by Kathryne. I colored the bear with Copics. The bows were paper pieced and have tiny pearl centers. She was fussy cut and her nose and dress were accented with a white gel pen. She was adhered with pop dots to the card front. Faux stitching finishes off the edges of the card and background paper.
Supplies:
Cardstock: Bazzill (pink), Georgia Pacific (white), Neenah Solar White (image)
Patterned Paper: American Crafts
Stamps: StampArt Design by Kathryne (Sweetie Bear), computer generated sentiment
Copics: R81, 83, 85; E29, 31, 33, 35, 37, 40
Tools/ Embellishments: Uniball Signo White gel pen, pearls/flourish (The Paper Studio), ribbon (American Crafts), Spellbinders dies (Petite Scalloped Circles Large), Cheery Lynn die (French Pastry), Staedtler black fine tip marker
I'm entering this card in the following challenges:
Digi Haven - Bear Hugs
Divas by Design - In the Pink
Inky Impressions Challenge #158 - Mother's Day
Papertake Weekly - Anything Goes
Tuesday Throwdown Challenge #194- For a Special Lady
Sweet Stamps Challenge #168 - For Mom
Going Grey with Scrap-Creations - Mother's Day/For a Girl
Fan-tastic Tuesday Challenge #34 - Flourishes
Just Keep On Creating - Anything Goes
I hope the rest of your week goes well. Thanks for visiting today.
Tuesday, April 15, 2014
Happy Birthday, to You!!
Today I'm honored to be a Guest Designer for the Top Tip Tuesday Challenge Blog. I really have been enjoying this challenge blog and have learned several helpful things from the tips that have been shared there. I was so delighted when they asked me to be a Guest designer for them. When I heard that this week's challenge was paper piecing, I was excited because I love that technique. The sponsor for this week is:
For my card, the girl is completely paper pieced (her dress and hat with patterned paper - her body/hair with cardstock) and glued over the log. Her skin, hair, the grass, log and sky are all colored with copics. After paper piecing the hat, I also added shading and colored the hat with several copics.
White embroidery floss was added to her hat and dress. The hat was coated with a Wink of Stella glitter brush marker. The dandelion fluff and flowers have some stickles for accent.
This image is a digi from Digi Darla (sadly, this store is now closed). For a tutorial on paper piecing with digi stamps see my tutorial here. Obviously paper piecing is a fantastic way to use scraps but using other smaller pieces on your card is possible when you cover seams or where they don't join with other elements. For instance: All the patterned paper used for my card were scraps from other projects. The red background piece wasn't big enough for my card front. I cut what I had in half and the floral strip covers the gap. And the floral piece wasn't long enough to span the width of my card. However, the image panel hides that gap.
Supplies:
Cardstock: Georgia Pacific
Patterned Paper: Basic Grey (Picadilly - 12 x 12 and 6 x 6 pad)
Stamps: Digi Darla (Blowing Dandelions); Stampendous (Birthday Wish clear stamp)
Ink: VersaFine (Onyx Black)
Copics: E00, 07, 08, 09, 11, 25, 31, 33, 35, 37, 50; BG000, 10; N1, 3; 100; R20, 27; YG03, 05; Colorless Blender
Tools/Embellishments: Sakura Micron .01 black pen, Quickie Glue Pen, Prima pearl flourish, DMC embroidery floss, Spellbinders dies (Petite Oval Large and Small, Floral Oval, Decorative Photo Corner), Sweet 'n Sassy die (Lacey Eyelet Border), Zig Wink of Stella glitter brush marker (clear), Stickles (Star Dust)
I'm entering this card in the following challenges:
Just B Creative Crazy - Anything Goes
Just Keep on Creating - Anything Goes
Scrapbook Blessing Club Challenge #17 - Anything Goes
V's Sweet Ideas Challenge #22 - Technique (I used paper piecing)
Please be sure to stop by the Top Tip Tuesday Challenge Blog to see the rest of the projects from the Design Team and to get additional tips from them. I also hope you'll join in the challenge for a chance to win the fantastic prize from our sponsor.
Thanks for visiting with me today. Please stop back tomorrow when I'll have another project using paper piecing (this time using clear stamps).
And an awesome prize of
Stamp and Create is an online store based in the US. We ship worldwide with reasonable shipping prices. We
specialize in Rubber Stamps and Scrapbook supplies. Some of the
companies we carry are: Wags 'n Whiskers Rubber Stamps, High Hopes
Rubber Stamps, Whiff of Joy, The Greeting Farm, Kraftin' Kimmie Stamps,
Stampavie, Whimsy Stamps, Emerald Faeries, Basic Grey, My Mind's Eye,
Echo Park, Ribbon, Charms, embellishments, dies, and more!
For my card, the girl is completely paper pieced (her dress and hat with patterned paper - her body/hair with cardstock) and glued over the log. Her skin, hair, the grass, log and sky are all colored with copics. After paper piecing the hat, I also added shading and colored the hat with several copics.
White embroidery floss was added to her hat and dress. The hat was coated with a Wink of Stella glitter brush marker. The dandelion fluff and flowers have some stickles for accent.
This image is a digi from Digi Darla (sadly, this store is now closed). For a tutorial on paper piecing with digi stamps see my tutorial here. Obviously paper piecing is a fantastic way to use scraps but using other smaller pieces on your card is possible when you cover seams or where they don't join with other elements. For instance: All the patterned paper used for my card were scraps from other projects. The red background piece wasn't big enough for my card front. I cut what I had in half and the floral strip covers the gap. And the floral piece wasn't long enough to span the width of my card. However, the image panel hides that gap.
Supplies:
Cardstock: Georgia Pacific
Patterned Paper: Basic Grey (Picadilly - 12 x 12 and 6 x 6 pad)
Stamps: Digi Darla (Blowing Dandelions); Stampendous (Birthday Wish clear stamp)
Ink: VersaFine (Onyx Black)
Copics: E00, 07, 08, 09, 11, 25, 31, 33, 35, 37, 50; BG000, 10; N1, 3; 100; R20, 27; YG03, 05; Colorless Blender
Tools/Embellishments: Sakura Micron .01 black pen, Quickie Glue Pen, Prima pearl flourish, DMC embroidery floss, Spellbinders dies (Petite Oval Large and Small, Floral Oval, Decorative Photo Corner), Sweet 'n Sassy die (Lacey Eyelet Border), Zig Wink of Stella glitter brush marker (clear), Stickles (Star Dust)
I'm entering this card in the following challenges:
Just B Creative Crazy - Anything Goes
Just Keep on Creating - Anything Goes
Scrapbook Blessing Club Challenge #17 - Anything Goes
V's Sweet Ideas Challenge #22 - Technique (I used paper piecing)
Please be sure to stop by the Top Tip Tuesday Challenge Blog to see the rest of the projects from the Design Team and to get additional tips from them. I also hope you'll join in the challenge for a chance to win the fantastic prize from our sponsor.
Thanks for visiting with me today. Please stop back tomorrow when I'll have another project using paper piecing (this time using clear stamps).
Labels:
Birthday,
Cards,
challenges,
Dies,
Digi Stamp,
Nestabilities,
paper piecing,
Sweet 'n Sassy Stamps
Wednesday, January 15, 2014
Deedee's Digis One-Stop Hop
Winter blues got
you down? What would lift your spirits? How about some crafty inspiration? A
free digi? A chance to win more digis? You can find all of this today at the
Deedee's Digis One-Stop Hop -- just the thing to chase those winter blues away!
Need a bigger pick-me-up? Visit each of our designers' blogs (you'll find them listed on the Deedee's Digi blog) and leave them
some love on their "hop" creations, and you'll be entered to win a
digi set at each stop. Still feeling blue? Join our sister team at the DaydreamDesigns blog for MORE inspiration, MORE prize drawings, and MORE freebies. The
fun starts today at the Deedee's Digis blog, and you have until 7pm EST Sunday
(January 19th) to participate. Those winter blues don't stand a chance!
Here is my creation for the Deedee's Digis hop. I used the Pocket Pal Kitten set for my card. This set includes: 2 color images, 1 outline image, 6 sentiments, 3 digi papers.
I paper pieced the pocket with some papers from my scrap pile (old SU papers I think?). I could have used papers from the set but my printer needed ink. {For a tutorial on how to paper piece using digi stamps, please see my tutorial post here.} The kitty was colored with copics. The kitty's eyes were given some attention from my new Wink of Stella clear brush pen (LOVE this pen!!). The kitten's paws were cut out separately and added over the pocket for dimension. I used some fairly new (to me) heart die cuts for the hearts on the pocket and sentiment panel. I added faux stitching and then some SU! Crystal Effects to the hearts and the kitten's nose. I learned a very important lesson by adding the Crystal Effects. This product bleached the pattern paper (I used the same at the top edge of the pocket) and smeared my faux stitching. *sigh* Live and learn I suppose. Due to last week's illness and my work schedule I couldn't redo this, so, use it as an example of "what not to do."
The image panel was cut with a square die. The image and sentiment panels were matted with dark gray cardstock and also given some faux stitching. Some baker's twine was added to make the sentiment panel "hang" from the image. They were popped up on top of the heart embossed panel and this was also popped up from the card base.
Supplies:
Cardstock: Papertrey Ink (for image), Georgia Pacific, DCWV
Patterned Paper: Scraps (SU I think)
Stamp Set: Deedee's Digis (Pocket Pal Kitten set)
Copics: N3, 5, 7, YG03
Tools/Embellishments: Uni-ball Signo White pen, The Paper Studio embossing folder (Tiny Hearts), Dies (Lawn Fawn Hearts, Spellbinders Classic Squares Large & Small), Staedtler pen (black), The Twinery baker's twine (stone), Zig Wink of Stella brush glitter pen (clear), SU! Crystal Effects
Do you like the digi that I used on my project today? You could win it or any other set of your choice from Deedee's Digis just by leaving me a comment on this post. One winner will be selected by random draw when our hop closes Sunday evening. Thanks for joining our hop, and be sure to check the Deedee's Digis blog after 7pm EST Sunday evening (January 19th) to see if you've won!
Thanks for visiting today. I'll be back soon on a more regular schedule. :)
Wednesday, November 13, 2013
Love in Deed and in Truth
This week's focus verse at Word Art Wednesday is 1 John 3:18, "My little children, let us not love in word, neither in tongue; but in deed and in truth." This verse admonishes us to not just say we love others but to put our love into action. When we get to do what we like to do, showing our love for others is easy to do. However, when it costs us something, time, money, self-sacrifice, then it gets a bit harder. However, that is the kind of "love in action" that the Apostle John is talking about. For the perfect example of this principle, we need only look to what Christ did for us by dying on the cross. Now THAT was love in action.
For my card this week, I chose to use the sunburst technique for my card design. The trees were paper pieced. I think the faux stitching gives it a sort of quilted look. I masked the trees and inked the image panel with some distress and dye inks. {Yes, I realize I could have done my inking before paper piecing the trees and then I wouldn't have needed a mask. However, I didn't think that far ahead when planning out the card.} I mounted the sunburst panel and verse panel on a square of dark brown cardstock before adhering it all to a white 5.5" square card base.
The verse is printed on patterned paper and a ribbon covers the seam between the sunburst panel and the verse panel. The image panel is popped up off the card and placed over the ribbon. I also did a bit of interior decorating and included more faux stitching.
The verse panel is finished off with more faux stitching and some pearls. The tree tops were given some stickles for a bit of shimmer.
Supplies:
Cardstock: Georgia Pacific, Bazzill (Bitter Chocolate)
Patterned Paper: Basic Grey (Out of Print 6 x 6 pad)
Stamps: WORDart by Karen (1 John 3:18), Stampabilities (3 Simple Trees)
Inks: Memento (Desert Sand, Rich Cocoa, New Sprout), Ranger Distress Inks (Broken China, Antique Linen, Peacock Feathers)
Tools/Embellishments: ribbon (Really Reasonable Ribbon), Stickles (Star Dust), pearls (Queen & Co. - Grass Green), Spellbinders Classic Squares Large, Staedtler triplus Fineliner (brown)
Techniques: Paper Piecing, Sunburst, Inking/Masking, Faux Stitching/Doodling
I'm entering this card in the following challenges:
Scrapbook Blessings Club Challenge #5: Sunburst Technique
SCS Try a Technique #455 (TLC455) - Let's Revisit Paper Piecing
Simon Says Stamp Monday Challenge - Got Ink?
Craft Your Passion #188 - Add some doodling
Through the Craft Room Door - Anything Goes
Shopping Our Stash #127 - Use something already out on your desk (I used white cardstock and some inks)
Twist of Faith #63 - Lots of Layers
Thanks for stopping by today. I hope you'll also visit the Word Art Wednesday blog to see what the rest of the design team have made this week and to pick up your free digi. I hope the rest of your week goes well.
For my card this week, I chose to use the sunburst technique for my card design. The trees were paper pieced. I think the faux stitching gives it a sort of quilted look. I masked the trees and inked the image panel with some distress and dye inks. {Yes, I realize I could have done my inking before paper piecing the trees and then I wouldn't have needed a mask. However, I didn't think that far ahead when planning out the card.} I mounted the sunburst panel and verse panel on a square of dark brown cardstock before adhering it all to a white 5.5" square card base.
The verse is printed on patterned paper and a ribbon covers the seam between the sunburst panel and the verse panel. The image panel is popped up off the card and placed over the ribbon. I also did a bit of interior decorating and included more faux stitching.
The verse panel is finished off with more faux stitching and some pearls. The tree tops were given some stickles for a bit of shimmer.
Supplies:
Cardstock: Georgia Pacific, Bazzill (Bitter Chocolate)
Patterned Paper: Basic Grey (Out of Print 6 x 6 pad)
Stamps: WORDart by Karen (1 John 3:18), Stampabilities (3 Simple Trees)
Inks: Memento (Desert Sand, Rich Cocoa, New Sprout), Ranger Distress Inks (Broken China, Antique Linen, Peacock Feathers)
Tools/Embellishments: ribbon (Really Reasonable Ribbon), Stickles (Star Dust), pearls (Queen & Co. - Grass Green), Spellbinders Classic Squares Large, Staedtler triplus Fineliner (brown)
Techniques: Paper Piecing, Sunburst, Inking/Masking, Faux Stitching/Doodling
I'm entering this card in the following challenges:
Scrapbook Blessings Club Challenge #5: Sunburst Technique
SCS Try a Technique #455 (TLC455) - Let's Revisit Paper Piecing
Simon Says Stamp Monday Challenge - Got Ink?
Craft Your Passion #188 - Add some doodling
Through the Craft Room Door - Anything Goes
Shopping Our Stash #127 - Use something already out on your desk (I used white cardstock and some inks)
Twist of Faith #63 - Lots of Layers
Thanks for stopping by today. I hope you'll also visit the Word Art Wednesday blog to see what the rest of the design team have made this week and to pick up your free digi. I hope the rest of your week goes well.
Sunday, August 25, 2013
Let Your Dreams Soar
I have my first project to share with you today as a design team member for the new re-opened Deedee's Digis. I am using the Lifted Up set. The set comes with 4 images (in 3 formats including colored and outline) and 4 sentiments. I chose to use the outline and layering formats ad 2 of the sentiments.
It's funny how we get into crafting ruts. For a long time, 90% of my cards were 5.5" squares. Lately, I've been making mostly A2 or 5x7 cards. Today, I revisited an old friend and went back to a 5.5" square.
I paper pieced the kite and the bows on the kite tail using 4 different coordinating patterned papers. I fussy cut and layered the kite and clouds. I added a baker's twine tail before attaching the pieced bows. I used a bit of copic markers around the edges of the clouds for a little dimension.
The sky background was made by using Memento Summer Sky (appropriate color name isn't it?) in a direct-to-paper technique and then embossing it with a Cuttlebug D'vine Swirls embossing folder. The swirls reminded me of wind currents.
On the bottom sentiment panel, I layered the sentiment on red patterned paper and added two eyelets to run the twine thru. This panel was popped up on another piece of patterned paper. I inked the edges of the papers with the same Memento ink used for the sky.
Supplies:
Cardstock: Georgia Pacific (white), Bazzill (blue)
Pattern Paper: Unknown - it was a gift
Digi Stamps: Deedee's Digis (Lifted Up set)
Ink: Memento (Summer Sky)
Copics: B000, N0, Colorless Blender
Tools/Embellishments: Cuttlebug Embossing Folder (D'vine Swirl), baker's twine (The Twinery), Zutter Round-it-all (used inside)
I'm entering this card in the following challenges:
Shopping Our Stash #115 - oldest hardware (my eyelets are from my early paper crafting years)
Craft Room Challenge - Something New (this stamp is from a new store, it's a new release, and it's a new sky technique for me)
4 Crafty Chicks #156 - Photo Inspiration (I used the colors as inspiration)
2 Sisters #158 - Square Card
V's Sweet Ideas #14 - Use Twine
Pile It On Challenge #34 - Use Designer Paper (I used 4)
Thanks for stopping by today. I hope you'll stop by Deedee's Digis soon. Deedee is adding more sets all the time.
Labels:
Cards,
challenges,
DeeDee's Digis,
Digi Stamp,
paper piecing
Wednesday, August 21, 2013
Godliness with Contentment
It's Wednesday and that means it's time for another challenge at Word Art Wednesday. This week's focus verse is 1 Timothy 6:6, "But godliness with contentment is great gain." Part of living a godly lifestyle is being content. I don't know about you, but contentment in some areas is easier than others. Contentment isn't just about things; it includes people, churches, jobs, season of life, etc. It might be easy to be content with our material possessions but we may struggle with our season of life. It's not easy! (Understatement right?) Even the Apostle Paul had to work at it. He says in Philippians 4:11, "Not that I speak in respect of want: for I have learned, in whatsoever state I am, therewith to be content." [emphasis mine] He had to learn to be content too. Somehow, it makes me feel better to know that it didn't come naturally for him either. :)
For my card, I used this week's Mojo Monday sketch (MOJO307) as inspiration. I used Digi Darla's Blowing Dandelions digi stamp. Digi Darla is one of our sponsors this week (be sure to link up a card this week for your chance to win a prize from her store). I paper pieced the girl and fussy cut both the girl and the log/grass. Since I was paper piecing her dress & hat, I took the opportunity to add a hat band and belt with white floss. Tip: When fussy cutting an image, I run a black copic along the cut edge to add a more finished look. This helps it look like you cut right on the line.
To make the sky background, I used a petite scalloped oval die cut as a mask to sponge clouds on a white piece of cardstock. I moved the die cut around to vary the shape/size of the clouds. Then I die cut the cardstock into a circle. I added the log and trimmed the bottom to fit the circle. Last I sat the girl on the log and popped her up off the cloud panel.
I used a border punch for some white trim along the edges of the purple paper but it is mostly covered up by the image & sentiment panels. I moved the circles around from the sketch & traded the banners for a pearl flourish. Definitely took a lot of creative license with this sketch. :)
Supplies:
Cardstock: Georgia Pacific
Patterned Paper: Stampin' Up
Stamps: WordArt by Karen (1 Timothy 6:6), Digi Darla (Blowing Dandelions)
Ink: Memento (Summer Sky)
Copics: E000, 00, 01, 25, 31, 33, 35, 37, 50; R20, 81, 85; Y000; YG03, 05
Tools/Embellishments - Uni-ball Signo white pen, Sakura Gelly Roll Metallic Pen, DMC floss (white), Spellbinders (Circles Large & Small, Lacey Circles), Fiskars border punch (Apron Lace)
I'm entering this card in the following challenges:
Aud Sentiments #87 - Anything but a birthday card
Going Grey with Scrap Creations - Girls want to have fun
Top Tip Tuesday #108 - Use at least 2 things that start with your initial(s) (I used stitching, spellbinders and white)
Mojo Monday (MOJO307) - sketch
Penny's Paper Crafty #141 - Use Dies or punches
Paper Pretties Wednesday Challenge (PWC272) - Girly Girl
Thanks for stopping by and visiting with me. I hope you'll stop by the Word Art Wednesday blog to see what the rest of the Design Team has for you, pick up your free digi and see what wonderful prizes are sponsors are offering this week.
Labels:
Cards,
challenges,
Digi Stamp,
Nestabilities,
paper piecing,
Scripture,
Word Art Wednesday
Monday, July 1, 2013
Happy Birthday, Cupcake
I haven't paper pieced in awhile and it's been even longer since I paper pieced with regular stamps. I decided that this cupcake image would be perfect for that technique. This card is made entirely of scraps. Even the card base is what was left over after making another card. After paper piecing the cupcake and cherry, I colored the cherry stem & leaf with copics. I added Crystal Effects to the cherry and stickles to the leaf & frosting for some sparkle. I found some waxed thread on clearance recently and used it for the buttons. I really like this type of thread. It's SOOOO easy to thread thru the buttons. I untwisted the ends of the thread a bit after knotting. The sentiment is embossed with Versamark and white embossing powder.
{For those friends who know me well, yes, the two strips that aren't matted are unusual for me and yes, I wish I'd matted them. :) }
Lesson learned: I tried rounding the corners of the card AFTER adhering the background paper and matting. My rounder didn't go in as far as I thought so I didn't get the look I wanted. Since I was using scraps, I didn't have enough to re-do the card so I'm living with it. :(
Supplies:
Cardstock: Recollections, Bazzill, DCWV, Express-It
Patterned Paper: MME Miss Caroline (Dilly Dally)
Stamps: Mark's Finest Papers (Celebrate Big)
Ink: Versamark, Memento Tuxedo Black
Copics: E25, G28, N0, 1, 3, BG10, Colorless Blender
Embellishments/Tools: buttons (Making Memories, Basic Grey), CM Fine Tip black pen, Silver Creek Leather Co. waxed thread, Stampendous Embossing Powder (White Opaque), Spellbinders (Circle Small, Eyelet Circle), Crystal Effects, Stickles (Star Dust)
I'm entering this card in the following challenges:
Sweet Stop Sketch 217 (SSS217) - sketch
Tuesday Throwdown #153 - Glitz & Glimmer (add some sparkle and/or shimmer)
Clear it Out Challenge - Paper Piecing/Scraps
Inky Chicks #7 - Anything Goes
Simon Says Stamp - Anything Goes
4 Crafty Chicks #148 (CCC148) - Cupcakes
Wags & Whiskers #107 - Cute as a button (use at least one button)
Thanks for stopping by today. I hope you'll come back soon.
Friday, February 1, 2013
Chugging by... -- SNSDC90
This week, the Sweet 'n Sassy Digi Challenge is quite easy. We're to make a Valentine's Day or Love card/project. Easy Peasy!! We have a sweet little 3 year old boy in our lives (our grandson) who loves trains. So I thought this Cocoa's Train digi would be perfect for him.
I used an older Sweet Stop Sketch (SSS160) for the design of the card front. My husband had the idea to use some type of 3D hearts as smoke billows so when I found these open buttons I thought they would fill the bill. I adhered them with SU's Crystal Effects. I also put some Crystal Effects on Cocoa's nose. I generated the sentiment on my computer and cut it out in a banner shape. I used a square punch to give me the points on the end.
I paper pieced Cocoa's train using two different patterned papers from a collection I've had in my stash for quite awhile. I bought this paper pack with Jack, our grandson, in mind. Actually, except for the cow catcher, it's just both sides of the same sheet of paper. I used buttons from my stash for the wheels. Cocoa is colored with Copics and his head and paw are popped up over the train.
If you're a regular reader, you know I *love* fancy folds. When I saw this pop-up card on Darlene's blog during a recent surfing trip, I couldn't wait to give it a try. Darlene show's two versions, a simple pop up and this more advanced one. Her directions are easy to follow and the "advanced" version was still pretty easy to do.
For the 3 hearts on the left side, I printed out a Cocoa's Heart the size I wanted them to be and hand cut a template. I then printed out 2 sentiments from the Valentine's Day Greeting set and generated my own sentiment for the center heart in Word. I used the template to trace around the sentiments and hand cut them. I taped them to red cardstock and then cut the mats. I used another greeting from the set for the "Happy Valentine's Day" and popped it up on the background. Cocoa's Heart is on the 4th pop-up. Strips from the patterned paper carry the train theme through to the inside of the card. I left a small spot to write a short greeting from Papaw & I.
Supplies:
Cardstock: Bazzill, Recollections, Georgia Pacific, Copic
Patterned Paper: Echo Park (Little Boy)
Stamps: Sweet 'n Sassy Digis (Cocoa's Heart, Valentine's Day Greeting, Cocoa's Train)
Copics: 0, 100, C0, E01, N0, N1, N3, N5, N7, N9, R02, R27
Tools/Embellishments: Spellbinders (Deckled Rectangles Large & Small, Petite Ovals Large and Small, Petite Scalloped Ovals Large & Small), blue buttons - stash, heart buttons (Dress it Up -Valentine Collection - Love Potion), baker's twine (The Twinery - Maraschino), SU Square Punch, CM Fine Black Pen
I'm entering this card in the following challenges:
Shopping Our Stash #87 - Valentine's Day, Hearts, Red, Love
Going Gray with ScrapCreations - Valentine's Day
WordArt Wednesday #65 - Anything Goes
Simon Says Stamp - Anything Goes
Paper Pretties Wednesday Challenge (PWC243) - Square Card
Really Reasonable Ribbon #64- Valentine's with Ribbon/Trim
Spark Your Creativity Challenge #5 - Anything Goes
V's Sweet Challenge #8 - Love Theme
I hope you'll play along in this week's challenge. Thanks for stopping by to visit today.
Monday, January 21, 2013
Daydream Designs Blog Hop & FREE Digis
Today, I get to participate in my first ever Daydream Designs Blog Hop. You should have arrived here from Sandie's blog. If you are a regular reader and started here, you'll want to go to Diane's blog to start at the beginning so that you don't miss a thing!
In this hop, we are featuring the theme of HEARTS. There are LOTS of new Valentine's digis in the Daydream Designs store and actually, there are plenty that could be used year-round. After all, saying "I love you" is never out of season!
The blog hop will run from today (January 21st) until the 24th. Be sure to visit and comment on each blog in the hop. The prize for a randomly selected winner who leaves a comment on every participating blog is a $20 gift certificate to the Daydream Designs store. Keep reading to the end to find out about the FREE digis being given away during the hop.
I have two heart-themed projects to share with you today. The first is a Valentine's Day card featuring 3 sets from the Snowbaby Love collection.
I printed out the adorable puppy from the Snowbaby Love Color set and cut him out. I paper-pieced the heart from the Snowbaby Love Outline set and also cut it out. After cutting out the puppy & the heart, I ran a copic marker around the edge to darken it. I used one of the many sentiments in the Snowbaby Love Sentiments set and layered it in the negative space behind to oval cutouts.
The patterned papers I chose have hearts all over them and to keep with the theme, I also used a heart embossing folder on the image panel. The image panel is popped up over the bling flourish and the puppy is popped up on the image panel. Two more rhinestones set off the sentiment and this simple but sparkly Valentine's Day card is complete.
Supplies:
Cardstock: Copic (for the puppy), Georgia Pacific, Bazzill
Patterned Paper: The Paper Studio (Love Stripe, Tiny Pink Hearts)
Stamps: Daydream Designs (Snowbaby Love Color, Snowbaby Love Outline, Snowbaby Love Sentiments)
Tools/Embellishments: Spellbinders (Classic Circles Large & Small, Petite Ovals Large & Small), The Paper Studio Embossing Folder (Tiny Hearts), flourish & rhinestones (Recollections), Copic marker (N9)
I'm entering this card in the following challenges:
Word Art Wednesday #63 - Anything Goes
Sentimental Sunday #138 - Negative Space
Spark Your Creativity Now Challenge #5 - Anything Goes
Cute Card Thursday #252 - Diamond are Forever (bling)
Pile it On Challenge #3 - Have a Heart
Terrifically Thrilling Thursday - Easy as 1-2-3 (1 sentiment, 2 pattern papers, 3 bling - 1 flourish plus 2 individual rhinestones)
Aud Sentiments - Bingo (I did the diagonal row Die cut, embossing, "Love")
For the second project.... A Countdown Calendar
In this project I am also showcasing the Snowbaby Love Color and the Snowbaby Love Sentiment sets.
Our daughter has requested "countdown calendars" for major events in her life ever since she started college. Most of them were countdowns to Christmas vacation and Summer Vacation. After she got engaged, she requested a countdown calendar to the wedding. We decided to have each month on a separate page. Here is her calendar for February:
I designed the calendar itself in Word. I layered the "Happy Valentine's Day" sentiment on the heart before printing. Love that about digis!! I printed several of the images in the color set and cut them out. They were then popped up on the on the calendar. I used a heart shaped punch to make a border along the bottom and doodled in the negative space. A couple of the cut outs were used to highlight "February." Stickles were added to all the cutout hearts along the bottom, the big heart on Valentine's Day, the two hearts highlighting "February", selected hearts on the sled and the puppies' heart. I also used red stickles to mark the "3 months to go" day.
Supplies:
Cardstock: Georgia Pacific, Bazzill
Stamps: Daydream Designs (Snowbaby Love Color, Snowbaby Love Sentiments)
Tools/Embellishments: Stickles (Star Dust, Christmas Red), EK Success Heart Punch, CM fine black pen
Now it's time to go back to hopping. Your next stop is Traci's blog. I'm including the full hop list below, just in case you get lost or can't do the entire hop at one time.
Diane
Amy
Beth
Debbie
Helen
Jenn
Jerusha
Karen
Kris
MariLynn
Michelle
Miesje
Sandie
Stephanie - You are here!
Traci
Vicki
Amy
Beth
Debbie
Helen
Jenn
Jerusha
Karen
Kris
MariLynn
Michelle
Miesje
Sandie
Stephanie - You are here!
Traci
Vicki
As a thank you for visiting and hopping with us, here is a small gift for you - 2 FREE digis. Click on each one, then right click to save to your computer.
FREE Digis Have Expired
Thanks for coming by today. I hope you'll come back soon. Happy Hopping!!
Subscribe to:
Posts (Atom)