Thursday, 17 July 2008

TT&T2 - Catalan Fish Stew with Spelt Bread


Health concious? Me??


Well I do try... it's just the weekends that cause problems!!

Regular readers will hopefully know that most of my recipes are pretty healthy - I love my spice and don't eat too much dairy or red meat. I do obviously have the occasion exception to the rule... especially when I discovered deep fat frying... but on the whole I love making dishes that taste good without being full of 'rubbish'.

So Tried, Tested and True 2 - an event conceived by Psychgrad and Giz from Equal Opportunity Kitchen - is right up my alley. This is their second event - check out the round up from the first one - what a fab collection of recipes!

This time however, there is a difference. Our tried and tested recipes have to promote health - be it low cal, low fat, high nutrient, whatever. They want don't just want dishes that work - they have to work for you too!

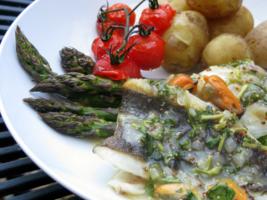
I decided to make a dish I have made a few times before - Catalan fish stew. It is a great dinner party dish as the bulk of the work can be done in advance. It is based jointly on a dish I had whilst in Barcelona and a Catalan fish stew I saw on MasterChef a year or two later - white fish, fried in olive oil, topped with a tomato, pinto beans and chorizo sauce. Flavoured with both fresh and ground fennel and thickened with ground almonds, this is a super tasty dinner - despite being healthy!!!

Right... so... you want to know what makes this so healthy?

Tomato Based Sauce!
Tomatoes are the best food source of uber-protective antioxidant nutrient, lycopene - which has amazing cancer and heart disease prevention properties.

Check this out - men who eat tomatoes twice a week are on average 35% less likely to get prostate cancer. Tomatoes also help protect against breast, pancreatic and intestinal cancers.

Tomatoes are an excellent source of vitamin C, vitamin A, and vitamin K (for bone health) and are a very good source of fibre and calcium too.

And... cooking tomatoes actually improves their health benefits as it concentrates the phytonutrients.

Pinto Beans!
Eating pinto beans will lower your cholesterol levels due to their high fibre content. They are also an excellent source of protein and vitamin B1

If you suffer from unstable blood-sugar levels (like me!), eating pinto beans will level out the highs and lows - with slow release energy thrown in to boot!

Pinto beans high levels of phosphorus, iron, magnesium, potassium, and copper lowers heart attack risk, heart disease risk and blood pressure.

Almonds!
Hmmm... Almonds? Really?? But they're sooo fatty...

Ah HAH - but they're the good type of fat! Y'know the type of fat that makes us lose weight, reduces the risk of heart disease and lowers cholesterol... monounsaturated fat!

Eating almonds can significantly reduce the GI level of what you're eating too, and contain more protein by weight than an egg!

Cod!
As well as tasting fab, cod is an amazing low-calorie source of protein - rich in omega-3 fatty acids. Though it really doesn't sound good - food rich in omega-3 fatty acids can help control blood pressure, protect against cancer and can even protect against Alzheimer's and Age-related Cognitive Decline.

Spelt!
What previously may have made this dish less healthy was that I generally serve it with huge hunks of chewy white bread... So in the spirit of the event I decided to make my own spelt bread to eat with the stew.

Spelt is higher in complex carbs that wheat - as well as containing way more fibre and protein. Many people also find they can tolerate it more easily than wheat - though it is still not gluten-free.

The bread had a lovely deep nutty flavour, and was very quick and easy to make - recipe at the bottom!

Low in Fat...
Ok, ok, so the fish is fried...

But it is in healthy olive oil... and get this: the phytonutrients in tomatoes will be far better absorbed when eaten with a little oil. So you see, I was thinking about you all the time!

So, now I've dispensed with my healthful rhetoric... let's get back to the dish, I hereby present you with my incredibly healthy, incredibly tasty...

Catalan Fish Stew

Served 7 hungry people!

  • 1500g cod fillet - skinned (any firm white fish will do!)
  • 500g huss fillet - skinned (again, any firm white fish will do!)
  • 500g mussels, prawns and/or squid cooked and peeled if required
  • 200g chorizo, diced
  • 1 tin pinto beans, drained and rinsed
  • 1 tin chopped tomatoes
  • 4 large tomatoes, diced
  • 1 large onion, chopped
  • 1 fennel bulb, chopped
  • 3 cloves garlic, crushed
  • 1 red chilli, finely chopped
  • 1 tsp fennel seeds, ground
  • 2 tbsp paprika
  • 1 tbsp oregano (fresh only, don't use dried)
  • 1/2 tsp saffron strands
  • 3 bay leaves
  • 1 cup water
  • A large glass of white wine (I don't measure wine in cups ;)
  • 1 cup ground almonds
  • olive oil for frying
  • 3/4 cup white flour for dredging the fish
  • salt to taste
Prepare the Sauce...
As I was cooking this for a mid-week dinner I decided to prepare the sauce in advance to give myself as little to do as possible the next day.

Heat the olive oil on a medium heat, and fry the onions, chorizo and garlic for 4/5 minutes. Add the ground fennel, oregano, 1 tbsp of paprika, the bay leaves and tomatoes and simmer for about 15 minutes.

Add the water and white wine, allow to cool and refrigerate until required. Or you could leave it to simmer away whilst you fry up the fish if you're doing it all on the same day! (Which is probably more likely ;)

Fry the Fish...
(If you did prepare the sauce the night before then bring it to a simmer now!)

Chop the fish into large pieces. Mix the flour with a tablespoon of paprika and season with salt.

Dredge the fish in the flour mixture - patting off as much excess as possible.

Heat olive oil to a medium heat and fry the fish for a couple of minutes on either side - or until just cooked through - this will depend on how thick your fish is!

Set aside.

Put it Together...
Add the pinto beans to the sauce and simmer for 5 minutes. Taste and adjust seasoning if required. Add the almonds, mussels, squid and prawns and cook for two minutes further.

Divide up the fried fish between the plates and spoon over the seafood sauce.

Serve with hunks of bread for mopping up the juices... for instance, my

Single Rise Spelt Bread!

Makes 2 2lb loaves


  • 6 cups wholemeal Spelt flour
  • 2 cups hand-warm water
  • 1 tbsp dried yeast
  • 2 tsp salt
  • 3 tbsp honey
  • 2 tbsp olive oil
  • Toasted sesame seeds to sprinkle
Activate the Yeast...
Dissolve the honey and yeast with one cup of the warm water. Cover and leave for 10 minutes until it starts to foam.

If it hasn't started to foam after this time, try again - the water may have been too hot or too cold. If this doesn't fix it may well be that your yeast is too old and needs to be replaced.

Prepare the Dough...
Add one cup of flour to the dough and mix well, then add the salt and the flour, cup by cup until it is all incorporated.

Turn out the dough and knead for 3 minutes - do not overwork the dough. The dough should be soft but not sticky.

Lightly grease 2 2lf loaf tins*. Divide the mixture in two, shape into loaf sausages and place in the tins. Cover in oiled clingfilm and put in a warm place to rise until doubled.

Spelt can be really fast rising - so start checking after about 45 minutes. In my case it took over an hour though.

Bake!
Preheat oven to 180c.
Lightly brush the tops of the loaves with milk and sprinkle with the toasted sesame seeds.

Pop in the oven and bake for 45 minutes, or until golden brown and sounds hollow when tapped on the bottom. Smells good? We're almost there!

Remove from the tin and put back in the oven for 5 minutes to crisp.

Place on a wire rack and allow to cool for at least 30 minutes before eating.

As well as an accompaniment to the fish stew - this made the most amazing sandwich bread - full of flavour!


* This is what I would have done if I'd had two loaf tins... I only had one - so I wrapped half of the dough in greased film and refrigerated it whilst the first loaf was rising - then let the second rise while the first was baking!)

Thursday, 19 June 2008

Spicy Roti with Fenugreek and Cilantro

Srivalli at Cooking 4 All Seasons is hosting a fabulous event: Roti Mela! Apparently it's on the back of the huge success of dosa mela - which I missed, but love the round ups!

As you may have guessed by the name, the event is to round up everyone's roti recipes - definitely a roundup to be bookmarked I reckon! Rotis are something which I had never really tried until recently - I think they fell into my fear of yeast/baking category.... yes yes, I know they are generally neither yeasted or baked... I was living in roti-free ignorance!

Then I fell out of my comfort zone when I made Coconut Rotis for my Sri Lankan cookery course. I was astonished that something could taste so nice and match the curry so perfectly... and be so easy to do. Not to mention that they let me to eat with my hands, slurp ;)

So here is another roti attempt from me. Having tried layered paratha last month, I fancied doing some with quite a lot of flavour going on. I'd hoped to have enough time to do a stuffed one too - but that was not to be :(

So here is my third roti attempt:

Spicy Roti with Fenugreek and Cilantro


Makes 4
  • 1 cup wholewheat flour
  • handful chopped cilantro leaves
  • 1 thai red chili, finely chopped
  • 1 small clove garlic, crushed
  • 1 tsp grated ginger
  • 1/2 tsp cumin
  • 1/2 tsp coriander
  • 1/4 tsp turmeric
  • 1/2 tsp dried fenugreek leaves
  • 1/2 tsp garam masala
  • 1/4 tsp aesofotida
  • 1/2 tsp salt
  • 1 tbsp melted ghee + more ghee for frying

Prepare the Dough...
Mix the flour, spices, salt, chili, ginger, garlic and cilantro together in a bowl. Slowly add warm water until the dough is soft but not too sticky.
Knead for a few minutes until the dough feels springy, then add the tbsp of ghee and knead well to incorporate.

Wrap in film and set aside for half an hour.

Cook the Rotis...
Heat a heavy frying pan to high.

Divide the mixture into 4, and roll one of them into a smooth ball. (Keep the other ones covered to stop them drying out!) Gently roll it out into a circle (or weird misshapen blob if your rolling skills are anything like mine ;)

Drop a wee bit of ghee into the pan and swirl it about with the back of a spoon (ok, so I *know* that isn't authentic - but I was starving and it worked for me!) Lay the roti into the pan and cook for a minute or two, or until you can see it's mostly changed colour, then flip... Now this is how I know it wasn't authentic - mid-flip, when it was balanced on my spatula, I reached under and swirl a bit more ghee on the pan!!

Meh - whatever, it worked!

Fry for a minute or two until browned and crispy at the edges.

Serve!
Serve with whatever you like! They are quite flavourful, so would probably work with tarka dhal, plain chana masala or something similar. I used mine as part of a somewhat unusual breakfast dish... I'll be posting it soon!

Thursday, 29 May 2008

Tried & Tasted: Tastes Like Home Caribbean Sunday Lunch

Tried and Tasted is a brand new monthly event hosted by Zlamushka of Zlamushka's Spicy Kitchen. Every month Zlamushka nominates one blog - and the entrants recreate and blog recipes from the chosen blog. For the first month the chosen blog is Tastes Like Home. This was a perfect choice for me - I have never cooked Caribbean food before - though have long had it on my list; I had never visited Cynthia's blog before - and now I have another addition to my google reader; and I could indulge my love of hot food... excellent!

It's a great idea - and I've had a great time playing around with these recipes. The hot pepper sauce was something I made outside of the event - though I have decided to include it in my little round up as it was so good it deserved a second mention!

In fact - I ended up using it even more than expected. On Sunday morning I realised I was out of chillies. Seriously - to me that is like running out of salt or something - I always have some in the fridge! So instead, I turned to the hot sauce and walloped a teaspoon into the fried salt fish and half a teaspoon into the buljol. Wow - was it ever good!! The scotch bonnets gave it had an altogether different heat from my usual Thai chillies - and it had a beautiful fruity flavour to back up the burn!

So I present you with....

My Carribean Sunday Lunch!

What a spread!


Fried Salt Fish
This was my favourite of the lot - deeply spicy, lovely chunks of salt cod simmered in tomatoes and onions. And a spoonful of scotch bonnet pepper sauce of course ;) It went absolutely perfectly with the bakes - I will be making this again. And once the fish is desalted, it's super quick to make!

Buljol
This is a cold salad of boiled and flaked salt fish, with peppers, spring onions, onions and tomatoes. (And hot sauce ;) I think I needed to flake the fish more - but I did enjoy the flavours a lot!
Oiled Paratha Roti

I was so impressed with how well these turned out! - I didn't get a picture, but they were beautifully flakey inside, and tasted gorgeous. Not too oily - which I was a little concerned about. In fact not oily at all, just a really nice texture!

Guyanese Bakes

Why are they called bakes when they are deep fried?

Don't care - they're lovely!

Cythia's original!

Thank you Zlamushka for thinking up and hosting this amazing event - I look forward to more!

And many many thanks to Cynthia for her recipes and also for her help when I was making them!

Tuesday, 22 April 2008

Taste & Create: Focaccia

This is my entry for this month's Taste and Create, which is hosted by the lovely Nicole over at For The Love of Food! This month I have been matched with KJ over at A Cracking Good Egg. I spent a fun couple of hours looking through her archives, and eventually narrowed my choices down to the luscious Flourless Chocolate Cake, her take on French Onion Soup, homemade crumpets, or Fantastic Focaccia. Due to serious overindulgence at the weekend, I've had to forgo the chocolate cake, I couldn't find my crumpet rings (I'm sure I had something like this before!), then arbitrarily decided on Focaccia between the last two! I'm definitely keeping these other recipes in my to-make list!

(I've got a rotten head cold just now - which seems to be adversely affecting my writing ability. Apart from the fact that I need to retype every other word due to misspelling (do colds cause the hapless victim's fingers to swell??) I also can't think of anything remotely interesting to say! I'm off work and watching daytime telly - right now, I'm watching a 6ft tall nanny being transformed into SJP. Oh dear, has it really come to this - I'm regaling you with what I'm watching on TV??? I should probably delete it, but bet I probably don't ;)

Ok, ok, stream of consciousness typing ends here!

Focaccia


This recipe was really easy to use. I had to make a couple of alterations - I used 1.5 tsp of active dry yeast, activated in the tepid water with 1.5 tsp of sugar instead of the fresh yeast.

I also let it rise slighty differently - I placed the runny dough into the greased baking tin before a first prove for 40 minutes or so. I then used an oiled spoon handle to push down the dough and create indents in which the olive oil would run. I then recovered it and left it for another half hour. Just before baking I drizzled some extra virgin olive oil over the surface and sprinkled with maldon sea salt.

The resulting bread was really tasty - with a lovely open springy texture - I'm looking forward to trying it again with some different toppings!


Monday, 7 April 2008

The Intrepid Baker Continues... Pita Breads!

Hmm...

Good start to a post?? Maybes not.

Hmmmm... Ok, so it appears this is how my post wants to start!

Well, following the success of my naan bread and berber pizza crust, I do believe I was starting to get, well, a bit cocky really! And following a craving for home-made hummus, I decided to go the whole hog and make the pitas from scratch too!

I checked out a few recipes, then decided on the amalgamation of recipes I was going to use to bake my pitas. (Hmmm... the Intrepid Baker suddenly realises that her inability to follow any recipe as it stands may be at least partially to blame for baking related issues!)

I got my huge tub of yeast from the fridge and activated it as I had before. I decided on a mixture of whole-wheat and white flour - attempting to be healthy? I did read somewhere that there is nothing special about pita bread recipes - it is the manner of baking that causes them to puff and swell in that fabulous way.

So the yeast was activated; the flour sieved; dough kneaded for 12 minutes (!!!), and left to double. So far so good! Once dough was doubled, I rolled them into thin oblongs, covered with a damp cloth and left to rise for another 15 minutes.

It all seemed to be going according to plan... until it came to the baking of the breads. They are supposed to be cooked in a very hot oven, on hot baking sheets (I think a oven stone would be ideal - but I don't have one...)

So the oven was smoking hot, when I realised I had already put the breads onto the cold baking tray. Doh. No worries, I had used parchment paper, so lifted them off, heated the trays before putting thim into the oven. However, hot oven, hot trays, small kitchen and no available work-surface resulted in several burns to the wrists... Note to self, get bigger kitchen. Or oven gloves.

I popped them in and left them for a few minutes. I could hear a really strange noise... The pitas were stuck to the parchment paper... eek! and as they puffed, the paper curled round the pita, the paper was touching the exceedingly hot back of the oven, and burning up!

They all had to go in the bin...

That was two-thirds of my dough, gone in 4 minutes ;) I only had four pitas left to attempt to create something edible!

I'm happy to report, that I did manage to get four, fairly successful pita breads in the end. They puffed up, and tasted good - but I maybe baked them for a minute or two too long, so they were a wee bit brittle at the edges.


This has been a bit of a stream of conscious post, so I won't bother posting the recipe I used. I don't think I have successfully tested it ;) But I test it again, and with some tweaks, hopefully be able to present you with some fabulous pita bread soon!

See, it did puff up in the end!

Friday, 28 March 2008

Naan Bread - from scratch!!

I am not a baker. I've tried, but it really just doesn't come naturally to me. My first ever home-made bread tasted of beer. My bread machine bread could probably be used as a weapon to kill small animals. Flat breads seemed to be just about acceptable - but I wasn't sure if that was due to the lack of yeast, or because I was being supervised by a chef!

Yet, last week, when I was preparing my dough for the berber pizza, something felt a bit different. It started to make a bit more sense. So last night, I put my neck out and decided to make some naan bread... and it worked! It just worked!! No beer smell. It rose as I wanted it to. I burnt a couple... but that's because I got distracted...

I don't know if it is using active dried yeast instead of the sachets. When I see the yeast foaming at least I know something will happen! Or maybe I'm just getting more used to cooking in general...

And so, the intrepid baker presents you with...


Naan Bread


  • 1 1/2 tsp active dried yeast
  • 1 1/2 tsp sugar
  • 1 cup hot water
  • 3 cups white bread flour
  • 1 tbsp salt
  • 3 tbsps ghee - room temperature, so liquid form!
  • 3 tbsps natural yoghurt
  • 3 tbsps melted ghee for brushing
  • garlic salt (optional)
Mix the sugar and yeast with the hot water until dissolved, then leave to stand for 10 minutes until foamy. (Woo hoo - I now know that the hot water wakes the yeast up - and that the sugar is its breakfast!)

Meanwhile, sieve the flour and salt together, add the ghee and yogurt and the activated yeast mix. Mix with a spoon, then by hand until it forms a soft dough, then turn out and knead for 10 minutes. (I even like kneading! It's great seeing the ingredients form a dough... that you just know will work!)

Place dough in an oiled bowl, cover with film and place in a warm place for an hour or so until doubled in size.

Remove from bowl, divide into eight pieces and flatten each one into a round circle - I just used the palm of my hand to do this - you want an uneven surface!

Now, I worked this out as I went through the eight pieces, but I think the best thing to do here, is to make the circles, then cover with a damp cloth for 15 minutes. Oil a baking tray, then take a circle and gently tug it downwards - ideally you want a teardrop pattern. Place this on the tray (you might be able to fit a couple on!). Brush with ghee and sprinkle on a little garlic salt if you like. (Or you could mix a bit of crushed garlic into the melted ghee!) Put it under a medium/hot grill for 2 minutes until puffy and browned. Bring it out, turn, brush with ghee and grill for another 2 minutes on the other side.

Serve immediately!

Anyway, I think I'm getting a bit over-excited with all this baking stuff - stand by for my next baking post... if it stinks of beer, or weighs more than I do, then it could well be the end of the intrepid baker!

Thursday, 20 March 2008

Berber Pizza! And a Mini Travelogue...

Three years ago I went for a two week trip to Morocco with a friend of mine. After a few days in Marrakech, Fes, Casablanca, we went on a road trip, driving over the Atlas mountains to the Sahara.

As you can imagine, food played a big part of my trip - and was one of the things I had been most excited about. But I had been somewhat disappointed by the choice in the cities - the ubiquitous cous cous with 7 vegetables along with chicken or lamb tagines seemed to form the bulk of many menus. We did manage to eat well - but it wasn't quite as easy as I had hoped!

Where was the the spice, the variety and the depth of flavours that I had been looking forward to?
As we drove over the mountains, I found it... Berber food!

Our guide took us into the Sahara, where we rode camels through the moonlight to reach our camp. The fire was already roaring when we got there, with some people playing music whilst others cooked dish after dish of stunning Berber fare. It was all vegetarian, and no two dishes were even approaching similar. As different from 7 veg cous cous as you could imagine!

Me and A. We called our camels Dave and Ian. They had really long eyelashes!

That night we slept in hessian Berber tents (you could see the stars through the tent material), snuggled under about six blankets (it got REALLY cold!!). And at about 5am we were woken to watch the sunrise over the sand dunes. Neither words, nor my photograph can describe how beautiful that was.

Sunrise over the Sahara

So we then trekked back through the desert before meeting our guide. We then had a long drive back, stopping to buy carpets (about a third of the price of those in Fes!), visit a film studio and look round a 6th century mud built town.

Like our Berber headware??

So, by the time we got to a silverware workshop we were almost faint with hunger. After a prolonged haggling session and 3 gorgeous purchases later, I had the most welcome invitation of my holiday... our guide informed us that the silversmith and his wife would like to invite us to stay for lunch!

As we sat down I asked what we were having, to which our guide responded... Berber pizza!

I was bemused - there was nothing that I had seen in Moroccan restaurants or cookbooks that even remotely resembled pizza. Then it arrived - a large round calzone type affair. When he cut into it, the juice from the meat poured out - it was one of the best things I ate all holiday!

The original Berber Pizza!

So when I found out that this month's blog party over at Dispensing Happiness was a Pizza Party, and started trying to decide what to make, the idea of Berber pizza popped into my head... and refused to go. Despite the fact I couldn't find a recipe anywhere! Then, after a few hours of detective work, I finally found this recipe. It is called medfouna - which means 'buried', and is basically stuffed bread! I seem to remember being told that they used to cook this by burning a fire in the sand, putting it out, then burying the medfouna in the hot sand to cook. I haven't been able to find a source to back this up though! I have made a few changes, but only to make it more like the original one I had! I also used half fillet/ half rump steak to cut the cost down.

As for a drink to go with it - Morocco is all but dry, so no alcoholic beverages for me. So instead I think I'll serve this with a glass of freshly squeezed orange juice - the Djemaa el Fna was full of vendors selling the best OJ you've EVER tasted... all for about 25p a glass!


Medfouna - or Berber Pizza!


  • 2 tsp active dried yeast
  • 1/2 tsp sugar
  • 175ml lukewarm water
  • 250g plain flour, plus extra for dusting
  • 1/2 tsp salt
  • 1 tsp caraway seeds
  • 1 onion, finely chopped
  • 1/2 large stick celery, finely chopped
  • 1 red chilli finely chopped
  • 1 handful flatleaf parsley, chopped
  • 1 small handful cilantro, chopped
  • 1 tsp ground coriander
  • 1 tsp ground cumin
  • 200g fillet steak
  • 200g rump steak
  • salt and pepper
  • 1 beaten egg, for brushing
  • sea salt flakes
  • cumin seeds

Start by activating the yeast for the dough - add the yeast and sugar to the warm water and mix to dissolve. Leave for about 10 minutes until the foam starts to form on the top of the yeasty water.

I made the dough in a mixer with the dough blade attached - but you could do it by hand if you like! Place the flour, salt and caraway seeds into the mixer and pulse a couple of times to mix. Add the yeasty water and mix for a couple of minutes - until the dough forms one big ball and the sides of the mixer are clean. Turn the dough out onto a floured work surface, and knead for five or six minutes.


I accidentally forgot to divide the dough at this point - it still worked ok, but it was harder to get a uniform shape! So, divide the dough into two equal pieces and place in bowls. Cover the bowls and leave to rise in a warm place for 30 minutes, or until the dough has doubled in size.

While the dough is rising, prepare the filling. In a pan, fry the onion, celery and chilli for a few minutes until they start to soften (I didn't fancy leaving the onion raw!). Using my mixer I pulsed the meat a few times - I wanted it still to have some texture.

Mix the onion mixture with the parsley, cilantro, coriander, ground cumin and meat into a bowl. Season with salt and freshly ground black pepper and mix well.

To build the medfouna, roll out both risen portions of dough into large rounds about the size of a dinner plate. Place one of the dough rounds onto an oiled baking tray. Place the filling on top and spread evenly, leaving a 2cm edge. Brush the edge with a little egg wash. Place the second dough round on top and press the edges gently together to seal the bread.

Brush the top with the egg wash and sprinkle lightly with sea salt and cumin seeds.

Bake in a preheated oven for about 20 minutes at 180c (350f), or until golden-brown.

Serve in slices and enjoy your Berber pizza!

Thursday, 31 January 2008

Sri Lankan Workshop: Coconut Rotis

To accompany the spicy, piquant tomato sambal and creamily delicious paripoo, we made some coconut rotis.

I'm not usually a fan of coconut meat (although I adore coconut milk and coconut based curries!) but these were really good - and complimented the two sauces very well.

The biggest challenge is trying not to eat them as they come out of the pan ;)

Coconut Rotis


225g plain flour
1/2 tsp salt
180g freshly grated coconut (use a processor for this if you can - otherwise it'd be a lot of hard work!)
30g softened butter (optional)
2/3 green chilies - finely chopped (optional)
2 tbsp finely chopped onions
Coconut oil for frying

In a bowl, mix together the flour, coconut and salt, then add just enough water to form a dough. If you have any of coconut milk left you could use some of that here (either from the paripoo, or the real stuff from cracking the coconut open!). The tutor used some 'real' coconut milk, with some coconut milk from a tin, mixed in with a bit of water.

You want the mixture to be very soft, but not so sticky that it sticks to the work surface.

Work in the onions, butter, and chilies (if using). You may need to add a bit more flour now if the mixture is too wet.

Knead for 5 minutes, them leave to rest for about 20 minutes.

Divide the mixture into 10 balls.

Heat a heavy-based frying pan until very hot, and add some coconut oil. If you don't have any oil, then you could use ghee instead. As you do each ball, only add oil if required, you probably shouldn't need to for each one.

For each ball:
  1. Roll out until about 5mm thick. The way we did this in class was to place a ball between two sheets of greaseproof paper, then used our fingers to spread it out.
  2. Peel the roti from the paper and place in the centre of the pan.
  3. Cook for 1 minute
  4. Turn with the spatula and cook for a further minute on the other side.

Serve with a Sri Lankan curry (or curries!) of your choice!

Wednesday, 23 January 2008

Date and Walnut Loaf

For my Italian cookery course last week I had to take in walnut bread. I looked in various delis, but couldn't find any walnut bread - so decided to take a chance and bake some myself! Now I am not a baker - the only other time I've tried to make bread 'from scratch' resulting in the whole house stinking like a brewery! (although I do use a bread machine from time to time... with ok-ish results)

For these reasons I decided to have a practice go, two nights before my course. I looked up a few recipes, but eventually went for an amalgamation of various things I had read - the key thing I took from the recipes was the ratio of yeast/flour and liquid. I wanted to try using spelt flour - as I think it has an amazing flavour. Due to the fragile gluten structure of spelt, I initially used half spelt with half strong white flour, though in the second attempt I increased the proportion of white flour - you definitely could still taste the spelt!

The second attempt got a second rise too - and definitely was a lot more risen than the first one which I only let rise once.

In both cases, the bread was fairly dense - but very very tasty! In my cookery class I cut it into thin slices and made plum crostini with it. It was utterly gorgeous, and the density worked very well. I will post up the recipe at some time - I have 2 weeks worth of lessons which I haven't even started on yet!

Date and Walnut Loaf


  • 100g walnut pieces
  • 100g dates, destoned and roughly chopped
  • 100g spelt flour
  • 300g plain flour, plus some extra for dusting
  • 200ml warm water
  • 1 rounded teaspoon salt
  • 1 rounded teaspoon quick dried yeast
  • 1 tbsp clear honey
  • 1 tsn roasted sesame oil
Start off preparing the dry mix and the wet mix separately: mix together the flours, yeast and salt in a mixing bowl; whisk the honey and the sesame oil into the warm water.

Pour the liquid into the flour and mix to form a soft dough. You can add more water or white flour as required if it is too stiff or sticky!

Turn the dough out on to a lightly floured work surface and knead for 5 minutes – until the dough becomes smooth and more springy. Try not to overwork the dough - spelt flour has a fragile gluten structure, and will turn too heavy if over-kneaded.

Using your hands, spread the dough out until it is about 2cm thick. Sprinkle with the dates and walnut pieces, then roll up the dough into a 'swiss roll'. Knead for a minute or so to ensure it is all mixed in, evenly distributed, and the the dates and walnuts are all covered in the dough!

Lightly oil the bottom of a mixing bowl, roll the dough into a ball, then turn the dough into it. Cover with a lightly oiled bit of clingfilm and leave to rise for an hour or so - until it has doubled in size.

I read somewhere that dough shouldn't be punched down - that we want to encourage more gas to be produced - not to knock out all the gas we have already managed to get into it. So for the second loaf I made, I turned it out and folded it into an oblong before leaving it for a second proof - it did rise quite a bit better, though that could have been due to the extra white flour in that one... (Make sure you cover with oiled clingfilm for the second rise - about 30 minutes this time)

The picture below was taken just before the second rise.


Meanwhile, preheat the over to about 180°C (350°F).

Once the second proof is over, put it in the pre-heated oven and bake for about 30 minutes. Once ready, the loaf will sounds hollow when tapped on the bottom.

Cool on a wire rack before tasting!