Showing posts with label Home Decor. Show all posts

Monday, September 29, 2014

Halloween Decor Ideas and Projects

I love it when this time of year rolls around and I can decorate for the holidays. It is not even October 1st, and I already have a lot of Halloween decorations around my house. Some are DIY Halloween projects, and others I picked up at the store. We are planning a big Halloween kids party this year and my sons are going to invite their whole class. I will share our invitation soon!


Here is our mantle and fireplace.
 
 
I bought this vintage postal scale at Antique Alley in Grandview, Texas last weekend. I love it and a pumpkin fit on top of it perfectly. If you have never been to Antique Alley it is twice a year and it is AMAZING!


Some old black shutters found the perfect new home on my buffet. I found a twisty tree branch outside, painted it black, and filled a mason jar with stones to hold it.

 
I love to place pumpkins around the house in little spots like this chair.
 
If you are looking for some more Halloween inspiration, here are some ideas and projects I created in the past. Surely something will be the perfect project for you!!


Click here to see how to make this fun sign.


Pumpkin bean bag toss click here for instructions
 
 
Monster tags click here for detailed directions
 
 
Witch yard art instructions here
 
 
DIY Monster pillow link here
 
 
Halloween Felt Cookies instructions here


Sunday, November 18, 2012

Simple Bedside Table Book Decor

I have been helping my friend Emma decorate her new house. She was having a house warming party, and I went over to help all her pictures and decor around her home. I quickly realized we needed some small accents for her tables and dressers. The next day, I went on a garage sale treasure hunt. Her room has an orange and turquoise comforter and accents, so when I found these two old hard back books, I knew they would match perfectly. Did I mention this project cost me 70 cents total?

 
I paid 10 cents a book and I bought a jeweled lace head band for 50 cents. When I got home I cut a piece of burlap 4" wide. I cut off the rubber band portion of the head band, and wrapped it around the burlap. With a simple tie and a few spots of hot glue, my project was done in less then 5 minutes! It looked amazing on my friend's bedside table and matched perfectly!!
 

Sunday, November 11, 2012

Embroidery Hoop Wall Decor Tutorial

As you all know, I have two little boys, so it is a rare treat for me to work on girlie projects. I was asked to help with some embroidery hoop wall decor a few months ago for a little girl's room and I was so excited. I even learned a fun new chain stitch in the process. This is a darling little girl named Kennedy's room. Her favorite word happens to be TWIRL. I love this inexpensive way to add art to a little girl's room.

 
Supplies:
 
Embroidery hoops of different sizes
White paint
Fabric and/or felt
Needle
Embroidery thread
 
Directions:
 
1. Begin by spray painting your embroidery hoops white (or color of your choice)
 
2. I worked on the chain stitch hoop first. Place your fabric in the embroidery hoop and ensure the fabric is taut. I drew on the black fabric with a pencil to outline my design. (They do make special fabric pens for this purpose if you have one)
 
3. Now for the chain stitch...
 
Working the Chain Stitch
Picture from Cheryl C. Fall from About.com
 
The chain stitch is simple, but it still took me quite a bit of time to complete this part of the project.


4. Trim the excess fabric from your embroidery hoop.


5. Each of the other three decorative embroidery hoops had unique fabrics. One was white lace, another was a pink print, and the last one was grey felt with three felt hearts stitched on top.
 
 
It was quite a simple way to glam up a little girls room with some very inexpensive art!


Thursday, October 25, 2012

Spooky Dead and Breakfast Sign

Goodness! Only a week until Halloween. This month has flown by too fast. We had most of our decorations out by the first of the month, but I still feel a little sad the month is almost over. I love having the yard all decorated when I drive up after work.
 
Go figure it starts to get really cold here in Texas right before time for trick-or-treating. It was 80 degrees today and it will be 50 degrees by the morning. I am excited to be taking my 4 year old on a pre-school trip to the zoo tomorrow. I can't wait to meet all his little friends and their parents.
 
In the meantime, here are all of our yard decorations. I saw this fun idea on bhg.com. This sign was a cinch to make. I cut the main sign out with a jigsaw from bead board. My husband made the post to hang the sign off of. (I love my husband so much when he gets sucked into my craft project ideas. Not quite sure he feels the same. Oops!)

 
I used a black sharpie to write Greene's Dead and Breakfast. Vacancy...
Then I used some dark black stain to antique it just a tad.
 
 
Next, I used one of our old wheelbarrows filled with dirt and body parts from the dollar store. Ha Ha. I was super entertained by the sign combined with a few extra extremities.

 
Add a few pumpkins, mums, and spooky spider webs...

 
And before you know it...
(some orange and black tights stuffed later)

 
Our RIP grave yard light up grave stones...(instructions here)
 
 
Oh, and I almost forgot our trick-or-treater witch yard art we made last year...
(instructions here)
 
 
We have a full yard of characters that is for sure!!


Friday, September 7, 2012

Personalized Fabric Clock

 
Have you ever found the perfect theme for a room, and then realized you have nothing to match it? My cousin picked out the cutest camouflage print bedding for her little boy, and then had trouble matching it with any other camo design to fit the room. However, she had an extra curtain left over, and that was all I needed to make this clock to match! You can personalize any themed clock this way.


I started with a see through clock. I picked it up for $5 at the store. I see similar clocks at Walmart and Target on a regular basis.


Next, I cut out her cute camo fabric to fit on the back. I had to leave a hole in the middle to accommodate the battery pack on the back. I painted a very thick layer of modge podge on the back of the glass and carefully laid the camo fabric down. I pushed from the center of the clock out to smooth the fabric out as much as possible. I then applied a thick layer of modge podge on the back and smoothed it out some more with my fingers.

 
I set it off to dry and it looked like this when it was done...
 
 
It was a quick and easy gift to make. The whole project took me about 20 minutes. Just imagine the possibilities of what some cute fabric can do to spice up your room!
 
How is school going for your kids? My oldest son started Pre-K at his childcare facility this week. I was suprised at how worried he was to have new teachers and kids in his class. The first day he came home and told me how awful it was. With some further questioning, I found out he did all kinds of fun activities. They painted, played outside, sang songs, played with cars and trucks, etc. The next morning when he was headed off to school I asked if I could come with him. He started giggling. I explained to him that school sounded like much more fun then my work, and that I wanted to see the transportation cabinet that hid all the trucks and cars. He was so busy convincing me I was not allowed to go because I was not 4, that he ran right into school. Once in a while, a little "jealousy" goes a long way. When he arrived home that night, he bragged about all the fun things he was able to do at Pre-K that day. It is funny how a change of perspective can go a looong way!! Thank goodness!


Friday, July 20, 2012

Easy Sew Envelope Pillow Covers

I am so excited to share with you these lovely and easy to sew pillows. My cousin's wife emailed me with a project idea for her new apartment and I was thrilled. She ordered this fabulous fabric online and wanted to cover her current pillows with a more modern and chic look. I immediately loved her fabric choices. My house is more rustic, so it was a great opportunity to make something with bright and vibrant fabrics for a change.


These pillow are so inviting!

Instructions:

1. Cut your fabric long enough to wrap around your pillow horizontally with about a 6 inch overlay. Measure the height of the pillow and add 2 inches more.
For example if your pillow was 16x16...you would cut a piece of fabric width (16x2+6=38 inches)...and the height (16+2=18).
Goodness, this is hard to explain. I hope the picture helps. I am generous with the 2 inches extra, because it allows me to not have a perfect 1/4" seam.


2. Fold over the fabric on the short ends and sew a seam to give it a finished look.


3. Lay the fabric print side up and lay your pillow on top.

4. Fold up one side of fabric followed by the second side of fabric. Then, carefully slip out the pillow.


5. Once you slip out the pillow, secure the fabric with pins. See picture above and notation of where to sew.


 Sew along your pin line. (This is Sara sewing her first pillows!)

6. Turn pillow cover inside out and stuff your pillow inside your new cover.

The best thing about pillow covers is you can change them as often as you like, and you can also remove them for washing. What a bonus if you have kids, animals, or the husband that insists on eating on the couch! These may have taken us 10-15 minutes per cover including cutting, pinning, sewing, and covering. It's time to spruce up your house for the summer!

Thursday, February 9, 2012

Valentine Heart Wreath

I passed an adorable Valentine wreath a few weeks ago on Pinterest and then couldn't find it again. That is what I get for delayed pinning. I am pretty sure that is the whole point of the site too! I remembered enough, to make a similar one of my own, before I finally found the inspiration wreath at Remodelaholic. Obviously, mine looks a little different, because I was only born with a partially photographic memory.


Supplies:

Foam wreath
Grey yarn
Pink and Red felt
Ribbon
Name Initial (If desired)

Directions:

1. I started by wrapping my green foam wreath with the yarn. I tied off the first loop of yarn to hold it in place. A little glue would have worked too.


2. Find a good movie or tv show and start wrapping....and wrapping...and wrapping.


3. Cut out your hearts from red and pink felt. Once your wreath is completely wrapped, lay the hearts in place on top. (Don't cut the yarn yet!)


4. Start wrapping over the hearts carefully, keeping in mind, that at then end you want it took look like an X over each heart.


5. Wrap a second time around the wreath until you have the X pattern on each heart.

6. Tie off your yarn at the end and tuck it in on the back side of the wreath. I painted my G red and hung it down in the middle of the wreath.


What fun last minute Valentine projects are you up to?

We are not so patiently waiting at our house for a new addition. No, I am not pregnant...but our pygmy goat is. See our fun story of Cookie (the goat) here. We are still new to farm life, but I am pretty sure she is due any day.


Tuesday, January 31, 2012

I Love You Because...Mirror with Dry Erase Marker

I have been inspired by Pinterest once again. I saw some cut out signs with I love you because. I have had a mirror that I picked up at a garage sale for 50 cents laying around my storage building. It was finally time to do something with it! With Valentine's Day around the corner, I thought this would be the perfect decor. And besides, my 3 year old informed me today, that we just did not have enough Valentine's decorations out. I think I have created a holiday monster. Lol!


Here is the ugly gold mirror I started with...


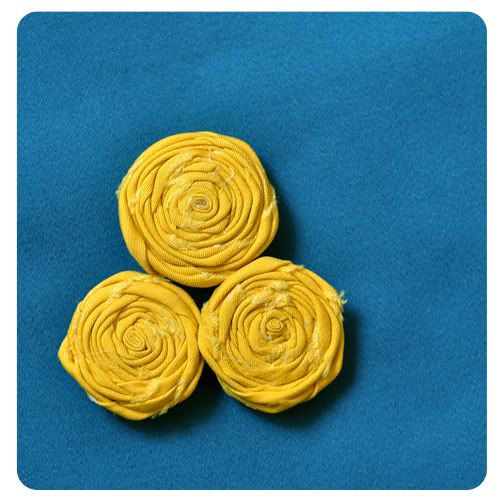
I taped it off and spray painted it with glossy black paint. Oops. I forgot to take a picture of this step. Then, I finally tried some of the precious little flowers I see on blogs everywhere. I found a great tutorial. The pictures were so amazing, and the steps so clear, that I made my first rosettes (rolled flowers)!
Photobucket
I found this awesome tutorial at My Sparkle. Check out her blog here.


Here are my first five attempts. The rolled flowers were easier to make then I anticipated. I can't believe I waited this long. Just remember, they don't have to be perfect. Imperfection adds to the creative unique look in my opinion. I just hot glued my little rosettes to the mirror. The last step was adding the saying, I love you because... I sure wish I had a fancy machine, but I just used some stickers.

I think the hardest part was taking the pictures to share with you. It is sooo hard to get a good picture of a mirror without some crazy reflection! I set a dry erase marker out, and I can't wait to write some love notes to my family on the mirror.
Related Posts Plugin for WordPress, Blogger...