Showing posts with label bread. Show all posts

Sunday, December 4, 2011

Semolina, Olive and Rosemary Focaccia

Yesterday I came across a contest sponsored by California Olive Ranch and Bob's Red Mill for recipes featuring their products - or so I thought when I first glanced it over. Call me bad, I have a problem with skimming. I checked out a variety of recipes through Google for inspiration, but didn't find exactly what I wanted, so I thought, "Well hell, I'll improvise."

So I hustled my ass right into the kitchen, worked some of that culinary alchemy that bakers live for, and a few hours later, I had this: Semolina, Olive and Rosemary Focaccia.

When I sat back down at my computer to enter the contest, munching on the delicious focaccia I might add, I saw that they only wanted ideas for combining their products, not actual recipes.

*dope slap*

What the hell, I entered anyway, and as a bonus, I have a very lovely recipe for a savory focaccia made from semolina.

Semolina, Olive and Rosemary Focaccia


Ingredients:

  • 1-1/3 cups water
  • 1/3 cup olive oil
  • 2 cups bread flour
  • 1-1/2 cups Bob’s Red Mill Semolina Flour
  • 1 tablespoon vital wheat gluten
  • 1-1/2 teaspoon salt
  • 2-1/4 teaspoons active dry yeast
  • Pinch of sugar
  • ¼ cup chopped kalamata, oil-cured, green and Greek black olives, mixed
  • 2 tablespoons chopped fresh rosemary
  • 1 tablespoon sea salt or kosher salt
  • 1 tablespoon chopped fresh rosemary
For thte rosemary-infused olive oil:
  • ½ cup olive oil
  • 5 sprigs fresh rosemary

Directions:

  1. Sift together the vital wheat gluten and bread flour in a small bowl and set aside.
  2. In a large bowl, mix together the semolina and salt.
  3. Heat the water to 110 F and add the sugar and yeast. Let sit until foamy, about 5 minutes. Then make a well in the center of the semolina and pour in the proofed yeast mixture and the olive oil.
  4. Stir well to combine and add the bread flour and gluten mixture ½ cup at a time, stirring well after each addition.
  5. Once the flour has been mixed in and the dough has come together to form a rough mass, dump it out onto a floured surface and knead for 8 minutes, then fold in the chopped mixed olives and 2 tablespoons of rosemary.
  6. Continue to knead until the olives and rosemary are well incorporated and the dough is smooth and elastic, about 10 minutes, adding more flour as needed to keep the dough from sticking to your hands.
  7. Cover with a kitchen towel and let rise in a warm spot for about an hour, or until doubled in size.
  8. Make the rosemary-infused olive oil: combine ½ cup olive oil and 5 sprigs of fresh rosemary in a pan and cook over low heat for about 5 minutes, then take it off the heat, let cool and put into a container and refrigerate until needed.
  9. Preheat the oven to 400 F and prepare a 9 x 13 inch baking sheet by coating it with a thin layer of olive oil. When the dough has doubled in size, punch it down to deflate it, then press it to fit into the baking sheet, making indentations with the tips of your fingers to create dimples in the dough.
  10. Cover with a towel and let rise a second time for 45 minutes.
  11. Remove the towel, drizzle 1 tablespoon of rosemary-infused olive oil over the dough, then top with another tablespoon of chopped rosemary and sprinkle with sea salt, then bake for 20 – 25 minutes or until golden brown.
  12. Let cool on a wire rack, warm the rosemary-infused olive oil in the microwave and then serve the focaccia warm with the dipping oil.

Bread machine directions:
  1. Place the ingredients in your bread machine according to the manufacturer's specifications, set it to the dough cycle and walk away until step 8.
  2. Make the rosemary-infused olive oil: combine ½ cup olive oil and 5 sprigs of fresh rosemary in a pan and cook over low heat for about 5 minutes, then take it off the heat, let cool and put into a container and refrigerate until needed.
  3. Preheat the oven to 400 F and prepare a 9 x 13 inch baking sheet by coating it with a thin layer of olive oil. When the dough has doubled in size, punch it down to deflate it, then press it to fit into the baking sheet, making indentations with the tips of your fingers to create dimples in the dough.
  4. Cover with a towel and let rise a second time for 45 minutes.
  5. Remove the towel, drizzle 1 tablespoon of rosemary-infused olive oil over the dough, then top with another tablespoon of chopped rosemary and sprinkle with sea salt, then bake for 20 – 25 minutes or until golden brown.
  6. Let cool on a wire rack, warm the rosemary-infused olive oil in the microwave and then serve the focaccia warm with the dipping oil.

Wednesday, November 23, 2011

Cheese Parathas

I needed a last-minute lunch before I had to hit the road to leave for our Thanksgiving road trip, so I settled on 2 cheese parathas. Quick, easy, tasty.


Parathas are very easy to put together and cook; you'll be done before you know it. It took me longer to get my camera set up and take these pictures than it did to make and cook the parathas from start to finish.

Parathas are an unleavened whole wheat Indian flatbread, often stuffed with some sort of spiced deliciousness. My favorites are the potato-stuffed parathas (Aloo Paratha) and cheese-filled parathas (Paneer Paratha), but you can find them stuffed with cooked, mashed cauliflower, and probably a variety of other ingredients.

When I came across this video from Manjula's Kitchen, I knew I wanted to try making the parathas her way. She made it look effortless and tasty. No doubt she has years of working that tiny rolling pin under her belt, and although I did a pretty good job of filling and rolling my parathas, they were not as thin and lovely as hers are.

Like so many other things, it just takes practice.


I wanted cheese parathas, but I didn't have paneer or plain yogurt, or even cilantro. I had to fudge the filling a bit to use what I had on hand, but I think that it worked out fine.  I also reduced the recipe quite a bit to make just 2 medium-sized parathas instead of 6 larger ones.

Cheese Parathas


Makes 2 medium parathas

Ingredients:
  • 1/4 cup whole wheat flour
  • 1/8 cup all-purpose flour
  • 1/8 teaspoon of salt
  • 3/4 teaspoon oil
  • approximately 3 tablespoons lukewarm water
  • 2 tablespoons green onion, minced
  • 1 heaping tablespoon sour cream
  • 1 tablespoon chopped cheese curds
  • salt
  • pinch of granulated garlic
Directions:
  1. Sift together the salt, whole wheat flour and all-purpose flour in a bowl.
  2. Add the oil and mix briefly to moisten the flour, then pour in the water.
  3. Stir the mixture together with a fork until it forms a ball, then turn it out onto a floured surface and knead until it is smooth.
  4. Let rest for 10 minutes.
  5. In a small bowl, mix together the minced green onion, cheese curds, sour cream salt and granulated garlic until well combined.
  6. Divide the dough into two pieces and roll them out into a circle about 1/4 inch thick. Place half the filling in the center of the dough and then bring all the edges together and pinch them closed so that you have a ball of dough encasing the filling. Repeat with the second piece of dough and let them rest for 2 to 3 minutes.
  7. Carefully roll out the stuffed ball of dough to a circle about 4 inches in diameter - the first few times you do this, the filling may squeeze out a few holes. Don't worry too much about this, it will gtet better with practice.
  8. Lightly oil a griddle or a large skillet - I use my cast iron skillet or griddle and raise the heat to high. Place the rounds of bread on the hot griddle and cook until the edges begin to brown slightly, then flip them over. If the rounds puff up a bit as you're cooking, that is a very good thing.
  9. After about 3 minutes, flip them over again to check the color, they should be speckled golden brown. Cook for another 2 to 3 minutes and then place them on a plate lined with paper towel to absorb any excess oil if needed.
  10. Serve hot.

Friday, November 4, 2011

Pumpkin Bread

Look! More pumpkin!

Yes, we've been hot-and-heavy with the winter squashes lately, but that's ok, because they are equally delicious in sweet and savory dishes alike. Some people think that pumpkin's only reason for existence is to be carved into some gruesome jack o'lantern for Hallowe'en or magically whipped up into a pie for Thanksgiving, but it is so much more versatile than that.

Truth be told, pumpkin pie isn't even my favorite pumpkin dessert. No, that would be spiced pumpkin cheesecake. Coming in after that, and still before the pie, are pumpkin gingerbread and pumpkin bread, and those are still in the realm of desserts. Dishes such as pumpkin lasagna, pumpkin ravioli in sage brown butter and curried pumpkin soup do a fantastic job of showcasing pumpkin's savory side.

If you want something pumpkiny and immediate, a quick bread like this one really delivers. It took me longer to assemble my ingredients than it did to get the batter in the oven, and the scent that filled the house while it was baking was just indescribably wonderful. Those fall baking smells are one of the reasons I look forward to fall so intensely.

This loaf is richly scented and moist, with the bits of pecan studded here and there providing nice texture.

Pumpkin Bread


Ingredients:
  • 1 cup fresh pumpkin puree, or about ½ of a 15 oz. can
  • 2 eggs
  • ½ cup pumpkin-apple butter*
  • 1/3 cup water
  • 1 cup brown sugar
  • 1¾ cup all-purpose flour
  • 1 teaspoon baking soda
  • ¾ teaspoon salt
  • 1 teaspoon cinnamon** 
  • ½ teaspoon nutmeg
  • ¼ teaspoon cloves
  • ¼ teaspoon ground ginger
  • ½ cup chopped pecans
Directions:
  1. Preheat the oven to 350° F
  2. Grease and flour a large loaf pan.
  3. Ina  large bowl, mix together the pumpkin puree, eggs, pumpkin-apple butter and water until thoroughly combined. I did this in the food processor when I realized that the pumpkin puree I had processed the other day still had some chunks of pumpkin in it.
  4. In another bowl, mix together the flour, baking soda, salt and spices.
  5. Add the dry ingredients to the wet, and mix well.
  6. Stir in the pecans.
  7. Scrape the batter into the prepared loaf pan and bake for 50 - 60 minutes or until a toothpick or cake tester comes out clean.
  8. Cool in the pan for 5 minutes and then turn out onto a wire rack and let cool.

Notes:
  • I replaced the oil that is usually found in these recipes with pumpkin-apple butter, but if you don't have any, you can substitute with the same amount of applesauce or a mild oil, like canola.

    If you do use the same pumpkin-apple butter, you can cut down on the spices provided in the recipe, because the pumpkin-apple butter is very generously spiced already. In fact, I added no extra spices at all. If you decide to use oil or applesauce, however, you will need to add the spices listed in the recipe.

Saturday, October 29, 2011

Kaiser Rolls

Not too long ago, I made another batch of pulled pork, bascially the same as this recipe, but with a few tweaks in the spice rub to go along with the very different apple-maple-bourbon-chipotle barbecue sauce** I dreamed up. The sauce worked, let me tell you, and the kids devoured the pulled pork sandwiches. It had been such a beastly sized pork butt - 6 pounds, if you can believe it - that I set some of the pork aside and froze it for a future meal.

Well the kids didn't want to wait long, so I defrosted the pork the other day and planned on making sandwiches as usual. There was only one problem: I had no kaiser rolls and I was in no mood to get dressed and drag myself out to the store for just one item, so I went to the King Arthur flour site and looked up kaiser rolls.

Sure enough, they had what looked like a simple but killer recipe. They were such a success that I had to make them again yesterday. I did have to make a change or two to the procedure, and without thinking, when I made them the second time, made a substitution to the list of ingredients, but this recipe really works either way. The kids were very impressed with the rolls and thought that they looked like something you might be able to buy in the store's bakery.

Yes, that is high praise. :)

Kaiser Rolls


Makes 6 rolls


Ingredients:
  • 3 cups all-purpose flour
  • 1-1/2 teaspoons yeast
  • 1-1/2 teaspoons sugar
  • 1-1/4 teaspoons salt
  • 1 egg
  • 2 tablespoons butter
  • 3/4 cup milk or water*

Directions:

Manual method:
  1. In a large bowl, mix together all of the ingredients, stirring until the dough forms a rough mass and pulls away from the sides of the bowl. 
  2. Knead the dough for 5 minutes, then let it rest for 10 minutes, then knead the dough for another 5 minutes. The dough should be smooth and silky, but stiff to work. If it is too sticky, knead in a bit more flour until it is nicely smooth.
  3. Put the dough in a lightly oiled bowl, cover with a kitchen towel and let rise  in a warm spot in your kitchen for an hour. I usually preheat the oven to 425°F at this point to get it good and hot and help warm up my drafty kitchen. 
  4. Once it has risen for an hour, place the dough on a lightly floured surface, and divide it into six pieces. Roll the pieces into balls, dusting them slightly with the flour and place them on a cookie sheet lined with a Silpat baking mat or parchment paper. Alternately, you can grease the cookie sheet. 
  5. With a large chef's knife, cut 3 slashes down into the top, making a star pattern. You'll want to press down and in one motion, slice down almost all the way through to the bottom. Don't saw through the bread. You want nice, clean cuts.
  6. Cover the rolls and set them in a warm part of the kitchen and let rise for 1 more hour, or until they've just about doubled in size. 
  7. Bake the rolls in a preheated 425°F oven for 15 to 17 minutes until golden brown. 
  8. Remove the rolls from the oven, brush the tops with cold butter, and cool on a wire rack until ready to use.
Bread machine method:

  1. Place the ingredients into the bowl of your bread machine in the order recommended by the manufacturer, set on the dough cycle and walk away. 
  2. Then follow steps 4 - 8 above. 

Notes:
  • The original recipe from King Arthur Flour calls for 3/4 cup of water instead of milk, and when I made them the first time the other day, I did indeed follow the recipe exactly as it was written, but when I made these again yesterday, I inadvertently used milk, probably because my favorite multi-grain bread recipe uses milk and I had just made 2 loaves of it this week and had that on the brain. Whatever the reason, I liked the resulting texture of the milk rolls better.
  • I also changed the shaping procedure somewhat, since I do not have a kaiser stamp. I had to use my chef's knife to slash the tops. 
  • The first time I made these, I flipped them over after they were cut to let them rise cut-side down, but I thought that they turned out a little too flat for my taste, so the second time I made them, I let them rise cut-side up.
  • Apple-maple-bourbon-chipotle barbecue sauce recipe to come soon.

Thursday, July 1, 2010

Healthy Eating

For the past few days this week, I have been eating healthier: More vegan and raw foods, though not totally vegetarian. I can not give up my weekend pizza gorge-fest, so I am trying to offset any potential damage by eating the best foods possible during the week. Besides, when it is hot out, I'd just as soon not turn on the oven.


For breakfast: Raw Apple Breakfast.*


Snacktime: persian cucumbers stuffed with a vegan cashew puree (sometimes called cashew cheese**) and topped with zesty sprouts and sunflower seeds.


For lunch, I had a tomato and avocado salad with watercress and a lime-cayenne dressing on homemade flatbread. Sorry, no picture. I practically inhaled it before it even occurred to me to take a photo.


But about these flatbreads***, one of my favorites. It is amazing how a lump of dough can go from this:


To this, in just about an hour and a half.


This particular recipe I like to cook on a griddle even though it smokes the hell out of my kitchen.

Look carefully, you can see smoke.


But the end result is worth it.


Raw Apple Breakfast
Ingredients:
  • 1 tart apple (I like Granny Smiths)
  • 1 T almond butter
  • agave nectar or honey
  • 1 T flax seeds, ground in a coffee grinder
  • pumpkin seeds
Directions:
  1. Take one apple, peel and all, core it, cut it into quarters and toss it into a food processor with the almond butter.

  2. Process until nicely chopped.

  3. Then put in a bowl and drizzle the agave nectar or honey over it and top with ground flax seeds and, my favorite, pumpkin seeds.

    You can also top with fresh berries or, if you like to live dangerously, some Greek yogurt. Wheat germ sprinkled on top is also a nice option.

  4. It is filling, packed with fiber and very tasty.

**Vegan Cashew Cheese

Ingredients:

  • 2/3 cup raw, unsalted cashews
  • 1/2 cup water
  • 1/4 cup chopped sun dried tomatoes
  • 1/4 cup nutritional yeast
  • 2 garlic cloves
  • 3 T lemon juice
  • 8 large fresh basil leaves
  • 1 T Bragg's Liquid Aminos (or soy sauce)
  • 1 tbsp cold-pressed olive oil oil
  • 1 tsp sea salt

Directions:

  1. Put everything in a food processor and blend very well until it is nice and creamy. If it's too thick, add more water slowly through the feed tube until it reaches the consistency you like. If it's too watery, toss in a few more cashews.


***Sesame-Flax Whole Wheat Flatbread

Ingredients:
  • 2 teaspoons dry active yeast
  • 2 1/2 cups warm water
  • 1 cup flax meal
  • 1 cup bread flour
  • 3 to 4 cups of whole wheat flour (or a combination of whole wheat and bread flour)
  • 1 T salt
  • 1 T olive oil
  • 1/3 cup untoasted sesame seeds

Directions:
  1. In a large bowl, mix together yeast and warm water. Let sit for 10 minutes in a warm place until the yeast mixture is foamy.

  2. Add the flax meal, bread flour, and 1 cup of the whole wheat flour, one cup at a time, mixing well until you have a rough, shaggy dough that starts to drag on the sides of the bowl.

  3. Cover with plastic wrap and let rest for 30 minutes. When it is done, you will have a messy-looking sponge. Don't worry, it is not supposed to look pretty at this point.

  4. Add the sesame seeds, salt and oil, mix well and then add the remaining flour 1/2 cup at a time until you have a nice stiff dough. Sometimes you may need only 2 cups of the flour, and at other times, you will need the full 3 cups.

  5. Turn out onto a floured surface and knead well for 8-10 minutes until dough is smooth and elastic.

  6. Place dough in a lightly oiled bowl, cover with plastic wrap and let it rise int a warm spot for 1 1/2 hours or until doubled in size.

  7. Preheat a cast iron griddle or skillet over medium-high heat.

  8. Punch down the dough and divide in half. Section it into 8 pieces. Roll out each ball of dough to about 1/4 inch thickness.

  9. Lightly coat the griddle with cooking spray.

  10. Place a round on the griddle (mine can hold two at a time). Let it cook for 15 second, then flip it. Let it cook for about a minute until bubbles start to form, then flip it back over and let cook another minute.

  11. Repeat with remaining dough.

  12. Wrap the breads in a kitchen towel to keep warm.

Note: This will smoke the hell out of your house, so have the windows open and the fans cranked, but it is so worth it.

Monday, June 14, 2010

Bruschetta

I rented Julie and Julia recently, which is lovely little movie and about as far as I go on the chick-flick meter. Honestly, I like this movie mostly for the food, although I can relate to Julie Powell to an extent. She said at one point that she felt lost and likened it to the sensation of drowning.

Now, unlike Julie, I didn't feel that way around my 30th birthday - 30 was a good year for me: I was happily married, pregnant with my first child, had a cute little house near the water, yes life was shiny and wonderful for me at age 30. Once I neared 40, however, it was a different story: marriage in tatters, one child in a grave, no prospect for employment after 10 years spent at home as a stay at home mom. Indeed. I am floundering and beyond lost. My life has been circling the drain since my husband left me in 2006. Cooking tasty food is almost the only outlet I have that gives me any pleasure anymore.

I rented the movie recently because I wanted to be inspired again. Those two women, Julie Powell and Julia Child also faced down some angsty life moments, but they seemed to conquer them. I guess I wanted reassurance that it could happen.

Ok, tangent over, now to the real point: When I was watching the movie, I was struck again by how absolutely luscious the food looked. That one scene near the beginning where Julie and her husband are eating a plate full of bruschetta had me salivating from the start. So yesterday, I whipped up my own version.

In case you've never seen the movie, you can see the marvelously mouth-watering bruschetta at the 1-minute mark in the trailer below.


Bruschetta


Ingredients:
  • rustic artisan bread - ciabatta, rustic Italian, French- something with a crusty exterior, but still soft inside.
  • 1 garlic clove, cut in half
  • 1 heirloom tomato or a beefsteak/vine-ripened, hothouse tomato if it isn't quite tomato season yet
  • fresh basil - 8 large leaves
  • olive oil
  • balsamic vinegar
  • salt & pepper
  • shredded parmigianno

Directions:
  1. Chop the tomato and put in a bowl.

  2. Drizzle with about 1 T olive oil and 2 t balsamic vinegar.

  3. Tear up 8 large leaves of fresh basil and toss in with the tomatoes

  4. Season with salt and pepper, and toss with a fork.

  5. Set aside to marinate for about an hour.

  6. After the tomato mixture has sat for about an hour, heat a skillet or heavy griddle over medium-high heat.

  7. Cut the bread into thick slices.

  8. Rub each side with half of a cut garlic clove.

  9. Pour some olive oil into a small bowl and with a pastry brush, smear the olive oil onto both sides of the bread.

  10. Place the oil-saturated bread in the hot skillet and toast until golden brown on each side, turning once.

  11. Remove from heat, plate, and top with the tomato-basil mixture, and sprinkle with freshly grated parm.

  12. Eat immediately while the bread is still toasty.

Notes:
  • In the movie, they used a variety of heirloom tomatoes- yellow, orange and red. Once my local Farmer's Market is in full swing with more fresh tomatoes, I'll be making this again with a wider variety of tomatoes.

  • Susan Spungen, food stylist for the movie, gives the recipe for the movie version in an article in The Atlantic.

    My version differs only in the addition of the balsamic vinegar to the marinating tomatoes and the grated cheese on top.

  • If you want to cut a few calories, you can toast the slices of bread in the oven until browned instead of basically frying them in a skillet or on a griddle, but why would you want to do that? ;-)

  • I used to be skeptical about the whole rub a cut garlic clove on the bread thing until yesterday when I realized that I could actually taste the garlic. I had no garlic in the tomato mixture at all and was using regular olive oil, not the kind infused with garlic. There was a definite hint of garlic in the final product -subtle and perfect, so I am totally sold on that.

Tuesday, January 5, 2010

No-Knead Bread: Why Bother?

For some reason, the past few months, everywhere I go on the internet I see some reference to the Bittman/Lahey No-Knead Bread which Mark Bittman originally mentioned in a 2006 article, and this youtube video clip:


As a bread-lover and long-time home baker, the phrase "no-knead bread" gives me a visceral twinge, and not a pleasant one. Now, I don't always knead my doughs by hand: In the past, I've relied heavily on my Zojirushi bread machine, Kitchen Aid mixer and even my food processor to work the dough, but some breads I save for 100%-by-hand manipulation.

Kneading a large mass of dough just feels great.

Not only is there therapy to be had in sometimes-brute pounding, the rhythmic knead-turn-fold-knead-turn-fold technique required in some breads' longer kneading time is downright meditative. Each stage of bread baking brings along with it its own special pleasure, whether it's the physicality of the kneading, the warm, earthy smell of proofing yeast mixture, the sensual attraction of shaping the dough, or that final shudder of anticipation when you pull a fresh, nicely browned loaf out of a blazing hot oven.

So why would anyone forgo some of these pleasures by creating a no-knead bread?

Also (for the bread freaks out there): Can a long, slow rise with a very wet dough really build the same essential structure out of the flour's gluten molecules as we get from the traditional kneading process?


Fans of the No-Knead bread claim that the proof is in the final taste, crumb and crust.


I have to admit, it's intriguing, if only in an "I'll try anything once" way.

Despite the wave of ecstatic reviews (many by acknowledged first-time bakers), I have read a few reviews of this bread which are less than rhapsodic: loaves stuck to the pot, burned bottoms, wet interior, insufficient rise, and a flat taste.

To be fair, there's no way to be sure that these posters followed Jim Lahey's instructions exactly. Plus, as with any bread-baking adventure, we should account for any number of variables: the ambient temperature during the 12-hour rise, the ratio of liquid to dry ingredients, the type and liveliness of the yeast used, and the true temperature of the oven during baking, and over-hasty slicing while she bread is still warm.

I imagine I may have to put this on my to-do list of breads, which is not a short list.


Mmmm... bread.

Monday, January 4, 2010

Russian Black Bread: An Ongoing Odyssey

Russian black bread (Ń‡Đ”Ń€ĐœŃ‹Đč хлДб/ chorniy khleb) is a dark pumpernickel-like, rye bread which is more than just pumpernickel. I know, you would probably never think of a hearty, delicious pumpernickel bread from a deli to be qualified as "just" anything, but you'd understand if you ever tasted Russian black bread. It's pumpernickel, yes - but deeper, richer, darker than you could ever have imagined.

Bread at its most basic is an alchemical mixture of flour, yeast, water and salt. Pumpernickel ups the ante by adding molasses, caraway seeds, and rye flour among other ingredients. Russian black bread takes the German pumpernickel to new heights of aroma and depths of flavor than you would believe.

When drinking vodka with Russians, you'll have yummy snacks, or zakuski, to accompany each sip. This black bread is definitely on the table, sometimes topped with butter, caviar, sliced cucumber or pickles.You'll love this as the base for a sandwich, topped with cream cheese and smoked salmon or - my favorite - toasted and slathered with butter.

Russian Black Bread


Ingredients:
  • 1 ½ cups water
  • 2 tablespoons butter
  • 2 tablespoons molasses
  • 2 tablespoons cider vinegar
  • 2 ½ cups bread flour
  • 1 cup rye flour
  • 1 teaspoon salt
  • 1 tablespoon brown sugar
  • 3 tablespoons unsweetened cocoa powder
  • 1 teaspoon instant coffee granules
  • 1 tablespoon caraway seeds
  • ¼ teaspoon fennel seed (optional)*
  • 2 teaspoons active dry yeast
  • coarse cornmeal

Directions:
  1. Add the ingredients in the order recommended by the manufacturer and put it on dough cycle.

  2. When the dough has finished with the first rise, take it out of the mixing pan and on a counter covered liberally with cornmeal, knead the dough briefly.

  3. Shape it into a round or a large, long loaf and place it on a baking sheet lined with parchment paper.

  4. Cover with a towel and let rise in a warm place for an hour or until it has risen to 1 ½ times its original size.

  5. Bake in a preheated 350°F oven for 45 to 50 minutes or until loaves are well-browned.


Notes:
  • First, this is an excellent loaf of bread.

    I scarfed down two pieces of it toasted with butter for breakfast this morning. However, this bread was slightly sweeter than the black breads I remember eating in Leningrad & Moscow, or even in Estonia, and believe me, like kimchi in Korea, this bread was a daily staple.

    More than anything else, this strikes me as a very good American-style pumpernickel bread.

    I may try a bit less molasses and a bit more cider vinegar next time. The bread I remember had a distinctly sour taste. Also, the texture is lighter, not as dense. Perhaps using all rye flour makes the difference. The gluten in rye flour is weaker than in wheat, making for a denser, heavier loaf.

    Alternately, I could begin with a sourdough starter. In my research of pumpernickel and black breads, I recall reading that traditional Westphalian pumpernickel uses a sourdough starter to counteract the strong amylases in rye meal; also, the bakers use a very long baking time to give it the dark color which many other recipes achieve through darker ingredients like molasses, coffee granuules and cocoa powder. Also, it is an all-rye loaf, whereas many other rye breads use a mixture of flours to improve the gluten and structure.

    I don't know if I've ever had the traditional German pumpernickel or if it tastes anything like Russian black bread. I have a sneaking suspicion that this may be my next task: finding an authentic recipe, baking it and see how close the taste comes to my memory of those unforgettable black breads.

  • Ah-ha! I just found a recipe for Russian black bread which uses a starter.

    I also found, on some of the recipes (like this one) which make use of ingredients (cocoa, coffee, molasses), comments from people saying that this bread just isn't quite the same as the beloved chorniy khleb that they recall. So, yay, I'm not the only one! Once I'm done with this loaf, I am making this other Russian black bread recipe, or I could make it today so I can do a side-by-side taste test comparison.

    My, it would be handy to have some Russians nearby to get their opinion. I do know an older Russian lady in the neighborhood: she's the grandmother of one of my older daughter's classmates. We've chatted in Russian from time to time, and she's a common sight walking down the road in her traditional Russian babushka outfit: housecoat, cardigan, woolen socks, tufli (slippers) and scarf. I know that there are several other Russians in that retirement home. Would it be weird of me to drop by with a few loaves of chorniy khleb? Probably.

  • Since I was elbow-deep in pirozhki-production when I started this yesterday, I decided to use my bread machine.

    To make this bread by hand:

    1. Proof the yeast with the sugar and warm water for 5 minutes or until the yeast gets foamy.

    2. Melt the butter, let it cool and add the molasses and cider vinegar to the butter. Mix well.

    3. Toss the salt into the yeast mixture, add the butter mixture to it and stir well.

    4. Start adding the dry ingredients, stirring well after each addition.

    5. Knead, let rest for an hour and a half or so, then shape, rest again and bake.

    6. Presto.


  • I know I have fennel seed somewhere, but I tore my spice cabinet apart looking for it and I simply could not find any.

    I mean, I can't tell you how many times have I been looking for cardamom pods, cumin seeds or mustard seeds only to find the jar of fennel seeds and ask myself, "Why the hell did I buy this? I never use it!"

  • I wonder what difference using Dutch-processed cocoa powder (DPC) would make.

    DPC is treated with an alkali agent to neutralize its acids so unlike regular old cocoa powder, it does not react with bases. Since this recipe calls on yeast for leavening, I wonder if switching out the regular cocoa for DPC would make any difference.

    I think that I read that DPC tends to make foods darker than the regular cocoa. Russian Black Bread is very dark, darker even the pumpernickel.

    Something to think about for the next time I make this.

  • And just because I mentioned babushki in this post, I give you Babushka Cat:


Sunday, January 3, 2010

Caramelized Onion & Shallot Dip with Bacon

I made this dip when I was at my parents' for Thanksgiving. We all fell in love with it, practically licking the bowl clean. I made it again for Lucy's birthday party and then one more time for New Year's Eve.

This dip really thickens up on sitting, enough to break even a hearty potato chip, but the flavors meld and intensify so nicely that I think that it's worth it. If you really wanted to thin the consistency, you might want to add a teeny bit of water.

After a few days in the fridge, this spread is delicious on toasted bread.


Caramelized Onion & Shallot Dip with Bacon


Ingredients
  • 1 tablespoon butter
  • ¼ teaspoon salt
  • ½ teaspoon brown sugar (optional)
  • 6 medium onions, sliced crosswise, ¼ inch thick (about ½ pound) - I like a mixture of red and white onions
  • 2 shallots, sliced thin
  • ground black pepper
  • 3 slices thick-cut bacon
  • 3 scallions , minced
  • ½ teaspoon cider vinegar
  • ¾ cup sour cream
  • ½ cup creme fraiche (optional) - you can use more sour cream if you don't have any creme fraiche

Directions:
  1. Heat the butter in a large nonstick skillet over high heat; when foam subsides, stir in salt.

  2. Add onions and shallots and stir to coat; cook, stirring occasionally, until onions begin to soften and release some moisture, about 5 minutes.

  3. Reduce heat to medium and cook, stirring frequently, until onions are deeply browned and slightly sticky, about 40 minutes longer.

    If the onions are scorching, reduce heat; we don't want blackened, crispy bits of onion. If onions are not browning after 15 to 20 minutes, raise heat or add a bit of brown sugar.

  4. Turn off the heat; season to taste with pepper.

  5. Fry 3 slices of bacon, in small skillet over medium heat until crisp, about 5 minutes; remove with slotted spoon to paper towel–lined plate and set aside. Crumble when cooled.

  6. Combine caramelized onions, cider vinegar, scallions, sour cream, creme fraiche and bacon in medium bowl.

  7. Season to taste with salt and pepper and serve.

The bread is the photo is the second batch of my french bread from The Bread Baker's Apprentice.

As you can see from the picture, it split in a funky sort of way when it was rising, but it's very tasty.


Friday, January 1, 2010

Maple Wheat Dinner Rolls

Since Thanksgiving and Christmas were just upon us, and sometimes that means cooking a dinner (if you're crazy enough to be hosting,) or bringing a dish (if it's pot-luck), I thought I'd share my favorite dinner roll recipe. I found this recipe in a magazine ages ago; I believe it was the now-defunct Veggie Life.

I usually double this recipe and make and herbed popover too because the family gatherings tend to be large and people like their food. :)


Maple Wheat Dinner Rolls

Ingredients:
  • 1 1/2 cups warm water
  • 3 tablespoons maple syrup
  • 1 pkg. dry yeast
  • 1/4 cup canola oil
  • 1 1/2 cups whole-wheat flour
  • 2 1/2 cups unbleached white flour
  • 1 teaspoon salt
  • Oil for brushing

Directions:
  1. Combine the warm water and maple syrup in a large bowl and stir. 
  2. Add the yeast and stir the mixture well with a fork to dissolve the clumps.
  3. Cover and let sit until the mixture gets foamy, about 5 minutes.
  4. Add the oil, whole-wheat flour, 1 1/2 cups unbleached white flour, and salt to the yeast mixture in the large bowl. Stir until well mixed.
  5. Dust a work surface with some the remaining flour and place the dough on it. Knead the dough for 10-12 minutes, adding extra flour as you go. - This dough will be slightly tacky, but it should not stick to your hands.
  6. Cover the dough let rise until doubled, 30 to 60 minutes.
  7. Lightly oil an 8 by 8-inch baking pan. Divide the dough into 16 balls. Brush the tops with oil, and place in the prepared pan. Cover and let rise again until until the rolls have doubled, another 30 to 60 minutes.
  8. Preheat the oven to 400 degrees. Bake until golden brown, 20 to 25 minutes.
  9. Serve warm with butter.

Tuesday, December 29, 2009

Not pain Ă  l'ancienne, but pain ordinaire

So yesterday, after lusting over the thought of a fresh loaf of pain Ă  l'ancienne, from The Bread Baker's Apprentice, I dived straight into the book a bit hastily and made the starter for regular old pain ordinaire.

Oh, gee, what a shame, right? Ha! Even the most ordinaire of pains ordinaires is probably light-years away from any other white bread out there.

I can hardly wait for this to be done. :)

However, I have managed to restrain myself and follow the author's suggestion to let the pre-ferment, or pùte fermentée, sit in the fridge overnight instead of using it right away. Letting it sit longer allows it to develop a more complex flavor, so if you're as crazy about bread as I am, the result is worth the extra effort and wait.

When I took it out of the fridge, the starter was nicely puffy, a good 1½ times larger than it was when it had gone in the fridge.


I was worried yesterday when I was putting the pùte fermentée together, because the recipe directions indicated that the water should be at room temperature. Ok, but what does "room temperature," really mean?

I live in a drafty old house with deplorable insulation. This morning, the air temperature outside was in the single-digits; in my kitchen, it was 56°F. So, whatever temperature constitutes "room temperature," I can bet it's not a mere 10 degrees warmer than the inside of my fridge! I saw in the book that Peter Reinhart made casual mention of a scenario where room temperature was 73°F.

That's a long way from 56°F! I ended up turning on the oven to warm up the kitchen a bit, bringing it up to the mid-to-lower 60°s.

The dough for pain ordinaire is now resting nicely in an oiled bowl next to the stove, covered in plastic wrap, where it can rise in warmth for the next two hours before shaping.


With luck, in 2 hours it will have grown to twice this size.


Edit (2:30): The baguettes have been shaped and are in the final proofing stage before being baked. They need to rise to 1½ times this size before I put them into a scorching-hot, moist oven.

I use a roasting pan of hot water in the bottom quadrant of the oven to create the necessary moist interior to attempt to mimic the conditions in a bread oven of a professional bakery.


Here are the two baguettes on their final rise:


Closer view:


Edit (5:00): When I took the baguettes out of the oven, they looked great. Nicely golden and crisp on the outside:


And with a lovely crumb on the inside:


Great. But how does it taste?


I sliced off a thick piece, slathered it with good salted butter and... *sigh* ... heaven.

Then I had to taste it, just the bread, to get a sense of it. The crust was sharp and crispy, but inside it was soft, not over-done. It wasn't tangy like a sourdough; it was creamy and smooth. Once I chewed it, there was a subtle "something else" just lingering on the palate, something slightly nutty, and wholly satisfying in that umami way.

The only disappointment was that the spots on the crust where I scored the dough hadn't bloomed properly. I think I need a razor to make the slashes next time. Also, I think I may have to shape them in a canvas couche to support the sides to that the baguette seems rounder in cross-section instead of the sides sloping down.

Still, it tastes phenomenal, so I'd say that it's a very successful first attempt.

:)

Sunday, December 27, 2009

Buttered Rosemary Parker House Rolls

I wish I had a picture of these, but we devoured them.

Dear God.


Buttered Rosemary Parker House Rolls

Ingredients:
  • 3 T warm water (105° - 110° F)
  • 3 T sugar
  • 2 ½ t yeast
  • ½ cup (8 T = 1 stick) unsalted butter
  • 1 cup of milk
  • 2 cups of bread flour
  • 1 ½ t salt
  • 1 ½ - 2 cups all-purpose flour
  • chopped fresh rosemary
  • sea salt

Directions:
  1. In a small bowl, pour the warm water over the yeast and 1 tablespoon of the sugar. Let it sit for 5 minutes and get foamy.

    If the yeast does not foam, it is either inactive or the water was too hot or too cold. Start fresh and make sure you have an accurate thermometer to gauge the temperature of the water.

  2. In the meantime, melt 6 tablespoons of butter in a saucepan. Add the milk and heat to lukewarm (105° - 110° F).

  3. In a large bowl, mix together the yeast mixture, the butter mixture, the remaining 2 tablespoons of sugar, the bread flour and the salt. Mix well. Then stir in enough all-purpose flour to make a slightly sticky ball of dough. The dough should begin to pull away from the sides of the bowl.

  4. Turn out the dough onto a well-floured surface and knead for 10 minutes, adding more flour as necessary to keep it from sticking.

    This dough, rich in fat, is silky and luxurious-feeling, a real pleasure to knead.

  5. Get another large bowl and butter it. Place the ball of dough in the buttered bowl, cover with plastic wrap and set in a warm place to rise for an hour.

  6. Butter a large baking dish (11 x 7 x 2).

  7. Divide the dough into 20 pieces, forming them into balls. Place them in the pan in 5 rows of 4. Cover with a tea towel and let rise another 45 minutes.

  8. Preheat the oven to 375° F.

  9. With the handle of a wooden spoon, press down and make a lengthwise crease on the top of each roll.

  10. Cover and let rise another 15 minutes.

  11. Brush the tops with the remaining tablespoon of butter, melted, and sprinkle with chopped fresh rosemary and sea salt. Bake 25 - 30 minutes until the tops are nicely golden-brown.

  12. Serve hot with more butter, or you can make them ahead of time, wrap them in foil and reheat them in the oven for 15 minutes.


Notes:
  • I strongly suggest getting a good thermometer to test the temperature of the liquids if you work with yeast dough. It really takes the guesswork out of it.

The Sauerbraten Sagas - Part IV: The Dinner

Well, three days later I've finally recovered from the abundance of festivity enough to give a run-down of the dinner. The food was fantastic - all the effort was worth it seeing people eat heartily and with pleasure; the wine flowed freely and the company was terrific.


The Food

Amuse bouche: - Goat cheese and roasted beet stacks with balsamic reduction.
I loved this last-minute addition; the flavors melded together nicely and it was a visually striking dish the way the beet juices seeped into the goat cheese, turning it hot pink.


Appetizer: Kartoffelpuffer - German Potato Pancakes
I'd really missed the potato pancakes we had growing up. They were not the kind similar to latkes made from grated potato, but smoother and puffier, but neither did they appear to be made from leftover lumps of mashed potato.

After some searching, including some consultation with a Facebook friend in Germany, I got it.

When I tasted the first tester out of the skillet, as is my right as cook, I got swept back to Gasthaus Edelweiss and their fluffy, cripsy potato pancakes.

Success!


The Main Course:
  1. Sauerbraten
    After going back and forth over the procedure, I finally decided to cook it in the crock pot on low for 12 hours. A good decision, except that the meat was done in 10. I turned the heat down to warm and let it sit in the broth until it was time to let it rest on the platter and make the gingersnap gravy.

    It was delicious, and this also came pretty close to what we grew up eating. Everyone enjoyed it, but the real test was when I brought the leftovers to my sister's house and she tried it. She said, "OMG Barbara! This tastes just like the sauerbraten we had at Gasthaus Edelweiss!"

    The gingersnap gravy was tangy without being too thick. As good as it was on its own, we discovered how much better it was with a bit of sour cream added to it.

    Again: success. :)

  2. SpÀtzle
    I love these things. My SIL brought over her SpÀtzle-maker, andI really need to get one of my own.

  3. Red cabbage slaw
    My SIL's canned spicy red cabbage slaw complemented everything perfectly. I need the recipe, too.

  4. Steamed green beans with walnut vinaigrette
    Would you believe it? I forgot to put this out!

    Several of us had even taste-tested the vinaigrette of walnut oil and balsamic vinegar right before I started making the other dishes, and we put it back in the fridge to sit a while.

    A shame, because it was tasty. It'll be today's lunch. :)

  5. Roasted Onions, Shallots and Leek with Grueyre Croutons
    This was another sort of last-minute, I'll-just-wing-it dish. A good choice.

  6. Cauliflower gratin
    So simple, so delicious. I make this pretty often because it's easy, it's good and the kids will eat it.

Bread
I made Parker House rolls brushed with melted butter, chopped fresh rosemary and sea salt.

Yeah, piping-hot, straight from the oven? Pretty good. They were good cold, too, which I discovered when I inhaled one down before making my cinnamon rolls in the wee hours of Christmas morning.


Dessert
  1. Linzertorte
    I forgot to dust it with confectioner's sugar, but it was pretty good. The almond short crust was especially yummy.

  2. SchwarzwÀlder Kirschtorte
    Another SIL made this, and after I'd taken the first bite I knew I needed to have the recipe. Again, this was just like the black forest cherry cakes we'd had when we were kids: a not-too-sweet chocolate cake, a chilling made from kirsch and sour cherries (very important), and topped with freshly whipped real whipped cream and chocolate shavings.

    I had two, count 'em, two pieces of leftover cake yesterday.

All in all, a great meal and the best part was when people hung out in the kitchen drinking wine while I puttered around.

The second best part? Lots of leftovers.

Lots of leftover wine, too. :)


Recipes are forthcoming


Sunday, November 22, 2009

Multi-grain Bread

I love the idea of baking bread on Sundays.

Well, actually, I love the idea of baking bread on any day, but there's something appealing about a lazy Sunday spent in a cozy house, with enticing yeasty smells of rising bread and baking bread wafting from a warm, humid kitchen.

Seriously, I love just about everything about bread. I have a difficult time during the first few days of stage one of the South Beach diet, sometimes even dreaming about bread, its taste, hearty smell, distinct texture.

The process of making bread is an enjoyable one for me as well. Even if I take the lazy baker's way out and toss the items in the Zojirushi, and sit back and let the machine do the kneading for me, I still like to shape the dough myself and bake it in my oven, and then, as easy as you like, I have an amazing loaf of fresh, home-baked bread.

Kneading the dough myself though, has definite benefits. At times it's damned-near therapeutic, as I beat the shit out of the dough and use it as a focus for every last petty grievance, stupid annoyance and revenge fantasy. The bread is always the better for it, too.

Some breads I will always create by hand from start to finish are:
  • Whole Wheat Flatbreads, which I cook on a cast iron griddle, which really smokes the hell out of the entire house so I have to have fans running full-bore, windows wide open, and even outside doors propped open, but they're so worth it - anytime I make Indian food, I whip up a batch of these too;
  • Herbed Whole Wheat Focaccia, best served warm with a dipping sauce of balsamic vinegar and extra virgin olive oil. It tends to get eaten up very quickly;
  • Pizza dough, my super-fast, incredibly easy, no-fail recipe which can be ready to go in the oven in under 30 minutes, makes homemade pizza almost as fast as takeout, and way more satisfying. It's fun too, because the girls get to shape and top their own personal pizzas, so no more arguing about which toppings are touching each other;
  • Russian Black Bread, because sometime I crave real zakuski* - buttered black bread topped with smoked salmon, sour cream & chives or sliced pickles with a sharp horseradish cheddar - and a loaf of pumpernickel, homemade or store-bought, while tasty, doesn't have quite the same kick to it that authentic black bread has;
  • Maple Wheat Dinner Rolls, one of my favorite Thanksgiving offerings. Coming soon!

My daily-use bread is some sort of whole grain, multi-grain bread. I really like Pepperidge Farms's Natural Grains loaves and several of Arnold's Whole Grain Classics, but nothing beats a loaf of bread I've baked myself. Even my kids have come to agree. Finally. Let me tell you, that was a hard-won battle! Thank God I have never had to wean them off of Wonder bread! That stuff is like crack, and about as good for you.

One of my favorites, great as toast, the base of a grilled cheese sandwich or just by itself, spread liberally with herbed butter, is this hearty multi-grain bread.


Multi-grain Bread


Ingredients:
  • 2 ¼ tsp dry yeast
  • 1 ½ cups bread flour
  • ¾ cup whole wheat flour
  • 3/8 cup oatmeal
  • 3/8 cup multi-grain cereal, like Hodgson Mills or Bob's Red Mill
  • 4 heaping T gluten
  • 1 ½ tsp salt
  • 3 T honey or agave nectar - I've come to prefer the subtler flavor of the agave nectar
  • 1 ½ T butter
  • 1 ½ cups warm milk
  • 3/8 cup mixture of sunflower seeds and sesame seeds
Directions:
  1. If you have a bread machine, place the ingredients inside in the order the manufacturer recommends.
  2. Add the sunflower seeds and sesame seeds during the tail end of the mixing cycle (last 10 minutes) before the first rise.
  3. I prefer to use the dough cycle, so I take it out once the dough cycle has completed the first rise, punch it down, place it in a loaf pan, cover it with a towel for the second rising (about 60 minutes until it has doubled in size. If it's a cooler season, I often turn on the oven to keep the kitchen warm while the dough rises.
  4. Bake in a preheated 375° F oven for 25-35 minutes (depending on your oven - start checking it at 25 minutes), take it out to cool on a wire rack and coat the top lightly with butter if you like.
Non-machine method
  1. Place warm milk (130° F), honey and yeast in a large bowl. Let sit 5-10 minutes until yeast mixture is foamy. Add salt and bread flour, stirring to incorporate.
  2. Sift in the whole wheat flour ½ cup at a time, stirring well after each addition. Add the gluten, oats and multi-grain cereal and mix well.
  3. Add the sunflower seeds and sesame seeds.
  4. Turn out onto a lightly floured surface and knead well until the dough is smooth and elastic (appr. 10 minutes).
  5. Set in a warm place, cover with a clean dish towel and let rise 1 ½ - 2 hours until doubled in size.
  6. Punch down and knead a bit, shape and put in a greased loaf pan, set in a warm place, covered with a towel and let rise for 1 hour or until the crown is about 1 inch above the top of the pan.
  7. Bake in a preheated 375° F oven for 25 - 35 minutes. Take it out to cool on a wire rack and coat the top lightly with butter if you like.
Notes:
  • This recipe makes a 1 ½-lb loaf. I have adjusted these ingredients upwards to make 2-lb loaves as well;
  • If I make the 2-lb loaf, I usually knead it by hand because I'm not sure how large a loaf the bread machine can handle;
  • Oddly enough, the machine seems to do best with the 1 ½-lb recipe, perhaps because the pan is vertical instead of horizontal, and has two kneading paddles and a smaller recipe might not get mixed as well as a slightly larger one, though that seems paradoxical at first, it makes sense when I'm looking right at the pan;
  • Have I ever mentioned how much I love this bread machine? I get downright gushy over it at times and actively proselytize the Zojirushi whenever I can.


* For an explanation of zakuski, see this great article from Vodkaphiles.com: The Zakuska Table, and this piece from NPR Zakuski: Mighty Russian Morsels, which includes a wonderful recipe for Russian Black Bread.

Sunday, November 15, 2009

Whole Wheat Flatbreads

These are great, satisfying flatbreads that go well with falafel, hummus, peanut butter, curried dishes, just about anything.


Whole wheat flatbread

Ingredients:
  • 2 teaspoons dry active yeast
  • 2 1/2 cps warm water
  • 5 to 6 cups of whole wheat flour (or a combination of whole wheat and bread flour)
  • 1 T salt
  • 1 T olive oil

Directions:
  1. In a large bowl, mix together yeast and warm water. Let sit for 10 minutes in a warm place until the yeast mixture is foamy.
  2. Add 3 cups of the whole wheat flour, one cup at a time, mixing well until you have a rough, shaggy dough that starts to drag on the sides of the bowl. Cover and let rest for 30 minutes.
  3. Add the salt and oil, mix well and then add the remaining flour 1/2 cup at a time until you have a nice stiff dough.
  4. Turn out onto a floured surface and knead well for 8-10 minutes until dough is smooth and elastic.
  5. Place dough in a lightly oiled bowl, and let it rise int a warm spot for 1 1/2 hours or until doubled in size.
  6. Preheat a cast iron griddle or skillet over medium-high heat.
  7. Punch down the dough and divide in half. Section it into 8 pieces. Roll out each ball of dough to about 1/4 inch thickness.
  8. Lightly coat the griddle with cooking spray.
  9. Place a round on the griddle (mine can hold two at a time). Let it cook for 15 second, then flip it. Let it cook for about a minute until bubbles start to form, then flip it back over and let cook another minute.
    Repeat with remaining dough.
  10. Wrap the breads in a tea towel to keep warm.

Note:
This will smoke the hell out of your house, so have the windows open and the fans cranked, but it is so worth it.

Tuesday, October 6, 2009

Italian Herb Bread

I am an admitted carb-freak, and freshly-baked bread tops my list of carb treats. This loaf fills the house with the smell of herbs. It's the perfect addition to a nice bowl of hot soup.


Italian Herb Bread


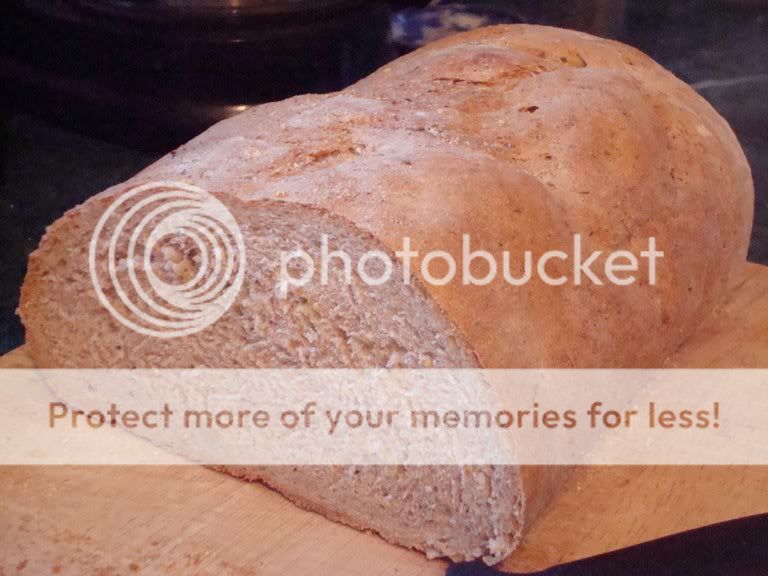
Photobucket


Ingredients:
  • 1 ¼ cups water
  • 1 ½ tablespoons olive or vegetable oil
  • 1 teaspoon salt
  • 2 cups bread flour
  • 1 ½ cups whole wheat flour
  • 2 teaspoons granulated sugar
  • 1 T Italian seasoning
  • 3 T vital wheat gluten
  • ¼ cup freshly grated Parmesan cheese
  • 2 teaspoons active dry yeast

Directions:
  1. Place ingredients in order given by manufacturer of your bread machine.
  2. Select Dough setting and hit enter.
  3. Take out the dough and let it rest for 10 minutes to let the gluten set.
  4. Punch it down, shape it into a long loaf and place on a baking sheet dusted with cornmeal, cover with a towel and let rise for 2 hours in a warm place until doubled in size.
  5. Spritz with water, and sprinkle with cornmeal and sea salt.
  6. Bake in a preheated oven (425 F) for 25 minutes.
  7. Makes one (2 pound) loaf.
Related Posts with Thumbnails