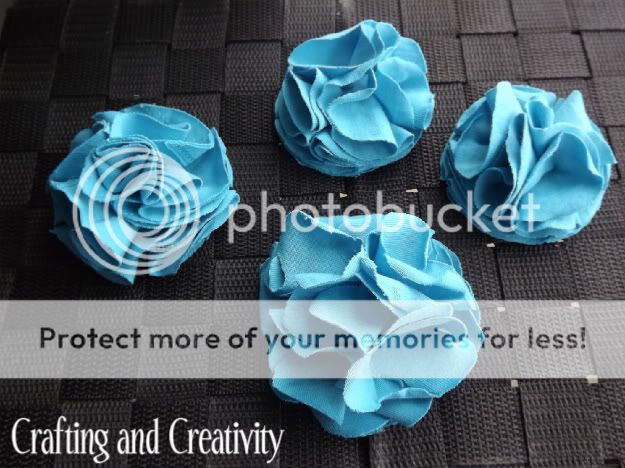
Showing posts with label DIY flowers. Show all posts

11.07.2012

DIY Christmas Pillow

Hope you're enjoying your Wednesday! We are getting SO MUCH snow here today it is insane!

I made a few projects last Christmas that I never got around to posting about.


The first is this pillow makeover:


I had this pillow that wasn't really my style, stored in the basement......


I made a new case for it using this cute Christmas fabric my SIL had given me for Christmas the year before. 
When I was finished sewing the cover, I made 5 rolled fabric flowers using some of the scraps. I like how the flowers jazzed it up a bit.


I am getting really excited for Christmas time and I look forward to decking the halls around here!

When do YOU decorate for Christmas???


5.22.2012

How To Make Rolled Felt Flowers

Happy Tuesday! Here in Canada we just had a long weekend for Victoria Day & I also celebrated my 25th birthday on Saturday. So it's extra-hard getting back into the swing of things today, especially since it's raining outside & the forecast has rain for the rest of the week, too!

I have had some comments and emails asking me to do a tutorial on how I made the felt flowers in THIS POST, so I am happy to help out!

Let's get started!


First, you start off with a long piece of felt, the longer the piece the larger the circumference of the flower will be. The width will determine the height of the flower since the piece will be folded in half.


Add of line of glue with your glue gun, then fold the felt over.


Next, cut snips on the folded side using your scissors. You can do the cuts close together or far apart & each one will alter the look of your flower.


Then you just start rolling it.....


Add a dab of glue when you get to the end...


Then you can cut out a circle of felt to go at the bottom. This is where you can add felt "leaves" if you so choose.


Then you're done!


For a different look, you can do diagonal cuts all the way down...


That till give you a flower that looks like this...


Repeat the flower making process again & again, cause they are super-easy to create!


5.15.2012

whip up some flowers today

Feeling like you don't have time to craft & that life is too busy? I feel the same way. 

So here and there, while I am watching something cook on the stove or waiting on hold to talk to a service provider, etc, I bring out some basic supplies & whip up a set of felt flowers or some simple hair clips for my daughter or to have on hand for gifts.


I am starting to accumulate a stash of extra flowers & such which saves time next time I am crafting or trying to make hair things for a baby gift. 

It's something that has been working for me :)


Happy crafting!

5.04.2012

Embroidery Hoop Wreath

Today I'm going to show you how I made my new wreath using an embroidery hoop...


The supplies:
-embroidery hoop (mine was $2.97 from Walmart)
-hemp string (under $2 at Walmart or any craft store)

**Note- I spent $5 to get my supplies, but I only used half the hoop and about half the roll of hemp string. So this project was around $2 or $3 to make.


- I took the embroidery hoop apart and used the inner circle so I didn't have the bulky part on the outer piece with the screw.

- Tied the string onto the hoop, using a double knot.


- I began wrapping the string around. I didn't allow it it overlap. I wanted it to look tidy.
Every so often I pushed the newly wrapped part over so that it was wrapped around tightly and it wouldn't allow any of the blue hoop to show through.


Any time my roll of string got tangled or I just felt like it, I would cut it off, then add a new knot and continue going. So there are a few visible knots showing on the wreath, which I thought made it look more interesting.


When I was finished wrapping the string around the entire hoop, I added some t-shirt pom pom flowers using my glue gun to finish it off.


I like the simplicity of the hemp string with the bold colours of the yellow and blue flowers.
It definitely makes me think of summer time! Oh yeah!


3.15.2012

my new spring wreath! {trash to treasure}

With the nice weather we've had lately, it feels like SPRING could arrive... someday!

This week I made a new wreath..... and the best part was that all the supplies I used were things I already had!


I had used this glittery wreath form for a project in the past, so I stripped it down to use for my new spring wreath!


I used some extra fabric I had after I hemmed curtains & cut it into strips.


I folded each strip so that the frayed ends wouldn't show & began gluing the fabric around the wreath.


I had this once it was all covered...


I whipped up some super easy flowers to girly it up a bit!
{The pink ones are my Easy Felt Flowers}


I love the pink & grey & white flowers together!

Such an easy transformation from my wreath form & fabric that I would have otherwise thrown away!


Places to Party: C.R.A.F.T., Ginger Snap Crafts, Homemaker on a Dime, Keeping it Simple, Lolly Jane ,  Lil' Luna, Making the World Cuter,  Naptime Crafters, Pocket Full of Pink, Sassy Sites, Simply Designing, Skip to my Lou, Someday Crafts, Somewhat Simple, Sugar Bee Crafts, Sumo's Sweet Stuff, Tatertots and Jello, The Girl Creative, Thrifty Decorating, Tip Junkie, Today's Creative Blog, Trendy Treehouse, Yesterday on Tuesday, Young and Crafty


2.17.2012

some DIY flower hair clips


Hey! There hasn't been any crafting or sleeping for me this week- my daughter is sick.

But I made some hair stuff a while back that I will share today!


I made up a bunch of flower clips for my daughter.......... {see the TUTORIAL here!}


And back in December, my kids got their first cousin on my side! I was excited to make up some things for my new niece's hair...... {you can see a tutorial for the felt flowers here}


Monday is Family Day here in Canada, so I am excited for a long weekend!!


 Places to Party: C.R.A.F.T., Fingerprints on the Fridge, Ginger Snap Crafts, Homemaker in Heels, Homemaker on a Dime, Keeping it Simple, Lolly Jane Boutique, Laugh, Love, and Craft, Lil' Luna, Making the World Cuter,  Naptime Crafters, Pocket Full of Pink, Sassy Sites!, Seven Thirty Three, Sew Chatty, Simply Designing, Skip to my Lou, Someday Crafts, Somewhat Simple, Sugar Bee Crafts, Sumo's Sweet Stuff, Tatertots and Jello, The Girl Creative, Thrifty Decorating, Tip Junkie, Today's Creative Blog, Trendy Treehouse, Yesterday on Tuesday, Young and Crafty

1.22.2012

spring wreath 2.0

Last year I made a spring wreath. This year I changed the look slightly. 
I give you the Spring Wreath 2.0......


I posted about it last year when it looked like this.....

{click on photo to go to the original post}


This year I updated the look easily, by adding a couple of my felt flowers.

{see the tutorial for my Easy Felt Flowers}


It's been seriously cold here this past week, so I had plenty of time to dream about spring as we've been cooped up at home. (It's been as cold as -40 degrees Celsius with the windchill- FREEZING!)


So which version of the wreath do you like better?? 


 Places to Party: C.R.A.F.T., Fingerprints on the Fridge, Ginger Snap Crafts, Homemaker in Heels, Homemaker on a Dime, It's FUN to Craft, Keeping it Simple, Lolly Jane Boutique, Laugh, Love, and Craft, Lil' Luna, Making the World Cuter, My Junk Drawer, Naptime Crafters, Pocket Full of Pink, Sassy Sites!, Seven Thirty Three, Sew Chatty, Simply Designing, Skip to my Lou, Someday Crafts, Somewhat Simple, Sugar Bee Crafts, Sumo's Sweet Stuff, Tatertots and Jello, The Girl Creative, Thrifty Decorating, Tip Junkie, Today's Creative Blog, Trendy Treehouse, Yesterday on Tuesday, Young and Crafty

11.14.2011

how to make t-shirt pom pom flowers

Happy Monday everyone! Today I'm going to show you step-by-step how to make these pretty flowers out of... a t-shirt!


I had this blue shirt I had never worn...


I cut it into strips. I used a juice glass to trace circles onto it, then cut them out.


I had a piece of scrap felt that I used as the base. I folded each circl in half twice, then glued it on to the felt until the pieces formed a circle, like this...


Then I added another round of them...


The ninth circle I used for this one went in the middle...


Once it was all assembled, I added a little dab of hot glue when needed to make it look the way I wanted.


The end result...


For this one, I had cut some of the circles out of the shirt, right close to the edge. I thought it would look interesting to have the stitching show throughout the flower...


The other type I made is just slightly different. Instead of cutting out circles, I cut out these flower-looking shapes...


And then put it all together the same way...


It was just slightly different, but very pretty once it was finished...


I was able to make these 4 out of that shirt:


What's your favourite way to use fabric flowers??

{This was featured at Reduce, Reuse, and UPcycle.}


Places to Party: C.R.A.F.T., Fingerprints on the Fridge, Ginger Snap Crafts, Homemaker in Heels, Homemaker on a Dime, It's FUN to Craft, Keeping it Simple, Lolly Jane Boutique, Laugh, Love, and Craft, Lil' Luna, Making the World Cuter, My Junk Drawer, Naptime Crafters, Pocket Full of Pink, Rustic Crafts, Sassy Sites!, Seven Thirty Three, Sew Chatty, Simply Designing, Skip to my Lou, Someday Crafts, Somewhat Simple, Sugar Bee Crafts, Sumo's Sweet Stuff, Tatertots and Jello, The Girl Creative, Thrifty Decorating, Tip Junkie, Today's Creative Blog, Trendy Treehouse, Yesterday on Tuesday, Young and Crafty

LinkWithin

Related Posts with Thumbnails