


Today I received an email from Becky at Tea Party Blog sharing the DIY ottoman she and her husband completed with the tutorial I posted here. Way to go Becky and husband...great job!


Apparently this stuff has got "Odor Elimination Technology"...whatever that means?
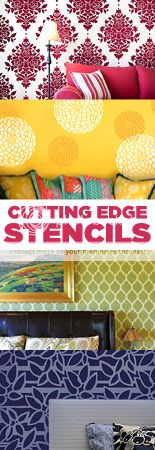
Perfect paint for the bathroom?
I'm just sayin.
Plus zero VOC's...WORD.
Operation bathroom makeover is officially ON!


(Click here to learn more about Dutch Boy Paints).

It wasn't my intention to use the glass frame for the light but I thought they made a unique and peculiar centerpiece. Plus, waste not...

From here on out I have to credit Mrs. Devore for the original creativity and inspiration for this project. Here's what I used to paint and prime the lights silver.


If it's summer in Arizona
you DON'T go outside...


Start with the "LOTS" mirrors from IKEA.
They come in a pack of 4 for only $4.99.
The trim is actually just basic trim moulding from Home Depot cut to size. Start with the long horizontal pieces, then cut the vertical pieces to go inbetween the long horizontal pieces.
Make sure to use a level every step of the way.
Believe it or not, mounting tape was used to hang every mirror AND piece of trim!
Nails kept splitting the the wood so mounting tape was used instead and worked great.

(Image via Pink Wallpaper).

(Image Via Chic Coles).

(Image via Design Sponge)

(Image via Pink Wallpaper).
Thanks for the great project Harmony! We'll definetely miss you and your family. Don't be suprised if we show up on your doorstep one afternoon at your new home in Phoenix!

A little sand and a few candlesticks later...
Centerpieces.

I'm not crazy about the gold. If I get ambitious one afternoon I might tape then spray the gold trim a different color.
IF I get ambitious.


If anything they were good conversation pieces at dinner.

From Home Depot I purchased a couple of 2 X 6's.
They will cut them per your specifications for free.
I think I had mine cut 40 inches each.
Once you assemble them as illustrated below you will have a perfect box square that is approx. 42 X 42 in.
I then had Home Depot cut two pieces of pressed, particle board the same dimensions as my box frame (42 X 42 in.). I only ended up using one.
Attach the pressed board right on top of your box frame with screws.
I knew I wanted to add button tufting so I took a drill and made holes where I planned for the buttons to be.
From my local fabric store (I went to Hancock because I had a 40% off coupon) I purchased some high density foam (I believe it was 4 or 6 inches thick). They cut the foam to my specifications with an electric knife.
Use spray glue in a can to attach the foam to your particle board.
The legs came from Home Depot which I spray painted white. I've always felt they are much too whimpy for the size of the ottoman.
It's been on my to-do list to change them out but time + kids + priorities...blah, blah, blah.
There are a lot of places you can get legs...just Google. Or, here is one great source.
After your foam is is in place, cover the entire thing (foam and frame) with batting. I wouldn't recommend using any less than 4 layers.
Now you're ready to uphoslter or slip cover.
I bought white vinyl (faux leather) because I love white and I could wipe it clean.
After breaking a few needles on my sewing machine I realized my Singer was no match for vinyl. I took it my favorite Upholsterer, Chavez and he charged me $100. to upholster it and put in the tufting buttons. When I got it back I could see that $100. was the best money ever spent. He added piping, did a fab job on the covered buttons...I was very pleased.

There you have it.
Happy DIY Ottoman-ing!


