After Hunter was born, we switched everything to a private blog. Now that Bennett is born we're making everything public again!!
Okay, so it really has nothing to do with our children being born but just some of the issues we kept running into with the private blog. With a private blog they make you limit readers to 100 people. I knew I could get around this by creating two identical blogs. Which is easy to do, hard to maintain.
Also, I had to keep re-adding people to our blogspot. People that were able to view our blog at one time, would suddenly start getting rejected when trying to view it. Frustrating.
So, we are a public blog once again. It'll be the only blog that gets updated and it comes with a new name and updated look: Life With Fingerprints. Change your links!
www.lifewithfingerprints.com
Sunday, July 3, 2011
Thursday, May 19, 2011
Bean Bags...
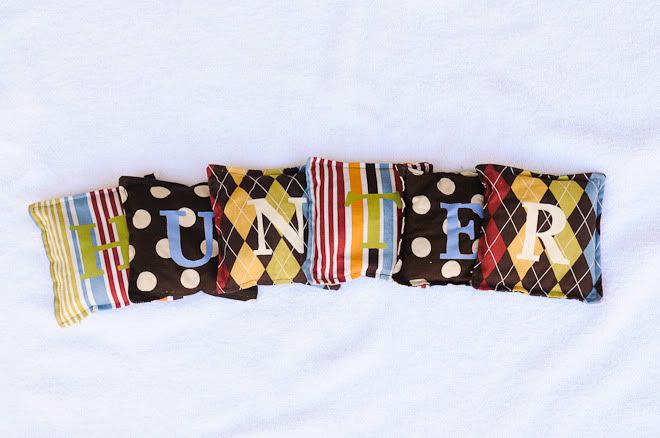
For Christmas I made Hunter some "ABC" bean bags. I came across them on a blog a while back and set out to make them.
Each bag has a capital and lowercase letter painted on. (I used freezer paper, and cut out the letters with an exacto knife. I then ironed on the freezer paper to the fabric, wax side down and it creates a stencil to paint over. Then peel off the freezer paper. Voila!)

We use them for a variety of letter recognition and letter sound games. They also get thrown down the stairs and at eachother! I love multi-purpose toys!! :)

Friday, October 15, 2010
Dresser Rehaul...
Once upon a time, I built a bed.
After the bed was in the bedroom, suddenly the other furniture seemed so drab and dreary. Our old dressers were functional, but they were a third level pass down from one of Steve's relative our first week of marriage and they had seen betters days. I thought about refinishing them, but they were falling apart and not so sturdy anymore. If I'm going to put a lot of time into refinishing, I've got to have a solid piece to start with.
So I went on the hunt to find a new dresser. I told all my friends of my new dresser desire and asked them all to keep an eye out for a piece that would work in our room. About a month later I get a call from my friend Tiffany who was browsing through a goodwill and came across a dresser she was convinced I would like. She sent me this picture:
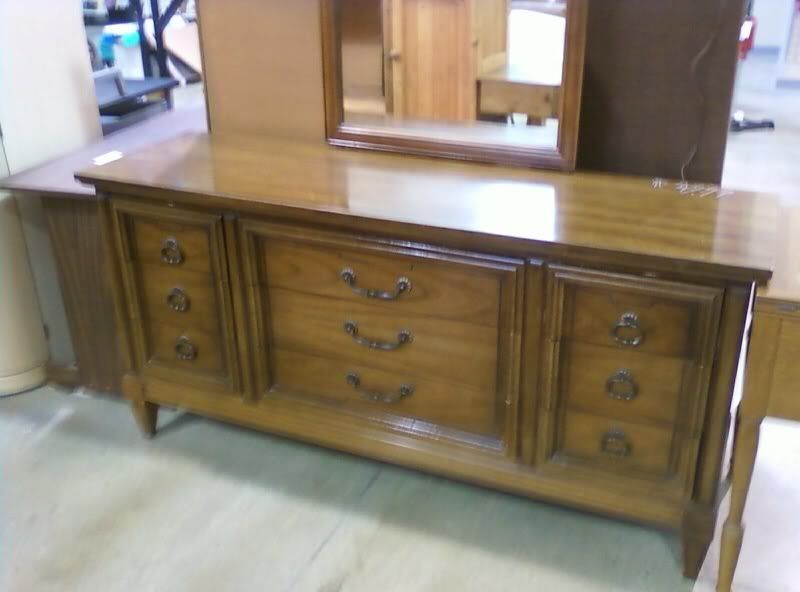
It was enough to get me out the door to check it out. I drove home that day with $72 less in my bank account, and not one, but two dressers!
I spent the next day and a half with the help of Tiffany, sanding, priming, sanding, painting, sanding, painting, sanding, clear coating. Quite the process.
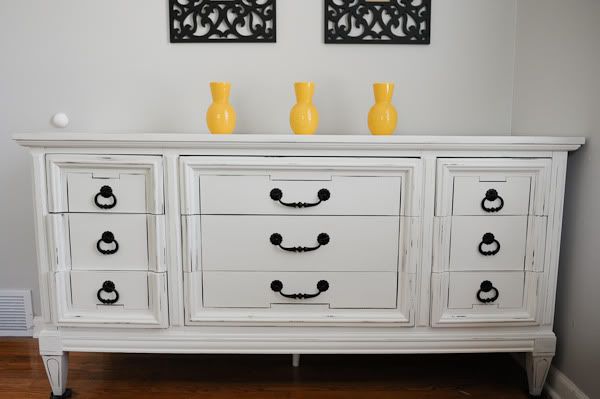
I kept the original hardware and sprayed it black which saved some money on new knobs.
I knew exactly where I wanted the long dresser, there was a special wall in my room I had saved for it.
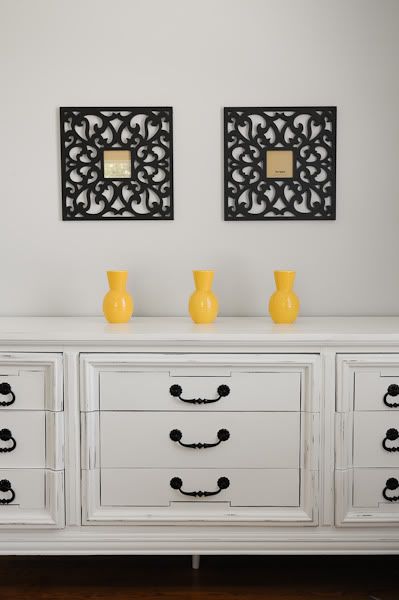
However, the other piece, I didn't have a place in mind as I finished it. There wasn't room in our bedroom, so my initial thought was to keep it in the garage and eventually there would be a special place for it.
A few days of being in the garage was all it took. My friends came over one morning and insisted we bring it into the house and find a place for it. So we did. We moved it a couple times and then settled on keeping it in the living room. So there it sits.
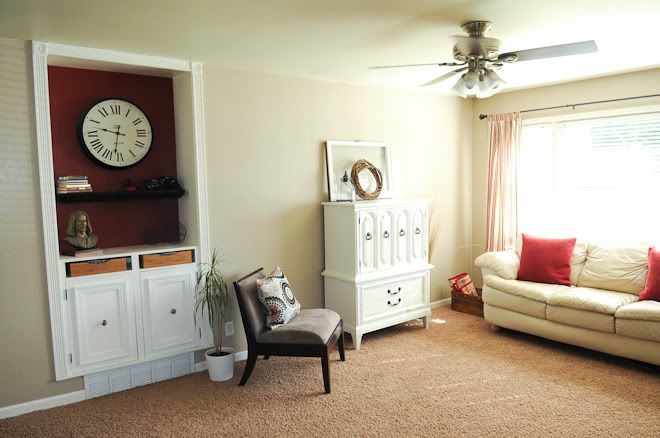
One day in a far off land, when are bedroom isn't the size of a closet, perhaps these pieces will be reunited...then again perhaps not!
After the bed was in the bedroom, suddenly the other furniture seemed so drab and dreary. Our old dressers were functional, but they were a third level pass down from one of Steve's relative our first week of marriage and they had seen betters days. I thought about refinishing them, but they were falling apart and not so sturdy anymore. If I'm going to put a lot of time into refinishing, I've got to have a solid piece to start with.
So I went on the hunt to find a new dresser. I told all my friends of my new dresser desire and asked them all to keep an eye out for a piece that would work in our room. About a month later I get a call from my friend Tiffany who was browsing through a goodwill and came across a dresser she was convinced I would like. She sent me this picture:

It was enough to get me out the door to check it out. I drove home that day with $72 less in my bank account, and not one, but two dressers!
I spent the next day and a half with the help of Tiffany, sanding, priming, sanding, painting, sanding, painting, sanding, clear coating. Quite the process.

I kept the original hardware and sprayed it black which saved some money on new knobs.
I knew exactly where I wanted the long dresser, there was a special wall in my room I had saved for it.

However, the other piece, I didn't have a place in mind as I finished it. There wasn't room in our bedroom, so my initial thought was to keep it in the garage and eventually there would be a special place for it.
A few days of being in the garage was all it took. My friends came over one morning and insisted we bring it into the house and find a place for it. So we did. We moved it a couple times and then settled on keeping it in the living room. So there it sits.

One day in a far off land, when are bedroom isn't the size of a closet, perhaps these pieces will be reunited...then again perhaps not!
Wednesday, September 15, 2010
Labor of Love...
Once upon a time, I came across the coolest website; www.knock-offwood.blogspot.com (which has now been switched to www.ana-white.com). The website had step-by-step instructions on how to build countless pieces of furniture, to resemble those of Pottery Barn. I was in heaven and the wheels started turning. Steve quickly shot me down. "Not until you finish all the projects in the house." He likes to throw out the caveat because he knows I will never be done with projects in the house. Once I get close, I just start re-doing, what I've already done.
I'm sure Steve thinks I'm a little handy-capable, fairly handy - yet somewhat capable! What can I say, I'm the project queen.
So I didn't start the bed right away, but I wanted to. Every couple days I'd pull up the site and look through the plans yet again. I did this for 5 months! That shows some restraint my friends. I'm normally not that disciplined. But I was really waiting for the approval of my husband. Why his approval you wonder? No he doesn't help in the process, but he has to live in a home that is neglected for a week. I really try to shelter him from the mess, but sometimes, especially on a project of this magnitude it is just not possible.
So once I got the green light, (green light meaning he didn't argue as much as he used to about the project) I went full speed ahead. I altered the plans a bit to my liking and purchased all my wood. This proved to be the most difficult task. Buying good quality wood was not easy. Most wood was split or crooked and it was frustrating to sift through piles and piles of wood to find one piece that would work. Definitely my least favorite part of the project.
After the wood was purchased everything went well. I was able to use my mother's day gift: nail gun and compressor which made me feel powerful! It did get difficult as I built the headboard; it just became too large and heavy to move by myself. But luckily I had some great friends that were able to assist me as needed!
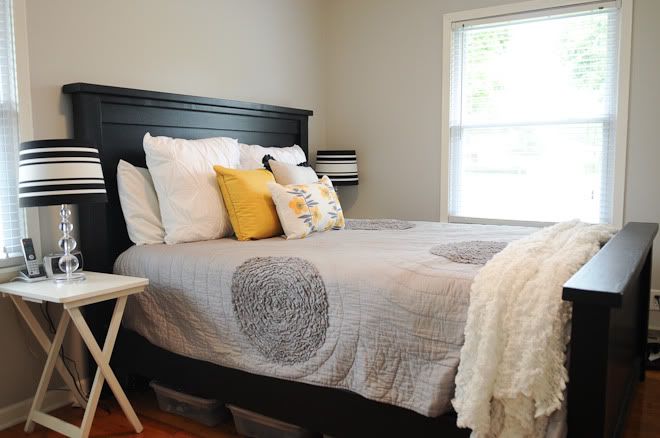
After a week and a half (and just two days before I left for Idaho) I was able to put the bed together in our room. What a rewarding feeling. I won't lie, I was a tad worried to sleep on it the first night because I feared I did something wrong and the whole thing might come crashing down on me. But I'm happy to report my worries were gone the next morning when I awoke, and the bed was still standing. YEAH!
Steve will admit, although he fought me on the bed, he too really loves it. What a much needed upgrade from our previous metal frame!
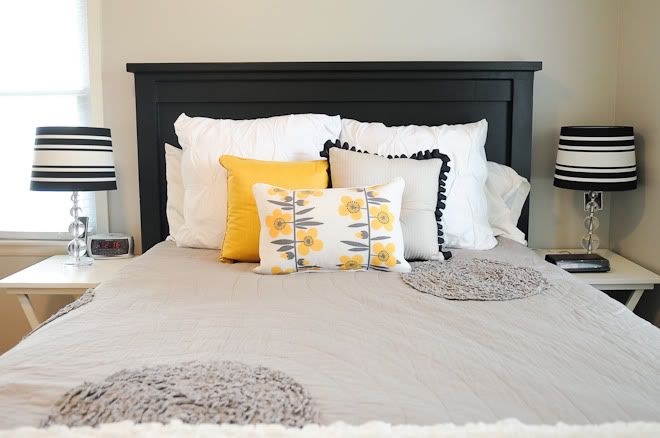
So, just as the bookshelf a while back was confidence builder, so was the bed. I'm ready for something else. Perhaps some nightstands, with drawers.
I'm sure Steve thinks I'm a little handy-capable, fairly handy - yet somewhat capable! What can I say, I'm the project queen.
So I didn't start the bed right away, but I wanted to. Every couple days I'd pull up the site and look through the plans yet again. I did this for 5 months! That shows some restraint my friends. I'm normally not that disciplined. But I was really waiting for the approval of my husband. Why his approval you wonder? No he doesn't help in the process, but he has to live in a home that is neglected for a week. I really try to shelter him from the mess, but sometimes, especially on a project of this magnitude it is just not possible.
So once I got the green light, (green light meaning he didn't argue as much as he used to about the project) I went full speed ahead. I altered the plans a bit to my liking and purchased all my wood. This proved to be the most difficult task. Buying good quality wood was not easy. Most wood was split or crooked and it was frustrating to sift through piles and piles of wood to find one piece that would work. Definitely my least favorite part of the project.
After the wood was purchased everything went well. I was able to use my mother's day gift: nail gun and compressor which made me feel powerful! It did get difficult as I built the headboard; it just became too large and heavy to move by myself. But luckily I had some great friends that were able to assist me as needed!

After a week and a half (and just two days before I left for Idaho) I was able to put the bed together in our room. What a rewarding feeling. I won't lie, I was a tad worried to sleep on it the first night because I feared I did something wrong and the whole thing might come crashing down on me. But I'm happy to report my worries were gone the next morning when I awoke, and the bed was still standing. YEAH!
Steve will admit, although he fought me on the bed, he too really loves it. What a much needed upgrade from our previous metal frame!

So, just as the bookshelf a while back was confidence builder, so was the bed. I'm ready for something else. Perhaps some nightstands, with drawers.
Thursday, June 24, 2010
Lake Michigan...
If you ever find yourself in Milwaukee on Lake Michigan you've got to check these bikes out.

It's a large surrey. It fits up to six adults and two children and you rent them by the half hour. We only used them for a half hour and it was plenty of time. It was quite the workout, or maybe we were just out of shape. You can take them up and down the lakefront on the pathway. While we had some friends (to read more of our visitors check it out here.) in town we spent a Saturday morning on the lake and these bikes were a hit! A must!

It's a large surrey. It fits up to six adults and two children and you rent them by the half hour. We only used them for a half hour and it was plenty of time. It was quite the workout, or maybe we were just out of shape. You can take them up and down the lakefront on the pathway. While we had some friends (to read more of our visitors check it out here.) in town we spent a Saturday morning on the lake and these bikes were a hit! A must!
Wednesday, June 16, 2010
Bookshelf...
One project down, many to go!
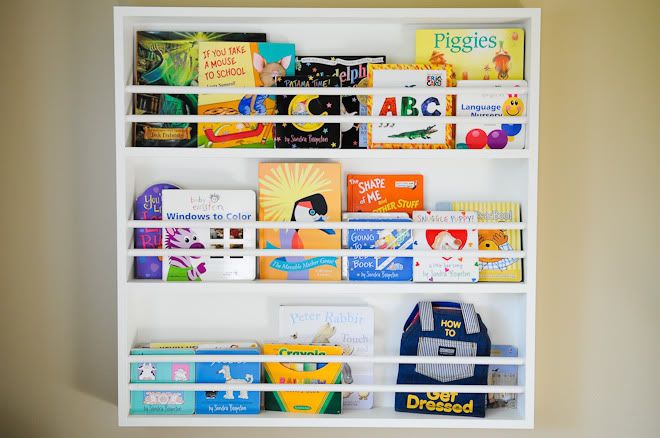
I made this bookshelf a while back and never got around to posting it. I told myself I needed to complete this smaller project before I tackled larger furniture pieces. It was some good practice and made me realize, with enough precision and patience I could probably make a lot of things!!
I found a bookshelf I really liked online - pottery barn kids - and using the dimensions they provided I made my own plans. I think I spent more time altering my own plans than I spent actually building!
The key to this project's success was very carefully hand selected pieces of wood. I used 3 1x4x6, 6 dowels and a thin sheet of plywood for the back. I made sure the boards were really straight without any knots and paid a little more for a nicer wood.
I cut 4 pieces 35 3/4" (top and bottom and both sides) and two 34 1/4" (middle shelves). After cutting, I drilled the holes for my dowels on both of the side pieces using a wood boring bit. (You can get them for pretty cheap at the depot.) I then primed my whole project and painted the two middle shelves as well as all the inside boards. I left the outside primed so I could fill my nail holes and sand it down. You can build it and then paint if you'd like, it was just easier for me to paint it not put together and then just touch up the little areas that needed it.
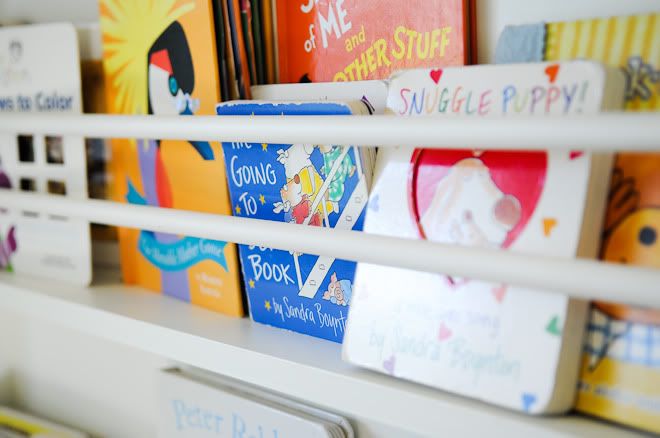
It went together fairly easy. I used a nail gun and used 4 nails on each shelf as well as the top and bottom boards. (You could also use screws, I just found the nailer easier to use) I used a smaller pin nailer for the dowels, but you could also just use wood glue. I filled my nail holes with a wood putty and sanded it down and put a coat of paint over it. You can attach it to the wall a number of ways. I used a little kit from the depot for a french cleat. Very easy to attach and hang on the wall.
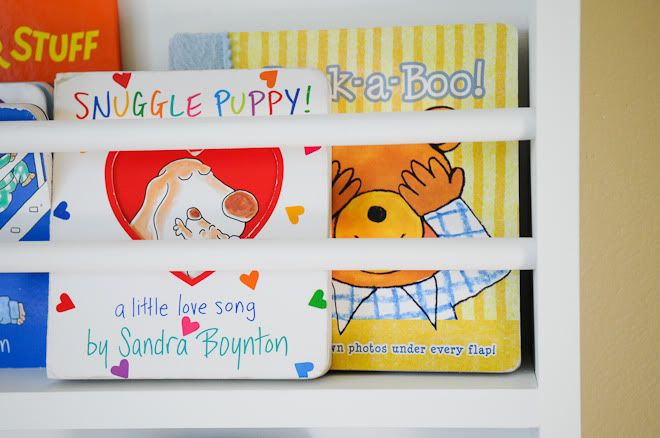
And there you have it.
I love it. I love that the books are no longer thrown across the floor. And I love that it holds a lot of books without looking messy. I think I might make a couple more. I love it that much!

I made this bookshelf a while back and never got around to posting it. I told myself I needed to complete this smaller project before I tackled larger furniture pieces. It was some good practice and made me realize, with enough precision and patience I could probably make a lot of things!!
I found a bookshelf I really liked online - pottery barn kids - and using the dimensions they provided I made my own plans. I think I spent more time altering my own plans than I spent actually building!
The key to this project's success was very carefully hand selected pieces of wood. I used 3 1x4x6, 6 dowels and a thin sheet of plywood for the back. I made sure the boards were really straight without any knots and paid a little more for a nicer wood.
I cut 4 pieces 35 3/4" (top and bottom and both sides) and two 34 1/4" (middle shelves). After cutting, I drilled the holes for my dowels on both of the side pieces using a wood boring bit. (You can get them for pretty cheap at the depot.) I then primed my whole project and painted the two middle shelves as well as all the inside boards. I left the outside primed so I could fill my nail holes and sand it down. You can build it and then paint if you'd like, it was just easier for me to paint it not put together and then just touch up the little areas that needed it.

It went together fairly easy. I used a nail gun and used 4 nails on each shelf as well as the top and bottom boards. (You could also use screws, I just found the nailer easier to use) I used a smaller pin nailer for the dowels, but you could also just use wood glue. I filled my nail holes with a wood putty and sanded it down and put a coat of paint over it. You can attach it to the wall a number of ways. I used a little kit from the depot for a french cleat. Very easy to attach and hang on the wall.

And there you have it.
I love it. I love that the books are no longer thrown across the floor. And I love that it holds a lot of books without looking messy. I think I might make a couple more. I love it that much!
Monday, June 14, 2010
Monday Must Have...
I have a few items that I simply love. I find myself thinking about these items often and my admiration grows with each passing day. This item just happens to be one of them...

Sprig Discover Rig (http://www.amazon.com/Sprig-Toys-A8001-Discover-Rig/dp/B001BERBL0)
When I worked at Pottery Barn Kids, we had one of these on display. It seemed every kid that would walk past it would start pushing it and they were caught off guard as it started talking to them. All the kids got a kick out of it. So, we gave one to Hunter for his first birthday and he's loved it. He walks around with this thing a lot. I find him trying to get it up the stairs, frustrated and crying with all his might. And he just throws it down the stairs when he's ready to play in the basement.
A few of things I love:
There are no batteries! However, if a child walks around with it it starts talking to you. It has an internal generator that starts when the wheels start moving. It's genius!
There is a little guy that plugs in through a USB port and he gives you a tour. You can purchase other guys to plug in and they each give a different tour. (Himalyan, African, Amazon)
You can play with the rig with the handle on or off.
It's very durable, it's not made of flimsy plastic.
I would highly recommend this toy. However, this is not a toy that helps a child learn to walk, it will tip over. It's for a more advanced walker who needs a little entertainment!
Subscribe to:
Posts (Atom)


