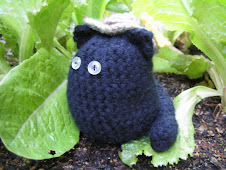
This class of duckies all have embroidered eyes to make them safe for youngsters. The pattern below uses black craft eyes if you prefer.
I've had a few requests for a pattern for these amigurumi ducks I made. Actually, it's a modified version of another free pattern from here:
http://www.craftster.org/forum/index.php?topic=154060.msg1531839#msg1531839.
I modified the pattern by shortening the neck and making a bigger beak. Here's the pattern if you'd like to give my version a try. Enjoy!
Amigurumi Duck
(My version) 6/20/09
Materials used:
Lily Sugar and Cream Cotton Yarn
G crochet hook
2 safety eyes
polyfill for stuffing
6 sc in a magic ring
2 sc in each sc around (12 sc)
1 sc, sc inc in next sc repeat around (18 sc)
sc around (18 sc) for 4 rows
sc inc in the first 9 sc, sc in last 9 sc (27 sc)
sc in first 6 sc, sc inc in next 6 sc, sc in last 15 sc (33 sc)
sc around (33 sc) for 3 rows
sc in first 9 sc, do 3 sc dec, sc in last 18 sc (30 sc)
sc in four sc, sc dec repeat around (25 sc)
sc in 3 sc, sc dec repeat around (20 sc)
sc in one sc, sc dec repeat around, end with 2 sc (14 sc)
Position eyes and attach
Stuff
dec around to close leave long tail.
I used tail to close and then to shape bottom so duck would stand even. Pull the yarn up through the back of the duck and back down to pull in bottom. Repeat on other side of duck.
Beak
6 sc in a magic ring
1 sc, sc inc in next sc repeat around (9 sc)
sc around (9 sc)
slip stitch into next sc and leave long tail for sewing
smash down and sew to body in a curved upside down “u” shape between rows 5 and 6.
Showing posts with label crochet. Show all posts
Friday, January 28, 2011
Sunday, December 26, 2010
Here comes the bride and groom
My cousin asked me to make some wedding dolls as a gift for a friend who has getting married. Immediately I thought about using lace for the wedding gown. I was pretty excited to get started, and luckily, everything fell into place in this project.
Everytime I attempt something new, I never really know how it's going to come out. Sometimes it surprises me what can happen when you put yarn and embellishments together. This was one of those times and I got to try something new with lace and paper flowers.
And I just had to take this picture of the groom after the wedding... Too much champagne?
Sunday, December 19, 2010
If you love your dogs...
My friend wanted a Christmas stocking made for her sister. I suggested we put on them little puppy heads that looked like her 3 dogs, Yuki, Hana and Chibi. They are yorkie, maltese and morkie dogs.
I've never made a Christmas stocking, so now was the time to learn. I used a Lion Brand pattern that I modified to size and improvised the doggy heads. The stocking needed some color so I embellished it with holly leaves and used felt balls for the holly. (Finally, I found a use for the felt balls I purchased).
I'm giving it to her tomorrow, so hope she likes it...
Thursday, December 16, 2010
A reason for everything...
A few days ago, I received a request from a customer to make a cat for her daughter. She wanted it to look like their orange cat "Sam". We discussed it a bit and she sent me photos of Sam, who I fell in love with at first sight. She needed a bigger size than I was used to making so I played with my yarn and made a few prototypes until I thought it was just right. I was excited about my "ball of fury Sam" and posted it on Etsy for her to purchase. Unfortunately, my customer decided to give the assignment to someone else who could make a bigger, more life like cat for less money. I was dissappointed to say the least, but I wished her well and took Sam with me to my mom's bowling league where someone purchased her on the spot!
Every time I work on a special request, it's challenging and time consuming but I usually learn something from the process of being pushed beyond my boundaries. I have been thinking about writing up a new pattern, and I think Sam will be perfect for the project. So now I'm off to making more of Sam's litter mates for the pattern photos. Oh, I think I'll make a black cat, and a grey cat and a calico and.... Oh how fun!
Always look for the silver lining in every situation! :D
Friday, November 26, 2010
Keep those hands clean!
These little purses hold travel size bottles of hand sanitizer. They look simple enough, but it took me many prototypes to come up with this idea. First of all, a friend put a bug in my ear that it would be nice to have a holder for her Purell because she keeps losing it in the bottom of her purse. So I decided to take on the challenge. I had a hard time finding little bottles of Purell around here so I had to buy a case of them online. Next, I played around with different shapes for the holder and decided to make it so that the bottle could be used without removing it from it's holder. I liked the look of these "mini purses" and embellished them with sequin and ribbon flowers. What do you think? Are they cute?
Sunday, August 1, 2010
The Donut Kokeshi Club
Well you see, there's this girl named Mie, and one day while shopping in Shibuya, she found this cool donut thing and thought she'd wear it in her hair. The next day at school, her friends saw it and thought it was "kakoii" (cool) and so they all started to wear them. This was the start of the "Donut Kokeshi Club". And then, there is this girl named Nami who decided to wear a cupcake dress. These crazy girls!
Saturday, July 24, 2010
"Ni Hao!" Kai Lan...With Headphones?
This was another special request from one of my best customers. She asked me to make a Ni Hao Kai Lan doll with some removeable headphones. I thought she was a bit nuts (in a cute way), but this is the result. I'm quite proud because she is completely improvised. HOWEVER, I should have written down how I made her because after some people saw her, I ended up with orders for 3 more! Sheesh. She is about 8 inches tall and wide.
Later, I was making more kokeshi dolls and decided to give them the Kai Lan hair style:
Friday, February 5, 2010
Juggling Cats
I call these “Juggling Cats” because they are just the right size to do that. However, if you are not into juggling, add catnip to the stuffing and give it to your cat to juggle. Or, add a cord and hang them to make people smile. Make them into ornaments, a keychain, a zipper pull...
You need:
Lily Sugar and Cream in colors of your choice.
“G” crochet hook
Polyfiber stuffing
Optional craft eyes (6 mm)
Yarn needle
Body:
Using white yarn color for face:
Make magic ring*, ch 1
Round 1: sc 6 into a magic ring, pull tight.
Round 2: sc 2 into each sc around (12 sc)
Change to yarn color for body:
Round 3: (sc 1 into next sc, then sc 2 into next), around (18 sc)
Round 4: (sc 1 into next 2 sc, then sc 2 into next) around (24 sc)
Rounds 5 to 9: sc around (24 sc)
If you are using plastic safety eyes, place them now.
Round 10: (sc 1 into next 2 sc, sc2tog) around (18)
Round 11 (sc 1 into next sc, sc2tog) around (12 sc)
Stuff with polyfiber.
Round 12: (sc2tog) around (6 sc)
Join with sl st to next st. Fasten off, pull tight to close and hide yarn end.
Ear - (make 2):
Make magic ring, ch 1
Round 1: 4 sc in magic ring (4 st)
Round 2: (sc 1 into next sc, sc 2 into next sc) twice (6 st)
Round 3: (sc 1 into next sc, sc 2 into next sc) three times (9 st)
Join with sl st to next st. Fasten off, leaving long end of yarn.
Tail
Ch 12
2 Sc into 2nd ch from hook, 2 sc into each ch until end
Fasten off, leaving long end of yarn.
Assembly:
Sew ears on top of face. Sew tail on back of body. Embroider some whiskers…and play!
* Don't know how to make a magic ring? Do a search on YouTube to see a demo...
Tuesday, January 19, 2010
Bunny Pencil Toppers
Okay, so everyone needs one of these, right? Probably not, but they can brighten your day with their cute little faces.
I was inspired by some plastic bunny cabochons that I have. I decided to try to crochet some bunnies in a similar shape and ended up making these pencil toppers. They turned out better than expected...
Meanwhile, in the real world, we are getting a lot of rain this week. It's been awhile since I remember having a good rain. Usually this means my garden turns into a pond, but the rainwater really makes the plants perk up. I guess the city water has too much clorine or something in it. We are in a drought too, so the rain is much appreciated. I'm one of those people who'd rather walk in the rain without an umbrella. So I say, bring it on. I just hope it doesn't hurt the folks threatened by mudslides.
Saturday, November 21, 2009
Mutts and Alley Cats Donation 2009
It's the holiday season again. How quickly it rolls around. The weather is getting frosty and I worry about the homeless pets outside in the cold. Last year, several of my mutts and alley cats made some money to be donated to the Best Friends Animal Society. This year, some of them went to the TLC pet adoption here in Southern Cal. I adopted three precious cats from them over the years and met a wonderful lady named Lisa. She saved our Eddie and fostered him and has been a wonderful contact. Lisa is also a veterinarian and I keep her updated on Eddie. She is truly concerned about saving cats and I can tell she loves them all. I hope the donated mutts and alley cats help them raise some money to help many more.
Friday, September 18, 2009
Kokeshi Kokeshi and More Kokeshi
I've been meaning to post this a month ago... Time just jets on by...
I needed to put together some items for a local craft show in November. I think the audience for this event will be mostly Asian, so I decided to make some kokeshi amigurumi. Kokeshi dolls are traditional Japanese dolls usually made out of wood in a simple cylinder shape with a round ball head. Ah, perfect for amigurumi. I made some traditional geisha type ladies and then spun off into other areas, like China dolls, ninjas and even fishermen. Check these out:
These are the first 10 I made, and there are 10 more I haven't photographed yet. Hope they like them!
Thursday, July 16, 2009
Watermelon Turtle and Flower Garden Turtle
I finally got around to making this "Watermelon Turtle". The idea was swimming around in my brain and I finally got it made. I used cotton yarn for the shell and a bright green acrylic for the body. The "seeds" are made with French knots. I think he looks delicious!
And, this is my "Flower Garden Turtle". She's a colorful girl with daisies embroidered on the top of her shell.
Friday, February 27, 2009
Golf Tee Balls are here!
I just opened a new store on Etsy to sell my golf tee balls. What are tee balls? It's a handy gadget to hold your favorite tees and it's a unique signature of your personality to boot. I've been having fun coming up with new ideas for them. I'm so excited to have sold a few sock monkeys. Yea!
Even if golf teeballs don't improve your game, at least it might make it more fun. Since I've been making these, I even get the urge to play more golf. Which is weird for me...
Check out my teeball store at www.teeball.etsy.com
Thursday, February 19, 2009
A Bunny For You
Here's a fast and easy crochet pattern just in time for Easter! I used Lily Sugar and Cream, but you can use whatever yarn you want. The size of the bunny depends on which yarn you choose. This one is about 3 inches tall and 1 1/2 inches wide. Enjoy!
This is a copyrighted pattern. Please do not copy or post this pattern on another site. Also, do not sell this pattern or make these items for commercial use.
BUNNY
Materials List:
- Cotton yarn like Lily Sugar and Cream.
- Polyester fiberfill stuffing
- Embroidery floss for eyes, nose and whiskers
- Plastic safety craft eyes - size 9 or small buttons (optional)
- Yarn needle
- Stitch marker (I just use a small piece of contrasting yarn to mark the end of each round.)
- Crochet hook size “G”
Body
Make magic ring*, ch 1
Round 1: sc 6 into a magic ring, pull tight.
Round 2: sc 2 into each sc around (12 sc)
Round 3: sc 1 into next sc, then sc 2 into next, around (18 sc)
Rounds 4-11 (8 rounds): sc around (18sc)
Round 8: (sc2tog, sc) around (12 sc)
If using craft eyes, insert now.
Stuff body with poly fiberfill.
Round 9: sc2tog around (6 sc)
Leave long yarn tail. Using a yarn needle, gather up the stitches in round 9 and pull tight to close. Weave yarn end into body.
Ears (make 2)
Round 1: sc 4 into a magic ring, pull tight.
Round 2: (sc 1 into next sc, then sc 2 into next), twice (6 sc)
Rounds 3-7 (5 rounds): sc around (6 sc)
Join with sl st to next st. Fasten off, leaving long end of yarn.
Tail
Use a fluffy white yarn if desired.
Round 1: sc 6 into a magic ring, pull tight.
Round 2: sc 2 into each sc around (12 sc)
Round 3: sc2tog around (6 sc)
Fasten off leaving yarn tail. Stuff very lightly into a round puff shape. Use the yarn end to gather stitches of round 3. Pull the yarn end to close the tail.
Assembly
Attach the ears to the top of the body. Pull the yarn end of each ear through to the bottom of the body. Tie ends of both ears together at the bottom of the body and pull up to flatten out bottom. Tie securely and weave in yarn ends.
Attach the tail to the back of the body.
Embroider eye, nose and whiskers as desired.
Sunday, February 1, 2009
Felted Mutts
First of all....HELLO Susie Farmgirl, are you still farming??? I only see crochet posts!
Yes, I'm still farming, but it's January, oops, it's already February. Where did the time go? Usually this time of year the weather is so cold that the veggies don't grow much, but stay nice and fresh in the ground. This January has been unusually warm and this week it's actually been in the 80's. The plants are very confused about what to do because the weather fluctuates so much. But that's farming...
Right now I'm concentrating on crocheting and building up inventory in my Etsy shop. I've been having fun making different kinds of mutts and I wanted to try felting some. So, I made some up in 100% wool (Patons) and washed them in hot water in the washing machine. This makes the fibers shrink and supposedly meld together into a beautiful surface. Well, I washed one dog 3 times, and the others twice. I put them in pillow cases and washed them with some clean towels for friction. The fibers shrunk and the dogs became very soft and fluffy to the touch. They also got this forlorn look in their eyes. I didn't get the felting I was expecting, so maybe the water wasn't hot enough, or there wasn't enough friction and agitation. Here's my litter of felted mutts:
Thursday, December 18, 2008
Rainy Day Crochet
It was raining all day yesterday and it's really cold for So. Cal. It was too wet to go out farming, so I bundled up by a heater and crocheted while watching a Korean drama. It amazes me that I can crochet and read subtitles at the same time.
I was inspired by a cat on a teapot I brought back from a trip to Japan. Now I admit, my crochet cat is nowhere near as cute as the teapot cat, but hey, I said it was inspiration! I liked the heather blue yarn I was using. It reminds me of denim. I added the flower to the cat's ear to perk it up a bit.
Saturday, November 29, 2008
Mutts
Check out my mutts. I call them Mighty Mutts. I'm having fun making them in different colors, with different ears and tails. In fact, I've made so many of them in such a short time, that my thumb is sore and keeps popping out of place. Ouch! These little dogs are a great way to use up yarn remnants. Oh, there's so many dogs to make. I'm also going to make alley cats, but that's still in the works. I'm in the process of writing up a pattern for these mutts, so if you are interested, check back later.
I'm hoping to sell these mutts to make money to benefit animals. One organization that I feel is very important is the "Best Friends Animal Sanctuary". If you would like to know more, check out their website at www.bestfriends.org.
Thursday, November 20, 2008
First ami people - Sachi and Yonny
I was racking my brain trying to come up with a thank you gift for some friends who have everything. What to do, what to do? Well, I finally came up with the idea to make ami dolls of them. Sachi is my tennis team captain (yes, even farmers play tennis) and her husband Yonny owned a special Japanese antique store.
I made these ami dolls on the fly, that is, without a pattern and without even knowing what they'd look like. I knew that the hair had to be spot on, since it would be the only identifying characteristic. I started by making the doll body out of beige colored yarn and added some embroidery floss for hair. I had just come back from the Fiber Festival and had a delicious stash of yarn to inspire me into making yukata for their clothes.
I was happy with the final result and had a great time making them and learned a lot in the process. Onward!
Friday, November 7, 2008
Fiber Festival Loot
Thanks to the L.A. group on Ravelry, I found out about the Fiber Festival sponsored by the SC Handweaver's Guild. I went just to "check it out" and came home with this stash...
Wow, wow, wow. I had such a great time. I especially liked buying the yarn remnants for 25 cents to a couple of dollars. They are perfect for my little amigurumi projects. I bought a lot from Newton's. They had many skeins for $5 and $9 dollars that were regularly priced from $10 to $29. I also had fun buying these tiny beads priced $1 a cup. I would have missed this great show if not for my friends at Ravelry.
Friday, October 24, 2008
Three Dog Night
We've been having crazy weather around here. It's been hot, then cold in the same week, and then the pattern continues week after week. Right now, the Santa Anas are blowing through making it hot and dry which makes eyes ichy and skin start cracking. It's late October and today it was in the 90's.
Meanwhile, I've been busy crocheting my friend's 3 dogs; Hana, Kiku and Kanoa. Hana and Kiku are German Shephard Chow mix and I'm not sure about Kanoa.
I made these puppies up as I went along. It's kind of fun to adlib and feel like you can crochet anything. Crochet really has some usefulness and I can see how it would really come in handy in an emergency. For instance, say you are stranded on an island, as in the movie "Castaway". If you know how to crochet, you can make everything you need if you can find some appropriate fiber. You can make socks, shoes, slippers, clothing, baskets, rope, even a raft. Why not?
Subscribe to:
Posts (Atom)