Today's colors were perfect as my goal was to make an anniversary card for my Husband. Our 25th wedding anniversary is tomorrow October 1st. I didn't want to make a super frilly vintage card, so this is where I ended up. The diamonds in the rough embossed layer is Core'dinations Vintage collection (man I love this CS!) I sanded it after embossing and then used an Adriondack sponge dabber in Stream to highlight some areas. A baby wipe was used to remove most of the actual turquoise color, leaving some shaded distressed ares. The main image panel was made by stamping the Framed Heart in Distress Walnut Stain on Baja Breeze CS. Then word diamonds bg was stamped in versamark and embossed in clear over the top. Adirondack paint dabbers (Stream, Mushroom, Espresso) were heavily applied over the embossed image and wiped off. I used blending foam and the alcohol ink applicator handle w/ Baja Breeze ink to "buff" the layer and bring back the sheen. The heart was colored with a Copic Marker E09 Burnt Sienna to make it stand out. The sentiment is a rub on. The image layer is attached to chocolate cardstock and the layered on foam dimensional tape before adding the Baja Breeze layer underneath. The brown/blue variegated organdy is May Arts and the Trinket pin (which says treasure) is Tim Holtz. One of my new favorite finds is Zip Dry glue. I purchased it from Scor-Pal and this stuff is wonderful for paper crafting. I attached my ribbons with it and also adhered the brown layer to the baja layer with it. It is especially handy when you have ribbon that is tucked between layers. Holds tight and lays very flat. Anyway, stamps and Paint Dabbers are available from Rubbernecker Stamp Co. Don't forget that it's Treasure Hunt Tuesday, so run on over to Rubbernecker and check out the deals!
My original artwork is for personal inspiration only and may not be copied for publication or contest submission.
Enjoy your Visit!
Tuesday, September 30, 2008
Treasure Hunt Tuesday
Arrrr ye mateys, it's Treasure Hunt Tuesday at Rubbernecker. As always, you can find the clue on our home page. If you haven't visited lately, you'll find that we are now offering your choice of the two images offered up for the treasure. In order to claim your treasure, place your choice of the two images in your cart, and then purchase only one other item.
Our Design Team, as always, will delight you with their creations. Be sure to visit their blogs.
Broni - Splashes of Watercolor (Blog Candy) Linda - Linda’s Works of Heart (Blog Candy)
Candy - Candys Land Bev - Savor the Journey Jules - Stampin with Inky Fingers Tami -
A Walk on the Mild Side Sherry - Walkin' on the BAD Side!
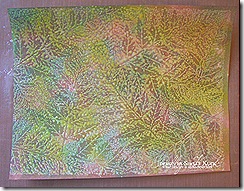
The fern background was stamped in versamark and embossed in clear EP on Vanilla CS. Then, I made an alcohol ink background over the top of the embossing using Latte, Meadow & Lettuce.
With the craft iron set on High/Cotton, iron the embossed image between a sheets of plain white copy paper. I actually use my craft mat for the under layer as it is heat resistant. The embossing will melt and absorb into the copy paper. The result is a faux bleaching with a multi colored background. Cool Huh? Thanks to Bad Sherry for playing around with this while we were demoing in Chicago recently. Love it!

 Here's what the iron looks like when collapsed. The handle pops off and slides over the metal base. When compacted, it measures 7 1/2" long and 1 5/8" thick. It also has a steam attachment and comes w/ a carry bag. Mr. Rubbernecker/Dave would love to add one to your Treasure Hunt order today. This is not only the perfect craft iron, but travel iron as well.
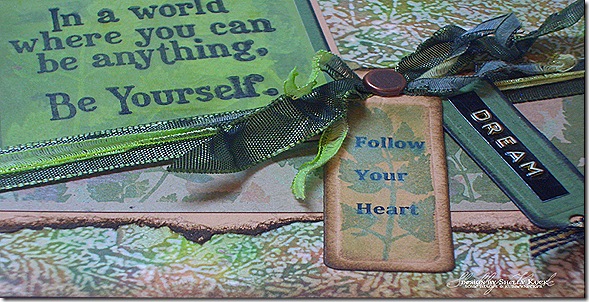
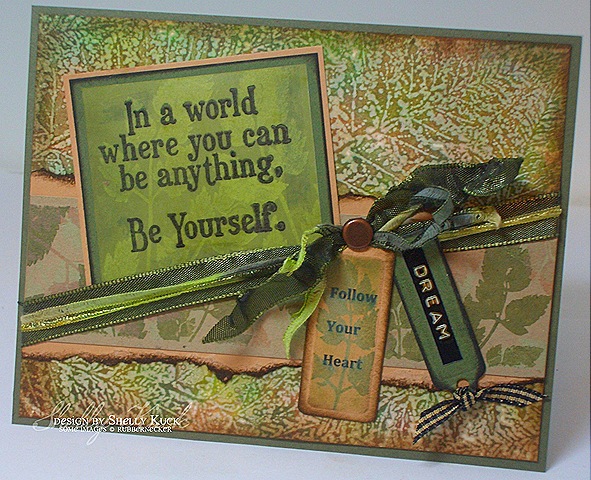
Back to the card details. The tags are both Spellbinders dies, the tan one is from the tags trio set. The Green one is from the double ended tags set and I simply folded the top of the tag over the ribbon and secured it with a glue dot. Both tags were die cut and then run through to emboss them. Follow your Heart was computer generated. The main sentiment was stamped in stazon black on CS weight vellum. The back was DTP'd with Distress ink/Peeled Paint. The leafy silhouette stamp was inked in Blanco Opaque White and stamped on the distress ink. Layering the colored vellum on the artichoke CS made the white images pop through. The black was sponged on with Blending Foam and the alcohol ink applicator handle. The strip under the tags & sentiment was stamped w/ the same silhouette stamp in 3 colors of VersaMagic chalk inks on Kraft CS. I used Sage, Hint of Pesto 7 Sahara Sand. It is layered on Caramel CS with torn edges that were sponged with Distress Walnut Stain. Stamps, inks, spellbinders, embossing powder and craft iron available from Rubbernecker Stamp Co.
Be sure to check back tomorrow for the next Blogger Challenge.
Monday, September 29, 2008
TLC188 Celebrate Batik
I made my batik challenge card a little differently today. Rather than embossing the image in clear and applying inks and ironing, I stamped the Batik Flower background in Blanco opaque white ink which doubles as a resist ink. Distress inks were swiped on a craft sheet and misted with water and the cardstock was layed in the various puddles of distress/water and ironing before adding color from another area of the sheet. I used Distress Tattered Rose, Tea Dye & Dusty Concord. The edges were sponged in Tea Dye ink. The sentiment and motif layers were stamped on the same batik paper. My card is also for FS86 which featured Terrore3 yesterday. The card I cased can be seen Here The challenge requires us to case a card changing at least 2 elements. I changed it from a monochromatice card, used different stamps and velvet ribbon replaced the stamped strip. I also eliminated a small rectangle layer with the velvet knot and silver heart charm. The stamps used are all from Innovative Stamp Creations Batik Flowers background, Motif/Artsy Victorian & Sentiment from Flair of Summer. The CS is retired Vintage Violet and US White.
Wednesday, September 24, 2008
Reindeer Peace
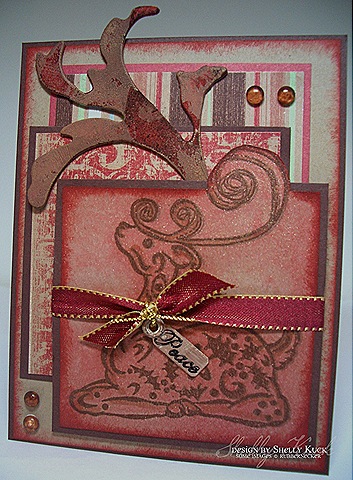
Here's my card for today's Sketch Challenge on splitcoast and also for the Rubbernecker Blog challenge to use Grungeboard or Chipboard. The striped & brocade dp's are Deja' Views Attic collection. The red mat under the striped layer is the reverse side of the DP. I used Chocolate for my card base and other mats and kraft for the main image panel and layer under the panels. The reindeer was stamped in Versafine Vintage Sepia and sprayed with pearlized distress mists in Tea Dye/Bronze perfect pearls & Fired Brick/Gold perfect pearls. A copic marker E37, was used to highlight parts of the image. The edges were sponged with fired brick distress ink. The grunge was painted with Frayed Burlap crackle paint and sponged with Fired Brick & Walnut Stain Distress inks. I finished it with Dew Drops & ribbon. The tag turn is by 7gypsies. The Reindeer image is Stamp Oasis and the Peace is from a Rubbernecker sentiment.
Make it work Wednesday #12
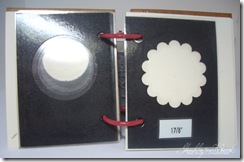
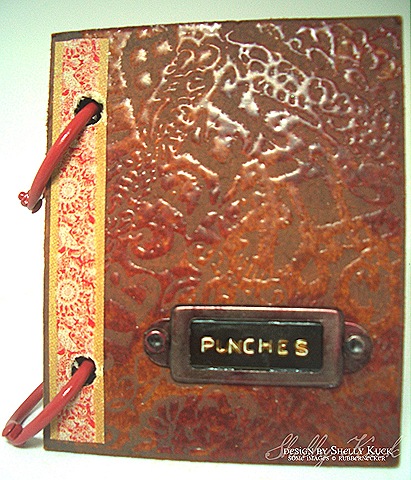 Here we are already at MIW 12! I also combined it with the Blogger Challenge over at the Rubbernecker Blog, to use chipboard or Grungeboard. Today I am bringing you an idea that I found on another blog and will track it down and give credit. How many times have you punched a punch out on a piece of scrap paper to lay over an image to see if it will work? I am so excited about this project because now I don't have to to do this each time to find the punch that fits. I cut the black CS at ATC size (2 1/2 x 3 1/2") punched, labeled and laminated using my Xyron. The chipboard book and dividers are from 7gypsies mini ringed book package. I kept the cover very simple so I can throw it in my purse without having to worry about dimensional embellishments etc.... The cover technique is the same that I used on the post here. I don't remember where I got the colored ring closures but the sticker strip on the binding is by Deja views. The punches label was done on my dymo labeler and run over with a Copic marker E37. I now have a book that can be added to& all my punches are laminated in it. I chose the rings instead of using a coil binding so that I can remove pages easily or add to my book. I can also flip the book open and place an image underneath to see if it will fit. If the image is on a large index sheet, I can pull it out of my book easily. Make sense?
I hope this inspires you to organize and find a system that works for you. For past Make it work Wednesday's visit the following links.
For previous make it work Wednesday's click on the links below.
#1 Ribbon & lots more (Clip it Up!)
#4 Punches & Wood Mounted Stamps
Tuesday, September 23, 2008
It's Treasure Hunt Tuesday!
Arrrr ye mateys, it's Treasure Hunt Tuesday at Rubbernecker. As always, you can find the clue on our home page. If you haven't visited lately, you'll find that we are now offering your choice of the two images offered up for the treasure. In order to claim your treasure, place your choice of the two images in your cart, and then purchase only one other item.
Our Design Team, as always, will delight you with their creations. Be sure to visit their blogs.
Bev - Savor the Journey (Blog Candy)
Broni - Splashes of Watercolor
Candy - Candys Land
Jules - Stampin with Inky Fingers
Kittie - Kittie Kraft (Blog Candy)
Linda - Linda’s Works of Heart
Shelly - Stamp with Shelly
Tami - A Walk on the Mild Side
Sherry - Walkin' on the BAD Side!
Be sure to check back tomorrow for the next Blogger Challenge!
Here's my card for the color challenge today. Vanilla, Kiwi Kiss & Baja Breeze. I actually ended up using Distress Faded Jeans 7 Shabby Shutter because the inks blended better than classic ink did. First, the vanilla cardstock was stamped using Ranger Clear Resist ink. I used 3 stamps for the background, How do I love thee text was stamped in opposite corners and then the other 2 corners with a floral and fern background. The 2 distress inks were swiped on a craft sheet, misted with water until the ink beaded up and then the cardstock was layed in the puddles to pick up ink. I repeated this several times and ironed in between to dry the paper. The main image panel was done the same way with the Baroque Background stamped in clear resist. The bird on branch is stamped in Versafine Onyx Black and I used an aqua painter to waterolor the bird. The edges were sponged with Faded jeans.
Monday, September 22, 2008
Distress Acrylic Resist Tutorial
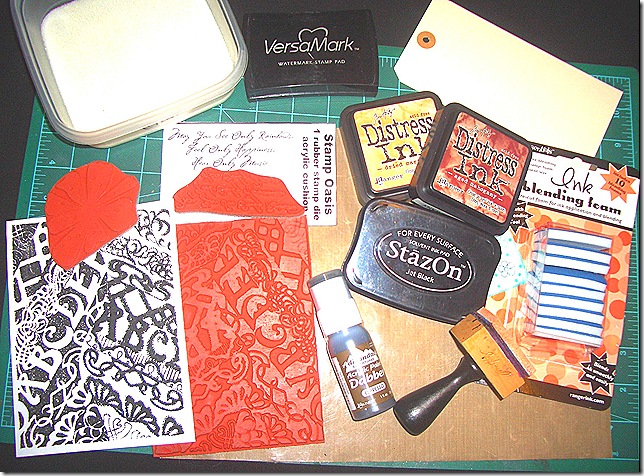
I am back from Chicago and totally beat. Working with Bad Sherry and Meg/Waxyo was a pleasure. Mr. Rubbernecker/Dave is always a delight to be with and Mrs. Rubbernecker/Pat is as well. I got back to Michigan with the Rubbernecker's at about 1 AM this morning. Is it naptime yet? I wanted to create a tutorial of the demo I did at the Rubberstamp Expo before going up for a nap, so here it is. I would call the technique Distress Acrylic Resist. The first sample was created using 2 colors of distress inks, 1 color in an Adirondack Paint Dabber and Stazon Black. Ready?
Here are the supplies you will need:
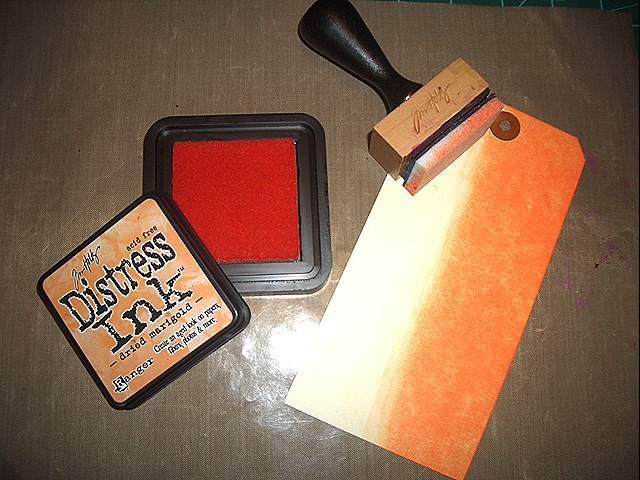
Using the applicator handle and an Ink Blending Foam pad, work Dried Marigold ink into a shipping tag.
Stamp a bold image in a darker color ink over the inked tag in Aged Mahogany.
Ink a bolder background image that has some open areas with versamark and emboss with clear EP.
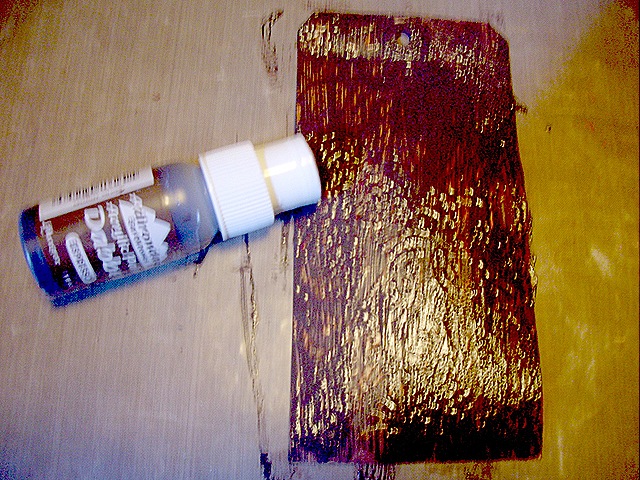
Sorry about the blurry photo. Cover the entire tag with a thick coating of Adirondack Espresso acrylic paint.
Wipe off acrylic paint with a soft towel or cloth.
Using the same blending foam inked with dried marigold to "buff" the tag. I have done the top 2/3
of the tag to show you the difference this step makes. The flowers really "pop" with this step.
Stamp some words or other images in black using a solvent based ink on the tag.
Using a new Blending Foam Pad, ink the edges of the tag w/ Stazon Jet Black to frame the tag in.
All images and supplies available from Rubbernecker Stamp Co.
Stamps include: KK Originals Floral Set, Stamp Oasis Nouveau Background & Hear Music Text
Inks: Distress Dried Marigold & Aged Mahogany. Versafine, Stazon Jet Black
Shipping Tag
Accessories: Clear EP, Blending Foam, Applicator Tool, Heat Gun, Craft Mat, Tim Holtz Accessories,
Assorted Ribbons and Fibers
The Blue tag uses the same technique and supplies, but I only used one color of distress ink/Faded Jeans for the sponging on the tag,
Stazon black for the flowers and Adirondack Mushroom paint dabber over the clear embossing. OK, it's naptime!
Thursday, September 18, 2008
I'm outta here
I am in Chicago for the Rubber Stamp and Scrapbook Expo on Saturday & Sunday. If you are attending the show, stop by the Rubbernecker booth and say Hello. I will be there as well as Bad Sherry & Waxyo aka Meg. I'll be back to sharing on Monday I hope. Have a great weekend!
Wednesday, September 17, 2008
Romance Collage
This is for today's Sketch Challenge on Splitcoast and also Rubbernecker's Blogger Challenge #1, to use die cuts.
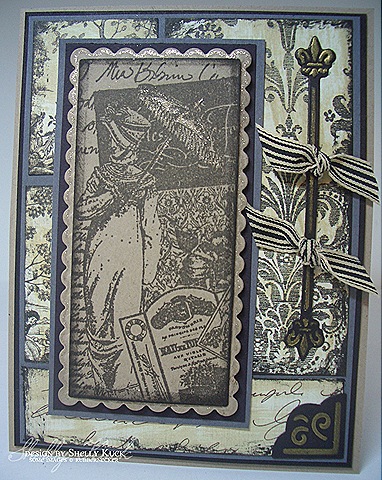
My card uses Kraft, Basic Gray and black Cardstocks. The Romance Collage (Stamp Oasis) was stamped on Kraft using Versafine smokey Gray and sponged with Versafine Black. The DP's are The Paper Studio and were swiped with Distress Old Paper ink and the edges scraped with an old toothbrush inked with Versafine Onyx Black. Spellbinders were used to cut and emboss the main image panel, the scalloped panel and also the Rod & Decorative Corner. The rod and corner were sponged with Encore Gold before removing them from the dies. Sakura Gel Pen highlights were added to the scalloped layer and umbrella, the ribbon is May Arts. Have a great Wednesday, Make it work Wednesday will return next week.
Tuesday, September 16, 2008
Santa Claus is coming to Town
Today's color challenge is Riding Hood Red, Basic Gray & Artichoke. I chose to make a Alcohol ink background for the Santa Collage. Colors used are Red Pepper, Pesto, Slate & Gold. The white highlights were done using a scratch tool to reveal the white core of the glossy paper. I also used a red copic marker to add color to the hats and coats. The edges of the glossy layers were also done with a copic marker. The artichoke layer was stamped with a holly sprig and sponged with Encore Gold ink. The collage is on dimensional foam tape and 7gypsies paper fasteners/riding hood red taffeta finishes it off. Images are all Rubbernecker Stamp Co. Be sure to stop by Rubbernecker's new Blog to check out the specials and those offering blog candy today and so much more.
Festive Tag
Today is Treasure Hunt Tuesday at Rubbernecker and that means free stamps and Blog Candy. All the details are on the
Rubbernecker Blog. Juliana & Candy are offering $10 in Rubbernecker Bucks Blog candy today, make sure to visit them for a chance to win.
While ye are sailing around today, make sure ye stop and visit the rest of me mates, Sherry, Kittie, Broni, Linda & Tami.
I love the dimension of the CS vellum leaves and the depth from the acrylic stamped layer with the distress mists and pigment stamping. After die cutting and embossing the Spellbinders leaves, I sponged them with pigment inks before popping out of the dies. Then, pearlized distress mists were sprayed on. The vellum curled up like dried leaves. After they were dry, I used a paint brush handle to manipulate the final shape of the leaves.

My tag was created with Pearlized Distress Mists made with Distress reinkers,perfect pearls & water.
Pearlized Distress Mists:
Scattered Straw/Gold perfect Pearls, Dried Marigold/Pearl, Fired Brick/Red & Shabby Shutters/Bronze
Adirondack Paint Dabber
Lake Mist
Ink
Adirondack Pigment Cranberry, Bottle & Terra Cotta
Versafine Onyx Black & Vintage Sepia
Stamps
Baroque Background (stamped in lake mist paint dabber)
Leaf Set
Festive Fall
Wheat Border
Accessories
Jumbo Shipping Tag
Cardstock Vellum
Tim Holtz Muse Token
Ribbon & Fibers
Spellbinders Assorted Leaves
Inkssentials Mini Misters
Monday, September 15, 2008
Glittery Peace
OK, I admit that I hate glitter because of the mess. I sparkle for days as does the cat and everything else in the house. I took on today's Technique Challenge and pulled out the glitter and glue pad which I haven't used in ages.
I immediately thought of my favorite "go to" background from Rubbernecker Stamp Co. Baroque Background. I used tsuineko's Essential Glue Pad and stamped the background on Riding Hood Red CS. The tags were die cut using Spellbinders Tags Trio set (lg for Forest & Med. for the white layer) Peace (Rubbernecker) was also stamped with the essential glue pad and glittered. The Holly Script (Stamp Oasis) was stamped on the white tag in Distress Pine Needles and on the Forest tag in Blanco White. The raised Holly script was stamped with Stazon Jet Black, colored with copic markers and glittered as well and raised on foam dimensional tape. The card was finished with green organdy.
Friday, September 12, 2008
Rubbernecker Company Blog
Rubbernecker is proud to announce that we have started blogging! Click here to go to the blog.
It is our aim and purpose to bring techniques, tutorials, challenges and an opportunity to get to know the Design Team through this blog. You'll be able to find our show schedule, specials and news from Rubbernecker. Stay tuned....
This week we added Staz-on, Brilliance, Dew Drops, Memento and Ranger Pigment Ink Pads to the Product Sale List. Spellbinders Nestabilities are on sale for another week.
All orders containing $25 in product (excluding stamps and/or cushion) will receive a 10% rebate (rebate based on actual subtotal paid after all discounts taken and refunds applied) on the entire order.
For more information, please visit the home page.
Have a wonderful Friday!
Thursday, September 11, 2008
Christmas Tidings
My card today is a multi challenge card for today's Ways to use it challenge on splitcoast/White Gel Pens, and the Innovative Stamp Creations challenge which is a sketch that can be found here. We would love for you to play along and upload your ISC creations to your blog or on line gallery and leave a comment on the ISC blog with your link. A random drawing will be held on Sunday 9/21 and the winner will receive 2 free Innovative Stamp Creations stamp sheets of their choice! Be sure to use the Key Word ISCC12 with your upload to an online gallery.
I used an Inkssentials White Gel pen to highlight the stamped flourishes and words as well as outlining the 4 narrow panels. The main panel is on dimensional foam tape. The red panels were made by running core'dinations CS through the cuttlebug with the textile folder and sanding. The other 2 panels and the sentiment layers are a sheet of art paper from a Somerset Studio magazine. All images are from ISC Christmas sheets and the brads are flocked.
Wednesday, September 10, 2008
Blog Candy Winner
Congratulations to Becky G. of Camellia Cottage was chosen by random.org as the winner of the Rubbernecker blog candy. I have emailed you Becky, glad I found your blog too, beautiful work!
Random Integer Generator
Here are your random numbers:
21
Timestamp: 2008-09-10 18:19:33 UTC
Check out the awesome sale going on at Rubbernecker too!
ON SALE NOW
Staz-on, Brillance, Memento, Ranger
http://www.rubbernecker.com/p-457-brilliance-pads.aspx
http://www.rubbernecker.com/p-1570-adirondack-pigment-ink-pads.aspx
http://www.rubbernecker.com/p-662-brilliance-dew-drops.aspx
http://www.rubbernecker.com/p-1584-memento-pads.aspx
http://www.rubbernecker.com/p-472-stazon-pads.aspx
Spellbinders Nestabilities Individual and Sets
http://www.rubbernecker.com/m-118-spellbinders.aspx
All orders containing $25 in product (not stamps or cushion) will receive a
10% rebate (rebate based on actual subtotal paid after all discounts taken and refunds applied) on the entire order. The rebate is processed manually after the order is qualified and we verify the product is available.
SC193 Red Snowflakes
I am rushed this morning to post before my power is shut off for tree removal today. I really wanted to add some sparkle with embossing or shimmer mists, but I just know if I need to use my heat gun or iron, they will come cut me off. So, here is my quick Sketch Card.
Images are all available from Rubbernecker Stamp Co. The Snowflake Background 1200 SO, Snowflake Word 154 SO & Snowflake Montage 1548 SO are all in the Stamp Oasis Section. The Snowflake stamped on the Spellbinders Die is from KK originals 21-13 KK. CS is Riding Hood Red, Pink Pirouette & Close to Cocoa. Inks are Riding Hood Red & Distress Vintage Photo & Walnut Stain. There is Perfect Pearls/blush dusted over the snowflakes text but it probably doesn't show up well. I added Riding Hood Red Taffeta and flocked Brads. The die cut snowflakes are on foam dimensional tape.


