hover over

HOVER OVER ANY PHOTO AND SHARE IT ONTO YOUR
PINTEREST, FACEBOOK OR TWITTER ACCOUNTS


Showing posts with label lapel pin. Show all posts

Friday, November 17, 2017

Rosemaling Witch Hat

Hello Dear Friends:

For Halloween,  I designed and painted this Witch wood hat pin in the "Rosemaling" style...
in the Traditional Decorative Folk Art Painting from Norway...

rosemaling witch pin  front view

I saw this witch hat in wood and I wanted to do something with a "Rosemaling" flower on it...

How to make this project: 

1- You select the main painting colors (background and 2 or 3 more for your flowers and leaves)
I use acrylic paints from DecoArt (Amercicana line)...
Note: Even though "purple" is not a traditional "Rosemaling" color I decided to use it just because I like the combination of the blue with the purple...
in creating there are no rules...right?

2- after selecting the colors you base coat the hat
3- Then proceed to draw a very simple flower (either free hand; as I did or copy/trace a flower that you like)

Note: I believe this one could be in the "Telemark" style because if the shape of the leaf...

rosemaling witch pin first steps

- start by using some of the basic brush strokes ("c" and "s" ) to make the flower and petals
(if you do not know these strokes yet, simply fill in the empty shapes with color)

- highlight some areas of the flower and leaves  (with a lighter color)
and shade some others (with a darker color)

- add additional small strokes to embellish even more the flower ("s" strokes)
- finally  finish it with some linework to outline the petals and leaves

rosemaling witch hat front

Finally, Give 3 coats of varnish
I used "Tripple Thick" glaze from DecoArt

rosemaling witch pin varnish

Even though I am still in a learning process and I do NOT master my strokes I am very pleased with the results...

As Salvador Dalí said, "have no fear of perfection! you will never reach it!"
seeing this quote on the positive side, do not fear of mistakes...You are not perfect!
So I encourage you that even though you do not feel as an expert, or feel that you can not design your own pieces, just try doing something simple and small as I did. 
Practice and repetition will make you better and more confident day by day...without fear of making mistakes...
"Embrace your imperfections!!!"

rosemaling witch pin varnish

This project was so easy and pretty to make that, as you can see in the photo, I made several hats to give away...

rosemaling witch pins

Last View...

rosemaling witch pins with paints

I hope you have enjoyed this quick painting project 

Thanks for the company 
I will see you soon with another painting 
or paper craft project, 
stayed tuned...
Hugs

Supplies:


Saturday, November 11, 2017

Witch Pin with DecoArt

Hello Dear Friends:

For Halloween at my painting class with My teacher Carl Larson, we made this cute "Witch pin" designed by Jamie Mills Price called "Wichypoo Pin"

witch hat pin front

using DecoArt acrylic paints from the "Americana" line

witch hat pin supplies paint bottles

Below, you can have a pick of my painting setting in my garage...full of paints, water,  brushes and wood!!!

To see the post that I made on my own designed "Rosemaling" black easel painting (photo)
click HERE

painting setting

 below you can see the process of some of the steps in painting these cute lapel pins...

witch hat pin steps

close up
witch hat pin finished

finished with 3 coats of varnish for extra shine...

witch hat pin supplies varnish

This product is great and gives an excellent shine

witch hat pin shine

Last view of the group

witch hat pin group
 
if you would like to get this pin and design please visit 
 Jamie Mills Price Site: "Between The Vines" HERE 

Thanks for the visit
 and see you next time...

Thursday, November 10, 2016

Flower Pins in Felt

Hello dear Friends:

I made these flower "Boutonnières"/lapel pins for my mother's birthday...
upon arrival all the women invitees could choose the pin of their desire...

flower pins in felt

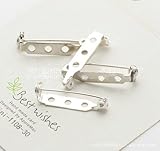
They are quite simple to make, you will need felt, Memory Box dies, brooches and a glue gun...
here it is how I made them..

This flower uses the "Plush Camelia" die from "Memory Box"
step 1: Die cut several petals
gather/glue  the smallest ones around 3 or 5 pistils
Note: you can skip the pistils and just gather 2 or 3 of the small petals and start gluing them to each other
some of my flowers do not have pistils, see photo.

flower pins in felt step by step

step 2: keep adding petals around, just place a dob of glue at the end of each petal


step 3; die cut some leaves (grey) and 2 circles (green) for the back


 step 4;
when finish adding petals add one circle
on the 2nd circle cut with scissors 2 small slots, to insert the brooch

step 5:
insert the pin and glue it


 step 6:
final result back and front

flower pins in felt back and front

for some other flowers to give a different look, you can start backwards
start with one circle (green) for the back and start gluing the petals (pinched) from the center outwards
to form a "cup"


here it is the "cup"
continue gluing petals


These are wonderful little souvenirs/favors for any party...
You could surprise your family for this coming Thanksgiving 
and give away these to make this special Holiday even more memorable

or how about some reds ones for Christmas
see photo below using the "Plush Anemone" die

here are the dies that I used...

flower pins in felt supplies


NOTE: use a high quality felt, it really makes a difference in the die cutting and in the end result of the look of the flower...leaving a clean smooth edge
See supplies below (felt from "Taylored Expressions")

Thanks for the visit...

Supplies 


Sunday, May 8, 2016

Boutonnière In felt for Mom

HAPPY MOTHER'S DAY
Wishing to ALL the mothers out there 
a terrific day!

boutonniere in felt for mom

I made this "Boutonnière" in Felt using the Memory Box Die "rose"...
I offered it to my mom and she is modeling it here!!!

boutonniere in felt for mom front

I place between the layers some tulle.

boutonniere in felt for mom detail

Sending warm thoughts 
and big hugs and kisses 
to all MOMS...

boutonniere in felt for mom detail


SUPPLIES