hover over

HOVER OVER ANY PHOTO AND SHARE IT ONTO YOUR
PINTEREST, FACEBOOK OR TWITTER ACCOUNTS


Showing posts with label blog hop. Show all posts

Monday, May 4, 2015

A Gift Packet of Cards for Mom

Hello My dear Stamper Friends:

"Petaloo" hosted a blog hop 
along with "Quick Quotes (scrapbook company)!

All week long both Design Teams Members, shared some inspiration projects featuring products of both companies for Mother's Day ...

Here, it was my take...

front gift card for mom using petaloo and quick quotes

I initially started by making a single card for mother's day...
I pieced some "Quick Quotes" papers in a diagonal way.
At the bottom left, I added a "Pie shape" and made an arrangement with "Petaloo" flowers.
On the top I made a small banner using some "Quick Quotes" banners and sayings.
I die cut some letters to make the word MOM.

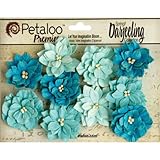
Here are the papers and stickers from "Quick Quotes" and "Petaloo" Flowers that I used...

supplies for card for mom using petaloo and quick quotes

I had so many pieces left over from the initial card that I decided to make some cards for her to use and send.
So that is how I came up with this small gift packet of cards for Mom.

gift packet of cards for mom using petaloo and quick quotes

I started by marking with pencil some diagonal lines for the layout of my card...

step one for cards for mom using petaloo and quick quotes

I choose 4 different Designers papers from the collection "", trace diagonal lines on the designer paper.
NOTE: Make sure to place numbers on each diagonal stripe even on the designers papers from 1 to 8 ...otherwise you will get lost and your stripes will not fit, it is like a puzzle.
THEN cut your papers...


When done cutting, I started to piece them onto my final cardstock...
since I had so many stripes left over (see photo)
I went ahead and make more cards...

step two for cards for mom using petaloo and quick quotes

so the end result is that from ONE sheet of stickers and FOUR different designs of A2 (4 1/4" x 51/2") papers (see photo on the left corner)
I got SEVEN completed cards...pretty good isn't it?

supplies for cards for mom using petaloo and quick quotes

Close up of the cards
All The sentiments are from the sheet of stickers.
The black words "thanks" and "hello" are die cuts with a punched leaf added at each extremity.
I added to each piece some "faux" stitching made with a "Black Copic mulitiliner"
and some pearls

close up for cards for mom using petaloo and quick quotes


seven cards for mom using petaloo and quick quotes

I tied the cards with this ribbon to make a simple gift packet of cards...

detail flowers corner card for mom using petaloo and quick quotes

remark: remember to trace the lines on the papers , MARK numbers on each diagonal stripe and THEN cut them. Once the papers are cut and marked with numbers, work on assembly line style and the cards will go pretty fast!

 card for mom using petaloo and quick quotes


Thanks for the visit, 
See you soon!

SUPPLIES
Punch: "Ek Sucess"  rock fern
Hello die: "Stampin'Up!
Mom die: letters taken from Penny black die see below supplies


Wednesday, March 11, 2015

A "Zen" card 50 Shades of Green LCD BLOG HOP


This is the 2nd post of the day!
To see the 1st one
"Winners for the TBT challenge #6"
Scroll down

 ______________ 0 _______________
I am grateful for all your sympathy comments!
 ______________ 0 _______________


Hello Dear Stamper:

Welcome to the Lost Coast Designs Blog Hop
"50 Shades of Green"

EVERYONE can participate
from today March 11 til March 30th
and WIN a $20 gift certificate to use at LCD website
winner announced on the 31st!
here it is my participation...

front Zen card 50 shades of green alcohol inks
everyone is encourage to participate 

1- make a card using  LCD and/or Carmen's Veranda stamps ONLY  in shades of green (white card stock and black ink are OK)
2- publish your card on your blog
3-  use the "Inlinks" gallery on your post
all the details are found HERE

step by step:
step 1:
add drops of alcohol ink onto glossy paper (from Ranger, specially to use with the Alcohol inks)
spray "air" with the dust container (used to clean computers)

step 1 Zen card 50 shades of green alcohol inks


step 2:
ink the stamp with Black Archival ink on top of background

step 2 Zen card 50 shades of green alcohol inks


Embellish it with an assortment of black "Washi" tape

detail Zen card 50 shades of green alcohol inks


last image

last Zen card 50 shades of green alcohol inks


Thanks for the visit 
keep on hoping 
and add your creation as well using the "Inlinks" tool below

SUPPLIES

Lost Coast Designs stamp: asian set


Thursday, December 11, 2014

Triangular Star card with Petaloo and Graphic 45

Hello My Dear Stamper Friends:

Today is the last day of the "10 Days of Christmas" 
celebration Blog Hop
with "Petaloo" and "Graphic 45"!

after seeing all the gorgeous projects done by the DT 
at Petaloo's blog
my turn, as part of the DT,  is to share with you All this
 very nice shaped card for today's Hop 
using the gorgeous "Petaloo" flowers 
and "Graphic 45" papers 
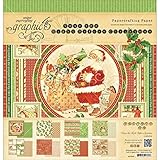
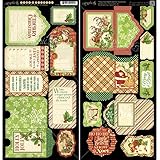
from the collection "It was the night before Christmas" ..

a Triangular Star Shaped card!

triangle star card front

On the internet I saw various sites with the step by step...with several measurements...
I did simplify things and instead of measuring and tracing with pencil and rulers 
I found out to do it in a quicker way just by
- cutting an equilateral triangle,
- scoring some lines with the score board
- folding and that's it!

Triangle star card details


But I will be sharing BOTH ways, mine is in black paper and the white one shows the tutorials found over the internet with the various measurements
You will choose which one to use..
but both gets you to the same place!

NOTE: MY way will leave you with a tiny space when folding the card on the top but this way it is easy for folding, you have more flexibility to make the folds it is not as tight as with the original tutorials...specially since this card needs extra space to tuck in the triangles ...
here are the step by step
step 1:
- cut paper @ 10 3/8" X 12"
- on the 12" side, find the middle (6") from that point up to the opposite point trace a line, cut. Repeat same on the other side.
Result: an equilateral triangle.

Triangle star card step by step 1-2


 step 2: trace lines and fold
- place one side of the triangle against the side of the board, score @ 5 2/8" and @ 7", repeat on all sides.
- Crease and Fold

OR white paper (tutorial found on the internet)
- find on each side the center point (6"), trace lines and make a 1st triangle, fold
- from that center measure 2" on each side, trace lines, to make a 2nd triangle, fold lines.

step 3: crease and fold

Triangle star card step by step 3-4

step 4: tuck the triangles inside to lock the shape

View of the open flat card

Triangle star card open flat


detail of the inside:
The word "Christmas" was taken from a large background die from Memory Box called "have a Jolly Christmas" 

Triangle star card open inside detail


a last view opened 

Triangle star card open inside

 I hope you will give it a try! 
It looks more difficult than what it is...and with my simplified version even more...no need to measure in extra places and trace with rulers...just cut the triangle, score 6 lines and fold and that's it!

Thanks for the visit! 
hope all your Christmas activities are going smoothly 
and remember 
to enjoy each moment of this wonderful season...
it is always too short!!! 

Follow on Bloglovin


SUPPLIES