Thursday, July 30, 2015

Something New To Share


Hey everyone. I have some awesome news to share! 

I made it on to the new ColourArte Design Team. 


Why don't you check out the post here and see who else made the team. Lots of amazing talent to be coming your way!

Check out the current challenge here over at ColourArte for the texture challenge.


Check out my process video here! 


I used some great Prima stamps and lace for this art journal. 


I had lots of fun with these Mardi Gras like colors. 


Items Used:

ColourArte

Tissue Paper
Gesso
Water
Matte Gel Medium
Lace
Manilla Tag


Tuesday, July 28, 2015

Tea Bag Art Journaling

Hello to my lovelies. I have a new art journal page up today over at Viva Las VegaStamps. I sure would love for you to stop by! 


Hello to you all today. Shanna here with my day up to inspire you all with some stamping fun. 


I wanted to play with a moon and I did. I started with a tea bag and some matte gel medium to adhere the tea bag to my journal page. 


I started with the Stars - #19291 stamp and combined it with some WOW embossing powder. 


Then I used the stamp Waybill/Invoice - #19416 with Vintage Photo Distress Ink.


I stamped the Butterfly Specimens. I dripped India Ink and spritzed it with water to make drips. 

Last I added the Happy Moon which I stamped on white cardstock and cut out. I added him by using matte gel medium so that I could take a black pitt pen to buff a black circle around him. 


Last I added the wording with a white gel pen. 
It was a real quick art journal page but lots of fun.


Stamps Used:
HappyMoon - #19507
Waybill/Invoice - #19416
Butterfly Specimens - #19415
Stars - #19291

Saturday, July 25, 2015

Retro Tags for Gina's Designs

Hello to you all. Shanna here with a little weekend inspiration for you.

I got some new paints to play with my new chipboard pieces. 

Let me know what you think!


I first gave my tags a layer of gesso then went over with some gelatos. 

For this tag I rubbed over a stencil with a baby wipe. I used Dylusions paint to cover the retro fragment and then Teal Zicron and Mediterranean Blue ColourArte h20's on the eyeglasses. 


Then this tag I used a different color of Dylusions paint with a stencil and another color on my frgament piece. I used Dreams Bloom and Playful Peony on the eyeglasses.


I finished both tags off with seam binding and some Tim Holtz phrases. 


Items Used:

ColourArte Twinkling H20's

Wednesday, July 22, 2015

A Little Magic in July with Alpha Stamps


How about a little magic this Summer?

Alpha Stamps June Kit

There are two awesome kits up the month all based on Magic over at AlphaStamps!


I played with both kits that are up over at Alpha Stamps and let me just say potions are so fun to play with. I had lots of little techniques with this project. The possibilities are endless!!!

First up I wanted to see how crackle accents would look int he glass bottles. I thought having something fun in them would really give a special touch. 


So I squeezed some Crackle Accents in and used a paintbrush to make sure it coated the insides. It turned out there was not enough air getting in there to dry it. I even tried using a heat gun, but it stayed just like as if in the original bottle. So if you do this, try a larger bottle. 


I ended up adding a drop of alcohol in and swirling it around the bottle for some slither slime. 


Next up I wanted to finish getting more bottles ready. 


I cut out tons of of labels from the Tiny Magic Books & Potion Labels Collage SheetWitchy Little Labels & Ephemera Collage Sheet, and Little Potions Collage Sheet to go and glue on all my pieces and bottles.


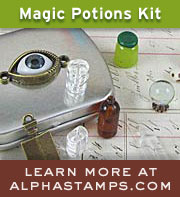
I even played with some clear beads from the Magic Potions Kit and turned them into jars! I did this by painting them with some of my Distress Painst and using the Smooth Jet Black Rondelles for a top to the jar.

 Next up I wanted to make my Spell Book box special and colorful, plus add lots of texture. 


So first I got my matte gel medium and some tissue paper. 


I gave the box a good coat of matte gel medium and then smooshed the tissue paper around giving it a crinkled look. 


Once that was dry I added Distress Inks to the book. 


Aren't these colors amazing!!!


I then decided (which I should have done first) was paint the pieces so you don't see chipboard. 


While that was drying I got on to my small tin. I found some alcohol inks similar to what I used for distress ink. I went to town adding color to the tin. POUNCE don't rub. 


I thought his butterfly with one eye was a great finish for outside of the Small Hinge Tin.


For the inside I filled it with lots of little position needs. There are so many Resin Bottles to choose from. 


Doesn't the eye in the spiderweb look cool? This tin has it's eye on you! 


I even used some rosary chain from the Lavender/Pink Bead Mifor a little bit of good luck charm adding the White Skull Bead, the Embossed Flower Charm, and the Small Man in the Moon Charm.


Now the book needs no words to explain as you can see how fun this is. I did use the pages parts from the Secret Spell Book Box Collage Sheet #2 so it really looks like a worn used book. 


I turned the cut out boxes, beads, and bottles into a potion boutique for this box. 


I also used some Miniature Books with covers from the collage sheets in the kit (in case the owner forgets her magical info). I also cut out some pieces from the Antique Leather Book Spines Collage Sheet and adhered them to the back of the shelves.


Now I am not a fan of ouija boards but thought this special wooden drawer kept its powers locked in tight.


Now don't forget to check out the Spellbook Box tutorial Teri created here!

To check out a full supply list click here and here!

Tuesday, July 21, 2015

Metal Embellishment


Hello all you in blogland. Today is a new challenge up over at The Inky Chicks Challenge
It really is such a fun challenge we want to see your metal embellishments!
So head on over to the blog and check out what the rest of the design team did for some awesome fun inspiration. 


I am getting through more Magnolia stamps I have in my stash that I have yet to share. 


This cutie was paired with some Authentique papers and Wild Orchid Craft Flowers. 


I colored her with copics and added a bottle cap with a Tim Holtz Chit Chat sticker. 


Don't forget to play along with us and share your work on the Inky Chicks Facebook Page. 

Sunday, July 19, 2015

Priceless Exploration

Hello all you wonderful crafters out there.
 Today I have a layout up over on the Marion Smith Designs Blog
You can go check it out for some awesome close ups!


I loved playing with the Junque Gypsy collection and the Color Lab. 
Boy did my fingers get red but it was worth it for this pop of color I get to add to my wall. 

Don't forget to subscribe to my Facebook Page so you don't miss out on any good projects or other awesome happenings. 

Patina Art Journaling

Today I am up over at The Crafter's Workshop

I love the look of Patina. Something about that turquoise blue green showing on rust. 


If you would love to see a video on how I created this spread check it out and SUBSCRIBE to my channel to keep up with lots more videos to come or check out videos from he past. 


Texture really plays a big part for these two pages. 


The spray colors I picked really helped out the patina look. The teal aqua is still a favorite look of mine. I even enjoy the rusty look. 


Saturday, July 18, 2015

Bulletin Box

Hey everyone. I am sharing a new piece I played with for Gina's Designs Lasercuts today.

When I got this I wasn't sure about how I would use it or what I would do with it. To be honest I wasn't sure about a lot but I wanted to play with something different and have fun. 

Well I want more of these Bulletin Boxes now. 

I covered the box with some Prima papers and coordinating flowers before I got to adding my lovely chippies. 


I used the base of the dovetail banner builder pieces because I really didn't want to use up all my cute little banner pieces. 


I altered the clock hand from the Steampunk 2 Shape Set with Distress Paints. 


I altered this gear from he Gears Shape Set to look old and rustic using acrylic paint. 


The steampunk dress form was altered with Distress Paints as well to look old and patina like.

So grab a box and give it a try. 

Items Used: