Showing posts with label playing with fabric. Show all posts

Monday, August 1, 2011

Simple Superhero Capes

Photobucket

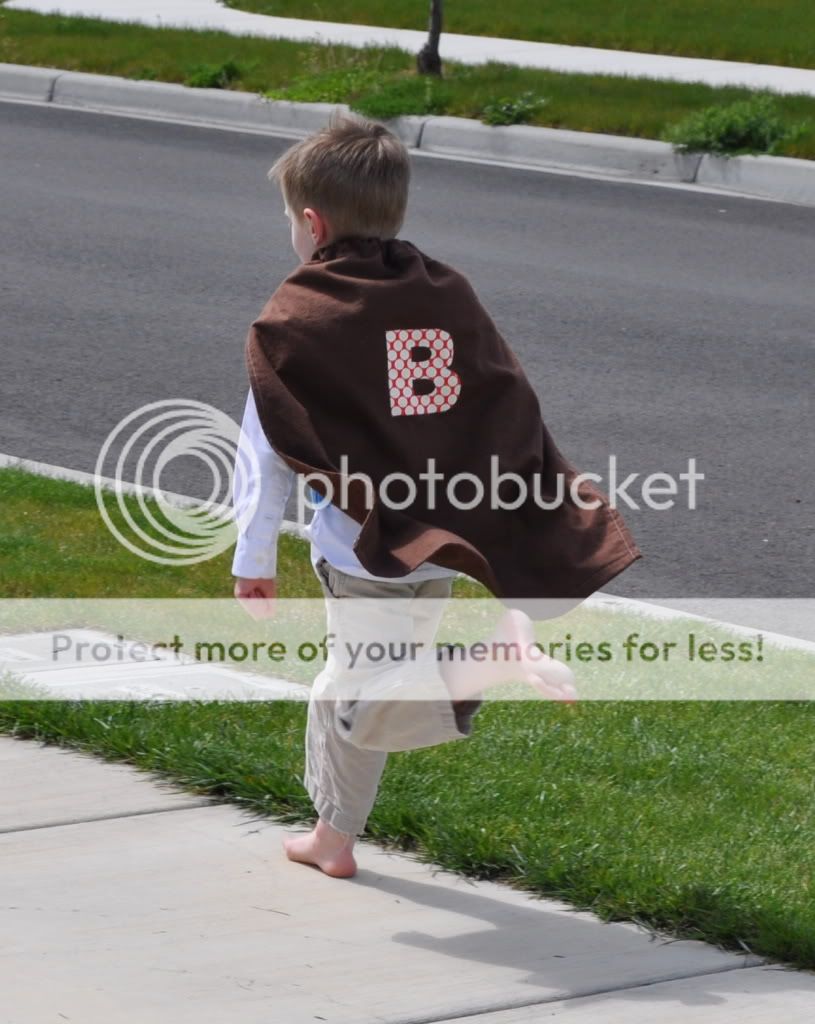
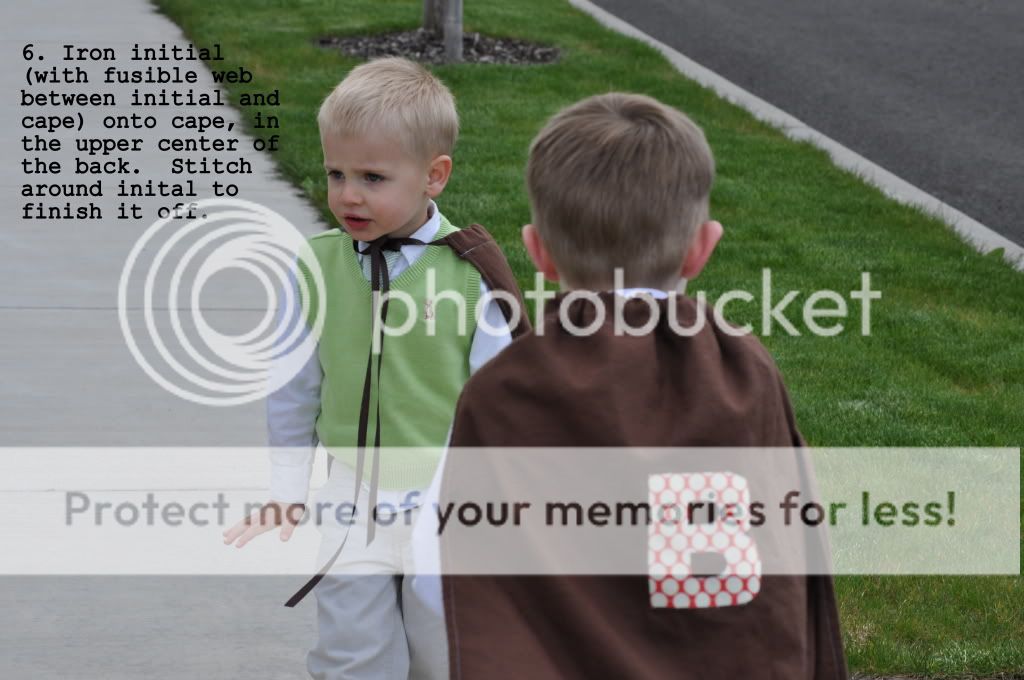
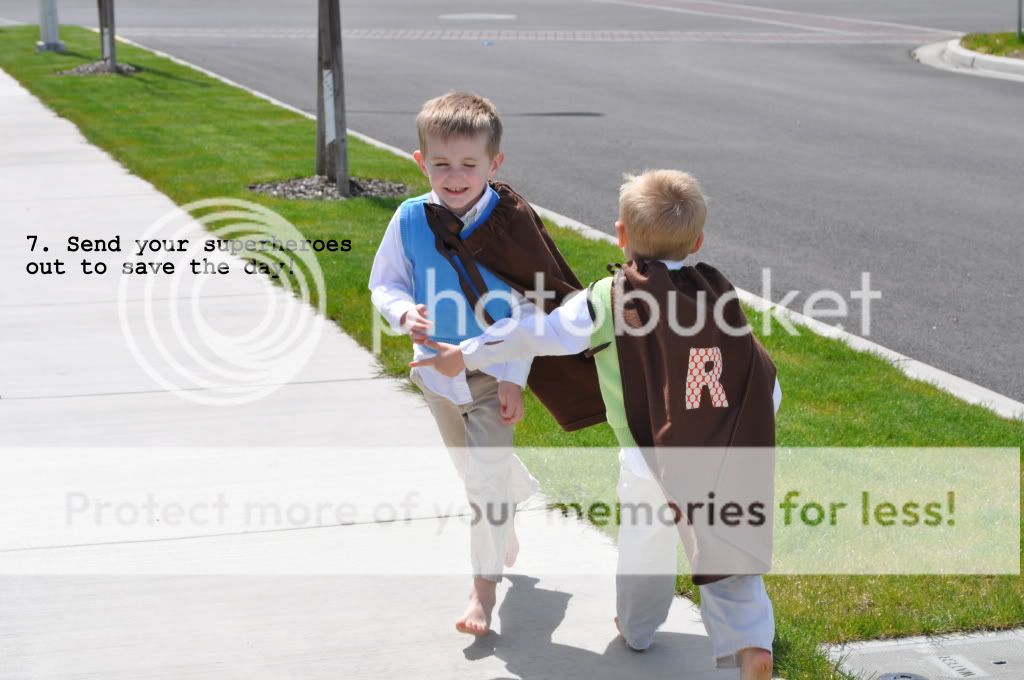
This spring I made some quick and easy capes for Blaine and Rog. I wanted something non-specific, partly because I don't love all the character commercialization in the world but mostly because a more neutral cape= more diverse imaginative play. I settled on a soft brown fabric with chocolate grosgrain ribbon for ties and a first initial appliqued on the back.

This was a really satisfying project for an amateur seamstress like me. They were simple and quick, and turned out just how I'd envisioned.

You can make one, too. Here's how:
Photobucket

Photobucket

Photobucket

Photobucket

Photobucket

Photobucket

Photobucket

Photobucket


***Unfamiliar with applique? Try this
(she taught me everything I know on the subject).
***Not into sewing but like this idea? You could make the whole thing out of felt and a hot glue gun and never touch a needle and thread!

Happy Monday!
xoxo
anne

Wednesday, March 16, 2011

No-Sew Pennant Banner Tutorial


I got crafty last week and whipped up a no-sew pennant banner for Lily's room. I'm still smiling about the results. And about the fact that this was an easy, inexpensive, one hour project that I was able to make from materials I already had in my craft closet. It felt so good to make something...my creative side was collecting dust. Sad!

Here's how I did it...

First, you'll need:
*small scraps of several different fabrics
*a length of twine
*pinking shears
*iron
*fusible web/wonder under
*glue gun


:: Fold each of your fabric scraps in half and press them with the iron so you have a nice crisp fold and a wrinkle-free piece of fabric to work with. The fold will be the wide base of each triangle pennant (so if you opened it up you'd have a long, skinny diamond) and the pennants will hang from the fold along the length of twine.


:: Cut your first pennant to the desired size and then use it as a template for all the others. I laid the template pennant on each different fabric and marked the corners with a sharpie.
I made nine pennants. You can make as many as you want, depending on how long you want your banner to be. You can make the pennants as big or as small as you like.

Don't those fabrics make you think of a dress your grandmother would have worn as a girl?
I'm in love with them.


:: Place pennants over twine at desired intervals.


:: Open up each pennant and place a small strip of hot glue in the fold and press twine securely into place so pennants don't slide around on the string.


:: Cut triangles out of fusible web/wonder under, just smaller than pennants. Place wonder under between the two sides of the pennant, close pennant, and iron - this will adhere the wonder under to one side of the pennant. Open pennant, peel back paper lining from wonder under triangle, close pennant, and iron again - this will adhere the sides of the pennant to each other. Repeat with each pennant.


Hang it up.
Love it up!

Don't forget:
$180 CSN Stores Giveaway here.
BLOOM St. Patrick's Scavenger Hunt & Cupcake Toppers here.

Thursday, March 10, 2011

Turning boot cuts into skinny jeans by Bloom guest Cami

Ooooooh we are excited about this one! Thanks for being here, Cami!
Hi everyone, I'm Cami from Candied Apples and I am so excited to be visiting Bloom again! Today I'm going to show you how to take a pair of boot cut jeans and make them into skinny jeans.

Let me start by saying, I'm slow getting into the skinny jean trend. I own a pair of black skinny jeans and that's it. So I definitely need more pairs. And, this pair of boot cut jeans was a little weird, so I was going to get rid of them and decided to try altering them. I am so happy how they turned out! Here's how you can do it too.


First you want to try the jeans on inside out. Jeans all have either the outside seam or inside leg seam that looks like it can be taken in. It's not the one with bulky decorative stitching. So check before you pin to determine if you're taking fabric from the outside of the leg or the inside. My jeans could be taken from the outside. (I think most jeans can be taken in from the outside of the leg).


So you can see my pins here. I don't want them to be skin tight but I definitely want them to be skinny. Carefully take your pants off and sew along the pins.


Try them on again just to make sure. When you're happy with the fit, take a deep breath and cut the extra fabric away. Remind yourself you were going to get rid of these pants anyway, so if you botch it you can just get rid of them. To avoid fraying I used pinking shears and then a large zigzag stitch along the edge.


Try them on again. And mark where you need to hem them, if you do. I definitely do. There are many great tutorials on hemming jeans but since my jeans were sewn with white thread I just cut off the extra, folded up twice and sewed around to make a new hem. I don't think anyone can tell. Seriously. Oh and you'll need a heavy duty needle. I broke one because it wasn't for heavy fabric.


Here they are. All done.


And here they are with boots. Lovely. So, try it. I'd love to see what you come up with.

Monday, February 28, 2011

A handmade gift with Bloom guest Jeanine

Jeanine here popping over from Serving Pink Lemonade where my sister, Amy, and I post about the fun things we do with our kids. I am mom to 3 (soon to be 4!) little boys ages 6 and under who keep me on my toes and inspire my creative side. I'm honored to be over here at Bloom today!

This past Christmas I had my older boys (ages 6 and 3 1/2) make the gifts that they were going to give to each other (see them HERE and HERE). I was having a hard time coming up with something for them to make for the one-year-old. Then I remembered this adorable giraffe tutorial I had seen forever ago on Make It and Love It but had never gotten around to making. My youngest is always carrying around a stuffed animal of some sort so this was just perfect! I had the boys look through my scrap fabric and ribbons to find something they thought their brother would like. They decided on some fuzzy blue fleece and a scrap of Dad's worn out dress shirt.

After I cut out the fabric and pinned it together I let them each have a go at hand stitching the pieces together. They did awesome! Their attention waned after a bit and I ended up stitching the rest but they still felt pride in working on this gift together, choosing something they thought their brother would like, actually making something pretty cool and useful. For me, I loved seeing that my boys were excited to give something instead of just listing off the things that they wanted to get.

Thanks, Jeanine! We love the giraffe and even more so the idea of teaching our children the fun of creating and gifting!

****Also, you don't want to miss Jeanine and Amy's post about celebrating Dr. Seuss's birthday--which is this Wednesday, March 2nd! So many great ideas!!****

Monday, February 7, 2011

Hooded Towels with Bloom guest Emily

Friends, we are excited to welcome Emily of Everyday Art to Bloom today. You are going to love this tutorial!
First of all, Jaime and I (Emily) from Everyday Art are so excited to share a project with you! A big thanks to Bloom for inviting us!

This project is one of my favorites and has been a go-to baby gift for a while now.

These towels are the perfect size for a baby. (A little small for a toddler.)


Start with a full size bath towel. Cut a square as large as you can and round the corners. I usually trace the edge of a bowl to make sure they're the same.

From the scraps, cut a hood shape by tracing one of your corners. Cut any ears, spots, noses, or anything else you'll need (depending on how you're decorating your towel) from towel and fabric scraps. If you're making ears I recomend using one layer of towel and one of cotton.

Attatch your face shapes using heat n' bond lite (iron-on adheasive) and sew around the edges.


To make the ears, put the right sides of your cotton and towel shapes together. Sew around all edges BUT the bottom. Turn right side out. Lay the ears on the hood and pin in place.


Align the hood with one corner of the towel (right sides together). The ears will be sandwiched between. Sew the hood to the towel by sewing along the top hood edge. (I usually sew over this a couple times to make it extra secure).


Turn right side out.


Sew the trim (extra-wide double-fold bias tape) around the towels raw edges.

Add any finishing touches- like these button eyes.


Fold it up and give it away- or keep it.


Here's a frog version. You can see the shape of the towel and how the trim goes around in this picture.


Sometimes I roll them up and tie with the extra bias tape.

Enjoy your new hooded towel!

Wednesday, December 8, 2010

Welcome Sponsor: Seedpod Craft Studio


We are happy to be welcoming sponsors at Bloom and so thankful for the interest we've received. Today, we're excited to introduce you to Jessica Croker, owner of Seedpod Craft Studios, and her sewing patterns for baby gear. First, the Seedpod story (which we think is awesome and fascinating):

Jessica is a homeschooling mother of five who always has to be making something. Typically that means she's sitting on the floor simultaneously knitting and playing legos, or sneaking in 5 minutes here and there to sew in her dining room turned sewing room while the kids read. That also means that she ignores copious amounts of laundry and wishes that her 3 year old could remind himself to go to the bathroom.

A year or so after graduating from art school she started Seedpod Craft Studio as a creative outlet where she sold handmade books. Over the years it morphed into a blog to document her crafty endeavors in quilting, learning to spin yarn, printmaking, sewing, and parenting.

Her most recent endeavor has been pattern designing. After her 5th baby was born she really wanted a cute, trendy, soft structured baby carrier and didn't want to pay an arm and a leg for it. She figured out how to make one and thought others would like to make one too, so she put together pattern pieces and fully illustrated instructions that she sells as a PDF from her Etsy shop. It's called the SweetPod. She recently released a second pattern called the SweetPod Saddle Bag which is a diaper bag that you can use on its own or attach to your baby carrier.


We love this kind of innovation! So do the people who have purchased the patterns:

"this pattern is amazing! Made the carrier a few weeks ago, we love it! Perfect for carrying baby, and I got to pick my fabrics. If all patterns were written this nice, I'd sew more. Thanks a bunch! :)"

If you'd like to see a sampling of the gorgeous baby carriers people have made with Jessica's pattern head on over to the SweetPod flickr group

We hope you'll check out her shop and the patterns she offers - these patterns would make such a thoughtful gift for a sewing mama on your Christmas list.

And a few of you might be lucky enough to receive a free pattern because Jessica is offering 4 patterns, winner's choice of either the Sweetpod Baby Carrier (can carry baby in front or back) or the Sweetpod Saddle Bag (can be attached to the carrier or used as a stand-alone diaper bag).

Leave a comment to enter.
Winner announced Monday morning.


**********************************************************


If you'd like to advertise at Bloom, please e-mail us for details.
We'd love to help you promote your business.

(aplacetobloom {at} gmail {dot} com)

Thursday, November 18, 2010

Make an upcycled vintage apron with Bloom guest Amy!


We are so excited to have Amy of Vintage Fern here today! Welcome, Amy!


Hello Bloom readers, I am excited to be with you here today! My name is Amy, and I have three beautiful girls and a crafty business that keep me busy. I love being a Mom and I love being crafty, I am addicted to thrifting and collecting fabrics whether they be new or vintage. I have waaaay too much fabric :) I was asked to share a tutorial with you today, so here we go!

I decided to do a little upcycled apron tutorial. I have so many cute vintage half aprons that I have either been given or collected, and I never use them! For me, when I am cooking, I need full coverage and a half apron just doesn't cut it for me.


Here is what I used:
a vintage half apron
1 1/2" jumbo rick rack, you will need at least 46"
a vintage napkin (mine measured about 17" square)
You could also gather some fabric scraps and bits to embellish it after it's done


The first thing you are going to want to do is measure the top front of your apron in between the ties to make sure your napkin (or you could use fabric, just make sure to hem all the edges) is the same length. I was lucky that mine were the exact same length so it fit perfect. If it doesn't you can adjust it so it does. Then you want to flip your apron so the wrong side is facing you and then lay your napkin piece (wrong side up also) how I have in the picture, I lined up the bottom of the napkin with the bottom of the waist band.


Then I pinned it.


I sewed along the bottom of the napkin first, wrong side facing up.


Then I flipped it over so it is now right side up, and sewed down the top of the waist.


So it should look something like this now.


Next, I flipped it wrong side up again and I folded in the sides to give it some shape, I don't really have a formula for this, I just held it up to me in the mirror to see what I wanted it to look like. (I hope I am making sense).


I also decided that I needed to make my top piece a little shorter, so I folded down the top a bit. Again I just eyeballed this by holding it up to me in a mirror.
Now, you want to take it to your ironing board and give it a good press.


Now you need your jumbo rick rack, cut two pieces that are 23" long. You will tuck each one underneath the folded down top and pin in place.


Now you are going to sew around the whole edge of the napkin piece, wrong side up.


I did a second top stitch just to make it look a bit more professional.
The second row of stitching, I used my first stitch line as a guide.


Now you want to stitch down the bottom of that folded over fabric.


Now it should look something like this.


Now you want to pin your ties up.


And sew them down, I tried to sew them in the same places as my top stitching.


Now all we have left is to take care of the ends of the rick rack ties, so they don't fray.


I just folded them over a couple of times and zig zag stitched them.
Now just tie the neckties and you have a cute new apron!

On mine, I added a couple cute fabric flower brooches I had to embellish the top a bit, but you could add anything to the top to make it even fancier, fabric flowers, applique, lace, buttons, it's up to you!


Now all you need to do is put it on and feel proud that you made something so cute!j

Thank you, Amy! We love it!
***Reminder: Lower Lights Giveaway (below) open through this evening!***