Showing posts with label Design Team. Show all posts

Wednesday, 6 May 2020

Art journaling 'Dream Tomorrow' by Karen James

I've returned to my art journal and ColourCraft Acrylic Inks for another double page spread.


I used warm tones - Golden Yellow, Orange, Scarlet and Deep Crimson - for the background and then contrasting Turquoise, Emerald Green and Cobalt Blue for the focal points with Copper Design-It paste giving more texture and a lovely sheen.
I filmed the process so you can see how all the layers are built up. It is edited to keep it short and I've given a voice over with lots of art journaling tips and tricks: Hope you enjoy it!


Please don't forget to subscribe to the ColourCraft channel while you are there.
With thanks for spending your time with us.
Karen
x


Wednesday, 25 March 2020

Art Journal pages by Karen

Art journaling is used by many people as a form of therapy, letting emotions out on to the page which can then be hidden by the art layers. I don't often do this but today I thought I would show this process because it does help to sometimes get feelings out of your head and on to the page.

Without any planning as to how the page would look when finished, I made a process video:

I scribbled some thoughts in the journal and then covered the pages with some gesso and started my mark-making, adding colour with Colourcraft acrylic inks. These translucent inks are permanent once dry so they can be layered without creating mud and have a lovely soft effect.

The colours were softened further in places with white ColourCraft Eco Acrylic Paint and the stencil was used with black.

 Further contrast and texture was added with Design-It paste in Glossy White.
Finally, I used a white pen to add highlighting to some shapes and the text.

Thanks for stopping by today. Do you do art journalling? I hope you like this spread and the lovely acrylic ink colours.
Karen


Saturday, 14 March 2020

Marbling with Manutex

Recently I was teaching a workshop in paper decoration and one of the techniques we tried out was traditional marbling.
Basically, traditional marbling is where thinned, water based paints, are dropped onto a prepared "size", manipulated with sticks, combs and/or brushes and then applied to paper or fabric which is prepared to accept the paints.
Sounds complex, doesn't it? It doesn't need to be!


There are different types of materials which can be used as the size in marbling. It basically is something which creates a surface you can float your paints on and manipulate them before applying to the fabric. I've used a couple of the traditional ones, Carageenan is one- it can go bad pretty quickly, takes 24 hours to set and is extremely expensive. Methocel is another option- but it needs to be blended with ammonia to work and is a bit trickier. Then I remembered 
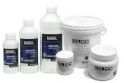
MANUTEX. Manutex is a Colourcraft product, often used with Procion dyes to thicken them for different techniques. I had used some the previous summer and wondered if it could work as a marbling size. It can!!

Basic instructions for fabric marbling with Manutex:
  • Mix 2 heaping teaspoons of Manutex with one litre of warm water and let sit for 2 hours
    • pour into a shallow container larger than your fabric
  • Mix 2 teaspoons of Alum (used for pickling as well as other things) in 4 liters of warm water for treating your fabric.
    • Soak your fabric in the Alum mixture and hang dry or dry flat. NB! Ironing fabric while it is treated with the alum could cause it to burn.
  • Blend Colourcraft acrylic paints with water until they can be picked up easily with a dropper, you might also need to add Ox Gall (usually used with watercolour paints)- a few drops can help your paints to float better.
  • Drop your colors onto the shallow container of Manutex- use combs, toothpicks etc to make designs.
  • Lay your dry, treated fabric gently on the top of the bath and pull off (the paint should stick to the fabric)
    • Immediately rinse your fabric gently under cool running water. The object here is to get the size and any extra paints off- the design should stay on the fabric!
  • Let your fabrics dry, and then heat set.


Dropping and combing color on the manutex

Lay the fabric onto the size, gently pat and pull off.

You can also just let the colors spread without combing to get a different effect.

Here are all the fabrics dried and heat set:


One thing I'm using these fabrics for are some miniature crazy quilt blocks for my #tamarama2020sal, Twenty art/crazy quilt blocks sewn in 2020. The mini blocks are for my "light" version. More info can be found here.

If you want to see another method of marbling check out these blogs :
here and here

MANUTEX


Wednesday, 11 March 2020

Coordinating scrapbooking papers and embellishments with Karen


I teach lots of workshops and here in France scrapbooking is particularly popular. I am currently working on my new album that I will be teaching for the first time at the end of March and I always like to include different techniques that the participants can apply to other projects. This time I am putting Brusho Crystal Colours at the fore to enable the groups to decorate their own papers and matching embellishments. I had already selected some printed papers (Florilèges Design) and plain cardstock papers so I needed the Brusho colours to coordinate with these. I chose Prussian Blue with a little Emerald Green.
I had already cut some plain white paper to the size I wanted. I sprinkled these with Prussian Blue Brusho Crystals and sprayed on some water then added a little Emerald Green to get the hue that I wanted. I used a paper towel to remove excess water and soften the colours for the background. I am delighted with the result. These papers were used to line the inside covers.


I then used the ColourCraft Tray with its air tight mixing pots to make up some pots of a mix of the two colours in water. I used this with a large round brush (size 9) to add colour to the centre of some white flowers and draw it out along the centre of the petals.

I also added the same colour to the black and white image of this camera. I am very happy with how this album is now coordinated with original papers, matching flowers and on-trend water colouring. I hope you have enjoyed these sneak peeks of the album and that this inspires you to use Brusho colours to coordinate your projects. Above all, I am hoping that the groups like the album as much as I do.

Thanks for visiting
Karen
x

Wednesday, 26 February 2020

Stenciled and foiled Birthday Cards with Karen


It's that time of the year when I need several birthday cards for male friends and family.
I gathered several sheets of white card and spread Design-It paste through a stencil on each one. I used Ocean Blue, Shimmering Aquamarine and Copper.

These were left to dry before sprinkling them with Brusho Crystal colours and spraying with water. I used Turquoise, Sea Green and Cobalt on two and a mix of Sea Green and Sandstone on the Copper stenciled piece.

These pieces were trimmed to size once dry. The sentiment was cut from double-sided foam and Transfoil was stuck on to the correct side before sticking these to the panels.

The panels were stuck on to card bases and I used Flexiglue to stick on small wood stars. This held these in place while I added more glue to their surfaces and left this to dry until tacky. I then added Transfoil scraps to give the stars a matching shiny surface. This photo shows one finished (left) and one in process (right). The blue version is still in progress as I ran out of stars and need to find other embellishments.

So, a few more cards full of shine and texture ready to send off.
Thanks for stopping by today.
Karen
x


Related Posts Plugin for WordPress, Blogger...