


Copyright © 2017 "Musical Instrument Repairs WA (MIRWA)" · All Rights reserved · E-Mail: service@mirwa.com.au


Violin / Cello Bridges break all the time, they are made of maple and have relief cuts fabricated into there design to allow for transfer of the strings vibration.
These relief cuts eventually collapse under tension and we manufacture a new bridge as basically a matter of course.
Time to repair approx 1 hr.
These relief cuts eventually collapse under tension and we manufacture a new bridge as basically a matter of course.
Time to repair approx 1 hr.
Remove strings and tailpiece.
Having reduced its ability to stick we apply it between the F holes.
Mark our centreline and the F hole notches.
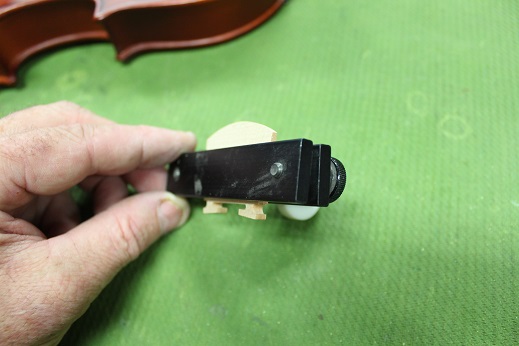
The bridge is placed into a clamp which has a roller fitted.
We slowly shape the base feet of the bridge to the same contours of the top of the violin, by moving the bridge back and forth.
Like so.
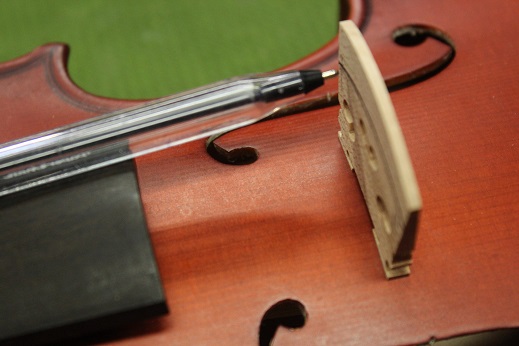
Take a pen or pencil and measure the diameter of it.
Roll the pen across the end of the fingerboard and mark the bridge.


The first thing to do is to find an appropriate sized bridge to fit,
This violin is a half size violin, but due to many discrepancies that now exist in the manufacturing of these instruments, the variations are huge
This bridge is a fraction to narrow.
This violin is a half size violin, but due to many discrepancies that now exist in the manufacturing of these instruments, the variations are huge
This bridge is a fraction to narrow.
This bridge is more appropriate in size.
Using some stick on sandpaper, we de-tack the back of the surface by sticking it to our clothes a few times
Mark your Treble and Bass string sides as well
The line will be half the thickness of the pencil of pen above the board, so in this caes approx 4.4mm above the fingerboard
The line will be half the thickness of the pencil of pen above the board, so in this caes approx 4.4mm above the fingerboard


